Step 1: Installing Membership plugin by Supsystic
In WordPress, navigate to Plugins > Add New. Search for “Membership by Supsystic” and click Install Now. When the installation has completed click “Activate Plugin”. You will have a new admin menu item titled “Membership by Supsystic”.
Step 2: Customizing the Membership Community
After activating the Membership plugin on your site you need to create required Membership plugin pages. For this go to Main tab -> Pages section. There you need to click on “Create all unassigned pages” and then save pages. After this action will be created such pages –
- Activity – page with activities of all membership users. Here you can monitor the registration of new users, creating new groups, posting new content from all groups and profiles. Also here you will be informed about new friends of all users of your Membership website.
- Groups – list of all groups on your Membership site. On this page plugin allows you to check all communities of your membership website, besides there are separate tabs for your followed and managed groups. Also on Groups page you can create your own new community.
- Login – login page for membership users.
- Members – list of all membership profiles.
- Profile – personal profile page of each user.
- Registration – page for registration new users.
- Search – page for searching content.
All these pages you can customize in Pages tab of your WordPress menu and add to site menu using this path – Appearance -> Menus -> customize Menu Structure.
After this go to Membership plugin Settings. Let’s configure the general settings.
On the Main tab of Membership plugin you will find the next settings –
- Admin Email – specify your admin email on which you will receive all notifications about your site. Also here you can send a test email.
- Messages, Groups, Friends, Activity – activate or disable this tabs for the profile page.

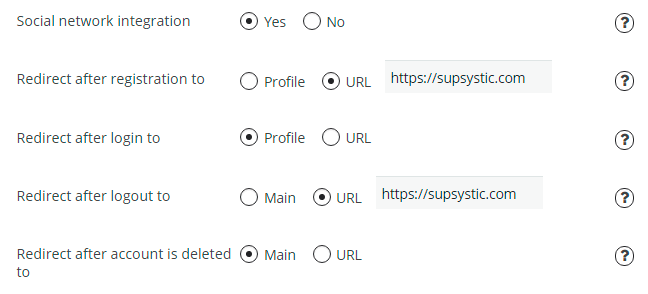
- Choose the Redirection page after such actions – Registration, Login, Logout and Account is deleted.

With Pages tab you can customize page links for general Membership Directories. Also here you will be able to create all unassigned pages for your Membership Website.

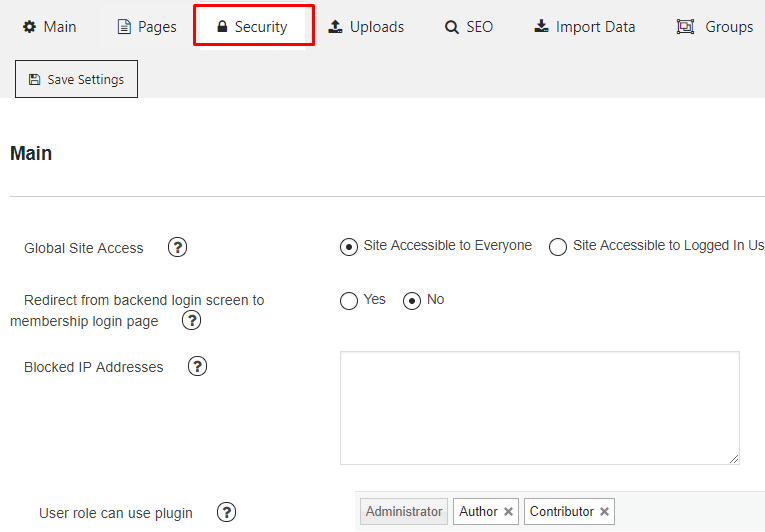
On Security page you can:
- Set the Global Site Access – make your site accessible for everyone or to logged in users.
- Enable Redirect from backend login screen to membership login page.
- Keep Blocked IP Addresses list.
- Set the type of User role who can use the plugin.
Uploads page allows you to customize such image settings –
- Maximum Image Size
- Maximum File Size (bytes)
- Image Quality

The last tab of Main Settings – SEO. Here you can set User Profile Title and User Profile Dynamic Meta Description.

Step 3: Users Settings
On Users Tab of this simple Membership plugin you will be able to monitor all members of your community. Here you will manage current user profiles and add new users.

Check more detailed information in this article.
Step 4: Profile Settings
On Profile tab you will be able to customize the following settings –
- Select the Default user role. All membership roles you can create on Roles tab.
- Use Profile Avatar.
- Use Profile Gravatar.
- Configure Avatar Settings.
![]()
- Enable and customize User Profile Cover.

- Select Profile Permalink Base – username or user ID
- Customize the User Display Name
- Choose the Registration Confirmation –
- Auto – after registration will be automatically created and activated the membership account for user.
- Email confirmation – after registration user will receive the confirmation message on his/her email address. To activate the account, he/she will need to click the link inside the confirmation letter to confirm the email address.
- Administrator confirmation – in this case after the new user registration – administrator will receive Pending Review Email. In this letter administrator can check the information about new user and make the decision – approve or reject the account. To make decision – go to Users page in WordPress menu -> find the user profile -> click Edit -> choose the Status for account – Active or Rejected. Besides here you can select another statuses – Deleted, Disabled, Pending Review. After the administrator will choose the status – user will receive the email about the admin decision.All letters you can edit on Mails Tab.


Let’s check the Registration Fields tab. Here you can create and customize profile sections and fields. These information will be displayed in About tab of user profile. Besides here you can specify what fields will be used for registration and which of them will be required. For more details check this article.

Step 5: Membership Roles Configuration
Roles tab offers you to manage with membership roles – create, edit or delete. By default there are three roles – Membership Administrator, Membership User and Membership Guest.
To edit role – hover your mouse on membership role and click Edit. Here you can set different permissions for membership roles. Read more about Roles functionality.

Step 6: Groups Settings
On Groups page you will have the next opportunities –
- Specify the Group Logo Size and Logo Thumbnails Sizes.
- Set the Default Logo Image.
- Choose the Default Cover Image.
- Specify the Group Cover Size and Cover Thumbnail Small Size.
- Select Group Permalink Base – group alias or group ID.
Step 7: Mails Settings
Emails tab allows you to customize the send options and templates of emails.
With Notifications tab you will be able –
- Set Messages Refresh Period
- Specify Admin E-mail Address
- Enable and edit notifications templates.
Check more about Mails Settings.
Step 8: Membership Design
On Design Tab, this membership website builder permits to change the front-end appearance of Membership Community. Here you can customize –
- General tab – set the Profile Image Style, Colors for Buttons and Inputs.
- Menu tab – configure some links for menu.
- User Profile – adjust the appearance of set profile
- Registration and Login – division to edit the texts of registration/login buttons and some additionals options for Registration/Login pages.
- Members Directory – customize appearance of Members Page.
Read more details about Design Settings in this article.
Step 9: Reports
On frontend of Membership site there is the ability to report about unacceptable content of posts (post of membership user or group) or unacceptable content of user profile or group. Reports tab will allow you to check all these reports and block all unacceptable content on your site.

Check more details in Reports post.
Step 10: Front-end Customizing
On front-end of your Membership website you and your users also will have a lot of settings which are available to edit.
Profile Settings
Profile settings are available to edit only from personal user account. On your profile page you will be able to edit personal information, make some actions with friends and groups. Besides plugin allows you to upload your photo for avatar and cover of profile.

Activity
Here you can post the text, photos and videos. Also on Activity tab there are possibilities to like, comment and share the posts for you and other users of Community. For profile owner – Simple WP Membership plugin allows to delete and edit the posts. Read more about Membership Activity.
Activity example

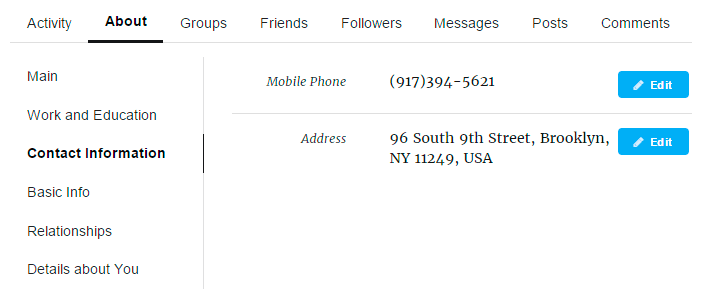
About
On this tab you can edit the information about yourself. Here will be displayed those sections and fields which you have created in Registration Fields settings of Membership plugin. About example
Groups
Shows the communities on which you have subscribed. Also in this tab will be shown invitations to new groups. Groups example

Friends
This tab shows the list of user friends. Also here you can accept or decline new friends, which want to add you to their lists, unfriend/unfollowed some of your friends or send messages to your friends. Friends example

Followers
Check the list of people you’re following and list of your followers. Followers example

Messages
Communicate with membership users in personal chats. Here you can –
- Start new conversation
- Check the list of all your chats
- Delete messages from conversation
- Delete conversations
- Block user

Posts
On this tab will be shown the list of all your WordPress posts. All posts with your authorship.

Comments
Comments tab contains the list of posts where you have left the reply. Also this tab will show the text of your comments.

Settings
This page allows you to customize such profile configurations –
- Account – here you can change your profile email and password. And also delete the account.

- Privacy – set the privacy settings of your profile page for another users. Here you can specify the limitations on different actions with your profile page for different users.

- Blocked users – check the list of blocked users.
- Notifications – enable notifications about different activity of your Membership profile.
- Send private message
- Send friend request
- Follows me


Group Settings
With Membership plugin you and your users will be able easily create unlimited number of Communities and customize them as you want.
If you want to create new group – click “Create Group” on Groups page. Enter Group Name and Description, choose the Community type (groups settings allows you to make your group open, close or private), invite users to your group and click “Create” button. Set the photos for avatar and cover of your community.

Group page includes such sections – Activity, Members and Settings. More detailed information you can find here.
Check this page to view more information about all Frontend abilities of Membership plugin.