Step 1: Installing Translate by Supsystic
In WordPress, navigate to Plugins -> Add New. Search for “Translate by Supsystic” and click Install Now.
When the installation has completed click “Activate Plugin”.
You will have a new admin menu item titled “<a href=”http://supsystic.com/plugins/translate-plugin/” title=”Tanslate by Supsystic WordPress plugin>Translate by Supsystic”.
Step 2: Customizing the Translate Settings
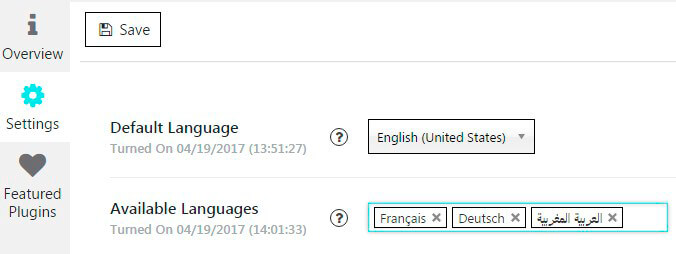
After activating plugin click on Settings tab of Translate plugin.

Let’s configure the general settings.
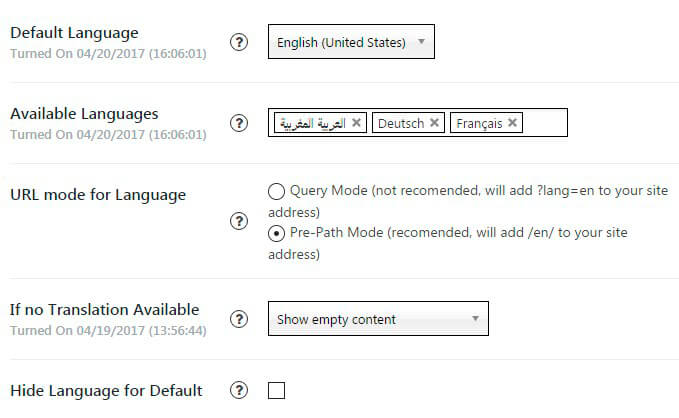
On Settings tab you will have the next opportunities –
- Default Language – here you can choose default language for your site;
- Available Languages – list with available languages for your site (you may select a few languages);
- URL mode for Language – define your site address with selected language in browser. Here you can select:
- Query Mode (not recomended, will add ?lang=en to your site address);
- Pre-Path Mode (recomended, will add /en/ to your site address).
- If no Translation Available – it means that if no translation for example exist for selected language – what we need to do? And here you can choose one of the following answers:
- Show empty content
- Show default language content
- Hide Language for Default – hide language in URL address for the default language

Step 3: Adjusting Translate Widget
After configuring the Translate settings, go to WordPress navigation menu -> Appearance -> Widgets.
On the list of available widgets you need to select Translate by Supsystic widget and click on the Add Widget button.
Or you can just click and drag this widget on the area you need and it’ll be added on the main widget area. There you have ability to manage your Translate plugin.
Here you can find such options :
- set Title
- choose Display Type:
- Simple link

- Buttons

- Select Box

- Customized Select Box

- Simple link
- if you want to show flag icon, you need to press on the Show Flag Icon checkbox (a small icon of the national flag of the country which language will be used)
- also you will be able to change Flag Icons Size (16px, 24px, 32px or 48px) .
Step 4: Creating translation for your content
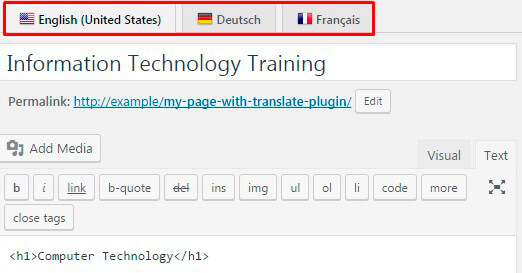
To create a translation of your site content – go to the existing post/page or create a new one.
Inside the page you will see tabs with languages.

There you need to translate your pages or posts with each of the languages you want by clicking on that tabs.
After you finish translating don’t forget to click on Publish button (or Update button).
Step 5: Viewing the result on the frontend
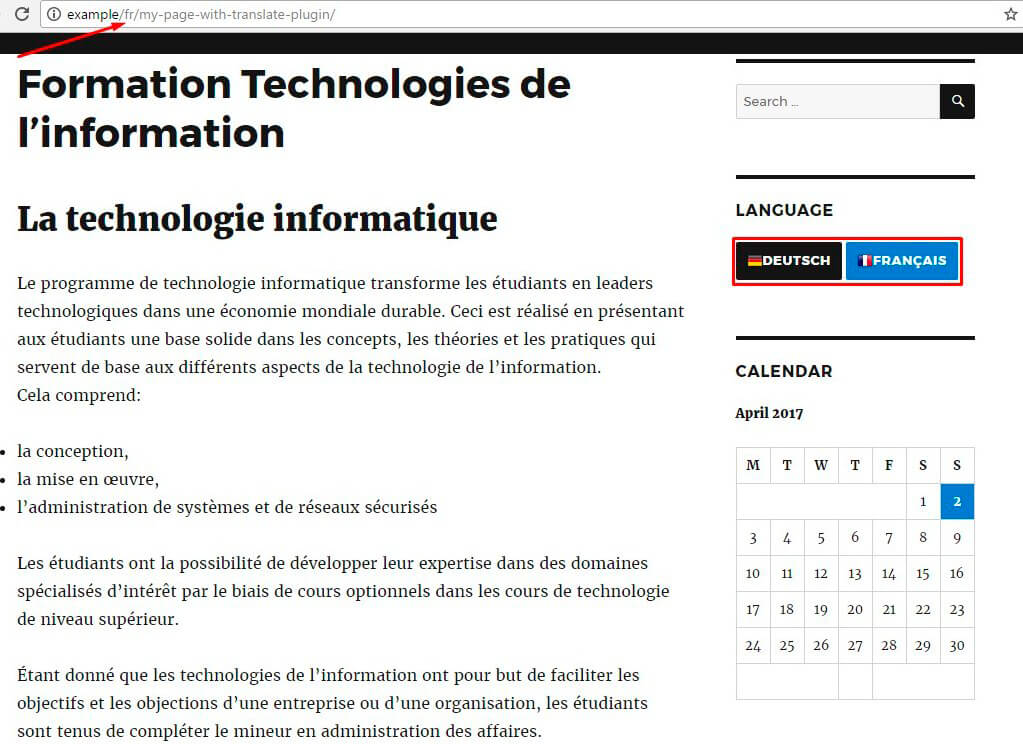
Now your site will contain a Translate widget. Visitors will be able easily switch the language what they need.
Also you may note that when you switch the language – your site address link is changed (it will be depends what have you chosen in URL mode for Language option on Settings tab of Translate plugin).
