An email list is the one audience you own. Search rankings change and social reach drops, but the people who gave you their address can hear from you whenever you have something worth saying. The hard part is the setup: a signup popup in one tool, a list in another, a welcome email in a third, and a few connections between them that break at the worst moment.
This guide builds the whole thing inside WordPress with one free plugin, CES — Popup Builder, Optin Forms, CRM & Email Marketing Automation. You will create a signup popup from a ready-made template, save every subscriber in a built-in CRM, send a welcome email with a discount code the moment someone joins, and then email the whole list. Our example is a small bakery called Kettle & Crumb that sends one recipe every Friday.
What you need
Only WordPress and CES. There is no third-party account to open and no Zapier connection to maintain: the popup, the form, the contact list and the emails share one database inside your site. Popups, forms and contacts are unlimited, and you never pay per subscriber.
Install CES from Plugins → Add New Plugin (search for “CES Supsystic”) or download it here, then open Customer Engagement in the dashboard.
Step 1. Start the “Build my email list” play
Plays are ready-made setups for one goal. Open Plays and pick Build my email list: CES will create the popup, the form, the welcome email, the subscriber list and the contact tag for you.
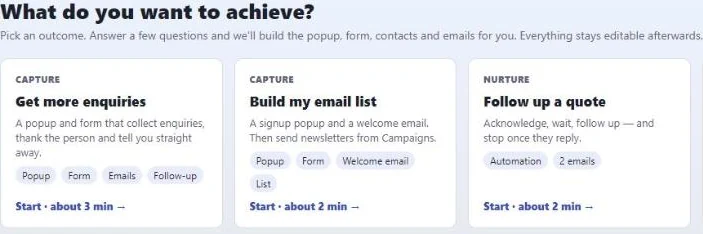
Answer six short questions: what people sign up for, the popup heading, one line about what they get, which fields to ask for, when the popup appears and what the welcome email says. At What should we ask for?, untick Name and keep the email only: every extra field costs signups. The live preview on the right updates as you type, and the summary underneath tells you exactly what will happen after someone subscribes.
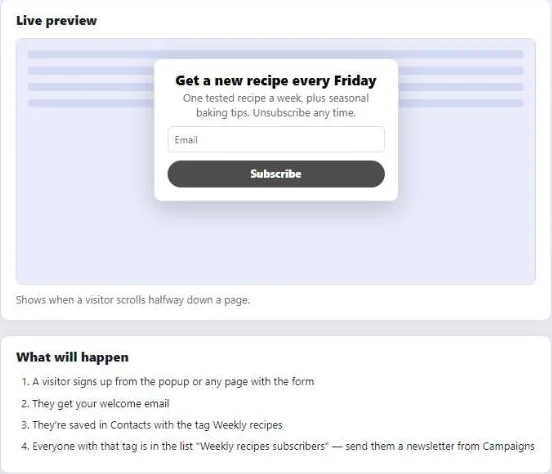
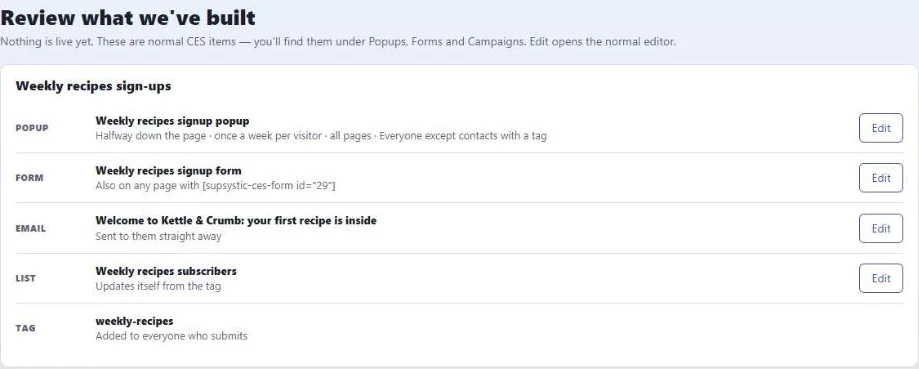
On the review screen you see everything the play built. These are normal CES items, so you can open and change any of them later.
Step 2. Give the popup a design from the template library
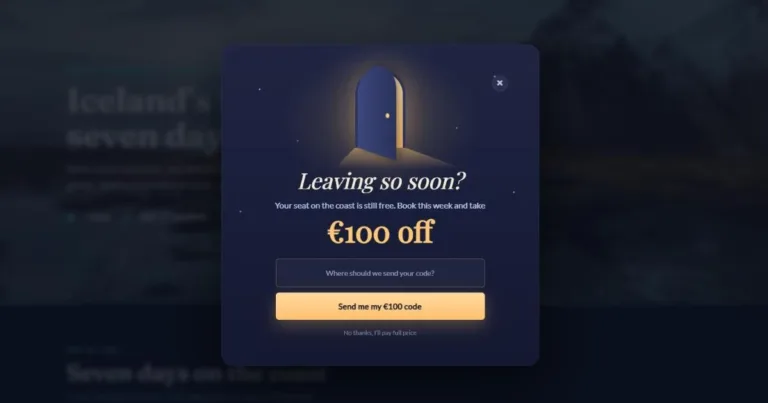
The quickest way to a popup that looks like it belongs to a real brand is a template. Open Popups → Add and filter by Subscribe & Leads. CES has 200+ templates for popups, forms and emails, from newsletter signups and discount offers to spin-to-win wheels and seasonal sales. Every template can be changed in the free editor, and you can build your own popup from scratch.
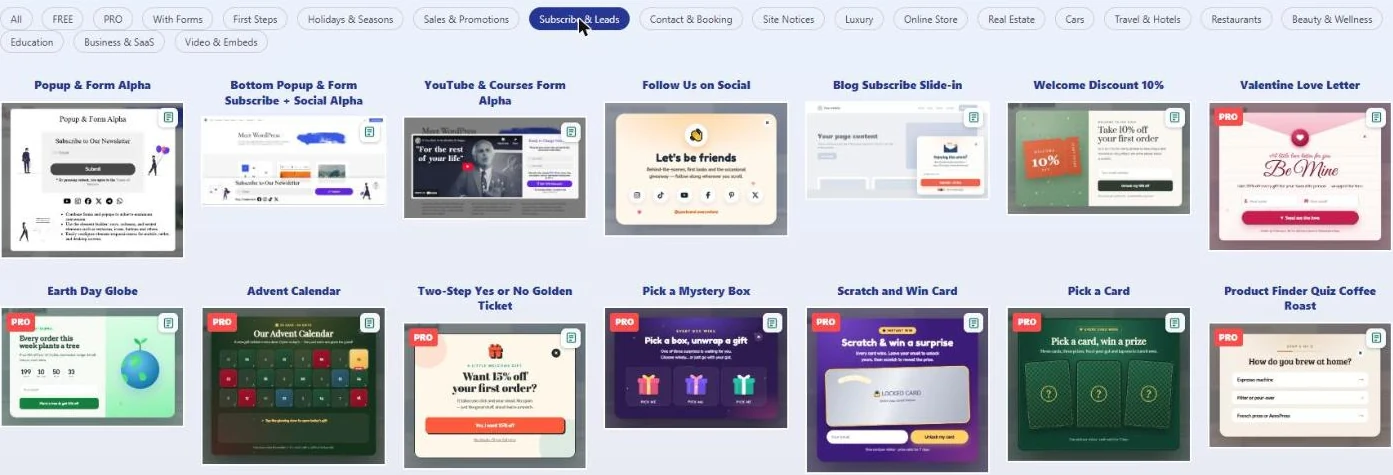
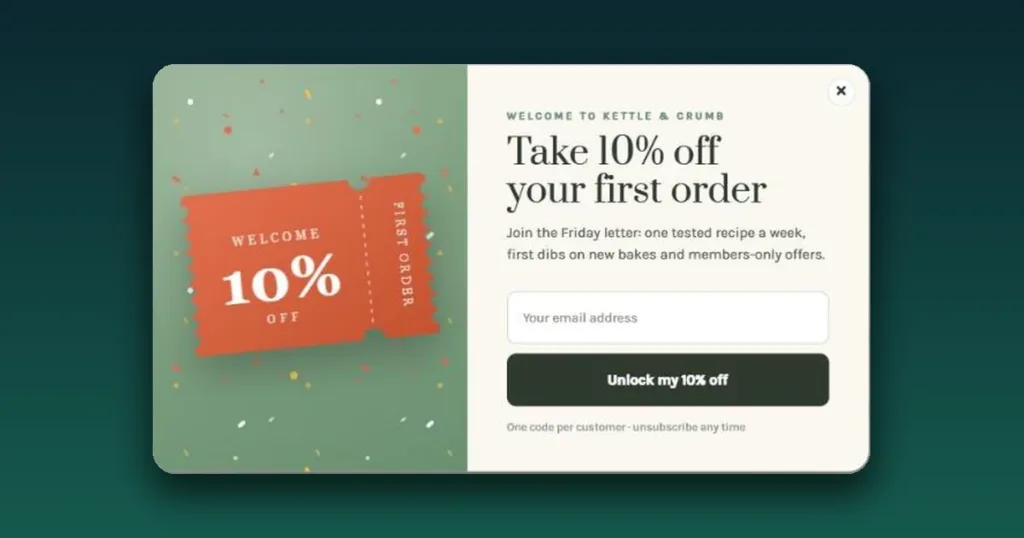
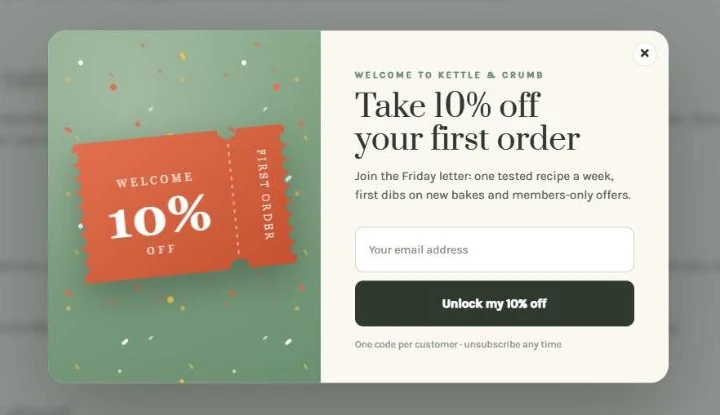
Kettle & Crumb uses the free Welcome Discount 10% template. It arrives fully set up: the design, the email field, the button, the success message and even a matching welcome email. To make it yours, click a text in the element list on the left and change it in Elements Options on the right.
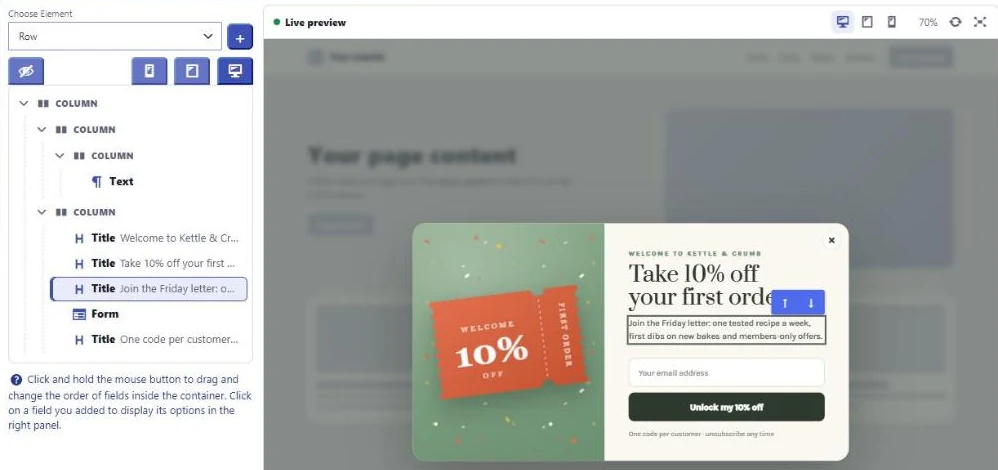
Keep one popup. The template popup takes over from the plain one the play made. Open Popups, edit the play’s popup (here “Weekly recipes signup popup”) and switch Popup is Enabled off. Its form, list and tag stay as they are. In Step 4 you give the template popup’s form the same tag, so every new subscriber still lands in the play’s list.
Step 3. Choose when the popup appears
A popup that interrupts a visitor in the first second rarely converts. Open the When & where tab and pick a moment when the visitor is already interested. Kettle & Crumb shows the popup when a reader has scrolled through half of a recipe.
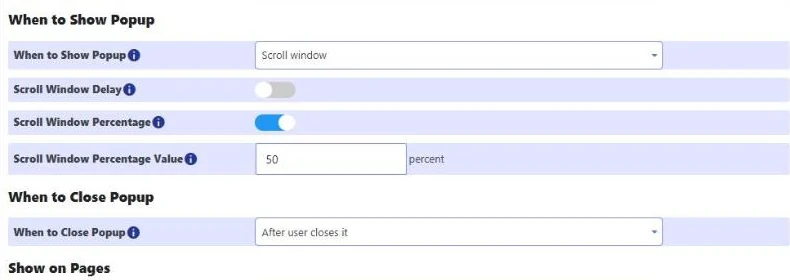
Other triggers work well for list building too:
- On exit from site – the popup appears when the cursor heads for the browser bar, a last chance before the visitor leaves.
- When page loads with a delay of 20–30 seconds, for readers who stay.
- User click on element – open the popup from a “Get the newsletter” button in your menu or sidebar.
- Bottom of the page and After inactivity for long articles.
In the same tab choose the pages, devices and how often a visitor may see the popup. Once a week per visitor is a good start. Also switch Popup is Enabled on, then save.
Step 4. Send a welcome email the moment someone subscribes
The first email is the one people open most, so it should arrive within seconds and deliver what the popup promised. The form behind the popup has it built in: open Forms, edit the popup’s form and go to Options. Under Send to Contact Email Options, keep Send success message to Contact email on and edit the subject and body. In Add specific tag(s) to contact, add the tag the play created, weekly-recipes, so new subscribers join the play’s list.
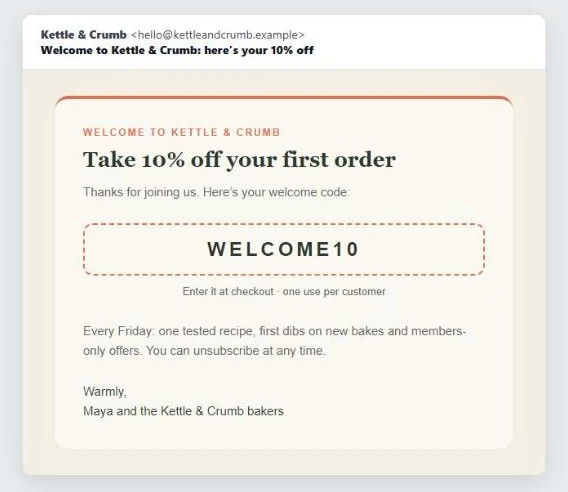
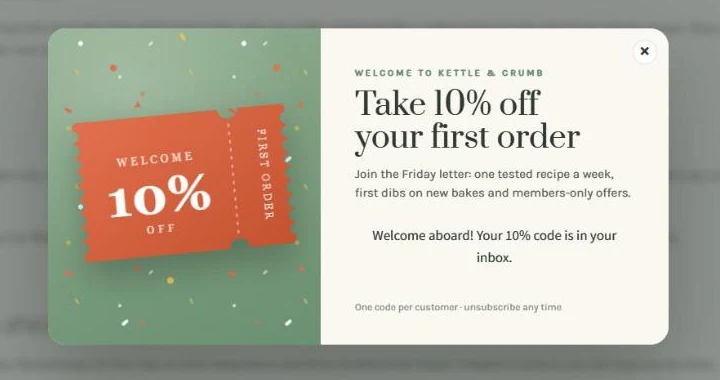
A visitor who subscribes sees a thank-you message in the same popup, and the email with the code is already on its way:
Step 5. Watch the list grow in the built-in CRM
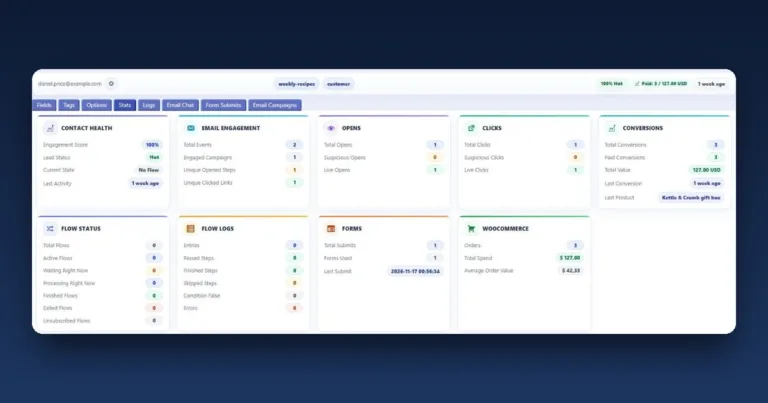
Every subscriber becomes a contact in Contacts, with the tag from the form, the date they joined, how many forms they sent and a timeline of what they did on your site: popups seen, forms sent, emails opened and clicked, and WooCommerce orders if you run a shop. Tagged contacts also appear in the list that the play created, and the list updates itself whenever someone new gets the tag.
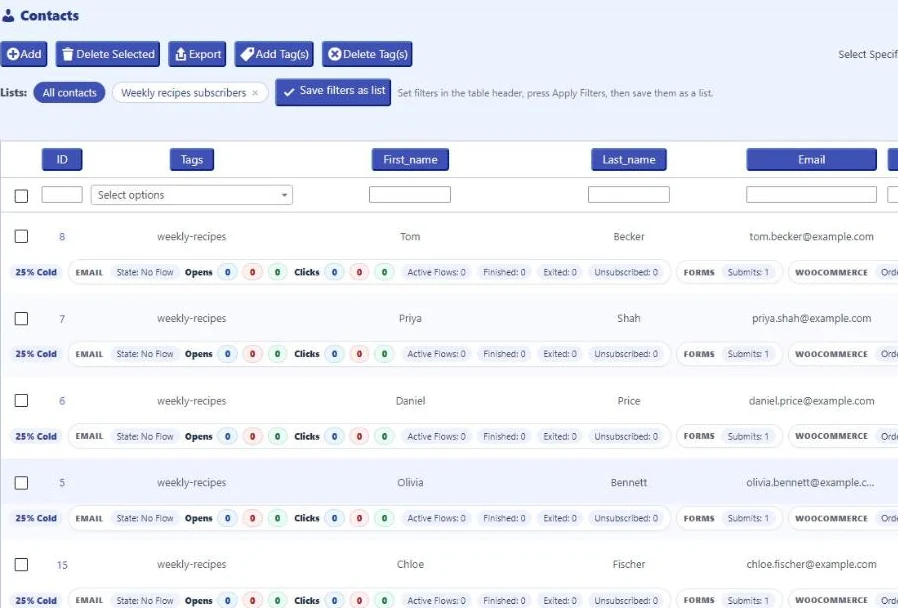
Your contacts are stored in your own WordPress database, not on someone else’s server. You can export them to CSV at any time, import existing subscribers from CSV, WordPress users or WooCommerce, and add your own fields for anything you want to remember.
Step 6. Send your first newsletter
When Friday comes, open Campaigns → Newsletters → Add. Choose who receives it (the subscriber tag or list), write the email in the visual editor, add a preview text, and send a test to yourself. Then press Send now or schedule it for a set time. Unsubscribed contacts are always left out.

Two small options pay off later. UTM tags on links label the traffic in your analytics. Tag people who click (Pro) marks everyone who clicks a link in this email, for example everyone interested in sourdough, so the next email can go only to them. The number of newsletters is unlimited in the free version.
Measure what works
Open Reports → Popups to see how many people saw each popup, how many subscribed and the conversion rate (submissions divided by unique visitors), plus how many closed it straight away. Change one thing at a time, such as the heading, the offer or the trigger, and compare.

Make sure your emails arrive
By default WordPress sends mail through your web server, and many inboxes treat that mail as spam. Before you announce the newsletter, open Customer Engagement → Settings and connect an SMTP mailbox on your own domain. CES also checks your sending domain for SPF and DMARC and shows what to fix, and it handles bounces over IMAP so dead addresses stop receiving mail. CES Pro adds direct connections to 10+ email providers.
Tips that grow a list faster
- Offer something specific. “10% off your first order” or “one tested recipe every Friday” works better than “subscribe to our newsletter”.
- Ask for the email only. Every extra field costs signups. You can collect a name later.
- Put the form on the page too. The play’s form has a shortcode, so you can place it at the end of every post for readers who never see the popup.
- Follow the calendar. CES has seasonal templates for Black Friday, Christmas, Valentine’s Day and more, ready to swap in for a few weeks.
- Keep your promise. If the popup says “every Friday”, send every Friday.
FAQ
Do I need Mailchimp or another email service?
No. CES collects the subscribers, stores them and sends the emails from your WordPress site. You only need a mailbox to send from, connected over SMTP for the best delivery.
Is this free?
Yes. Apart from the one option marked Pro, everything in this guide uses the free version of CES: the play, the free popup templates, scroll and exit-intent triggers, the welcome email, tags, the CRM, newsletters and reports. CES Pro adds email confirmation (double opt-in), advanced targeting, a tag for everyone who clicks a newsletter link, branching automations with unlimited steps and direct connections to email providers.
How many subscribers can I have?
There is no limit on contacts: every subscriber is saved in your CRM, and CES never charges per contact.
Where are my subscribers stored?
In your own WordPress database. Nothing is sent to Supsystic, and you can export the full list to CSV at any time.
Can I send different emails to different people?
Yes. Tag contacts by what they signed up for or clicked, and send each newsletter to a tag or a saved list.
Start your list today
CES is free on WordPress.org and is used on 10,000+ WordPress sites. Install it, start the Build my email list play, pick a template you like and your first subscriber can be in your CRM within the hour.
Download CES free | See Pro plans | Explore CES
More: Popup builder · Email marketing and automations · WordPress CRM · Forms · All free plugins