How to make albums with Supsystic Photo Gallery plugin?
Supsystic Photo Gallery plugin allows you to display multiple different images on a single page. There are several modes:
- Horizontal
- Box
- Polaroid
- Vertical
- Circle Gallery
- Fixed.
But what if you want to divide pictures by its content and sense? For this, we have a great solution – gallery albums. There is an example of how it looks in action. 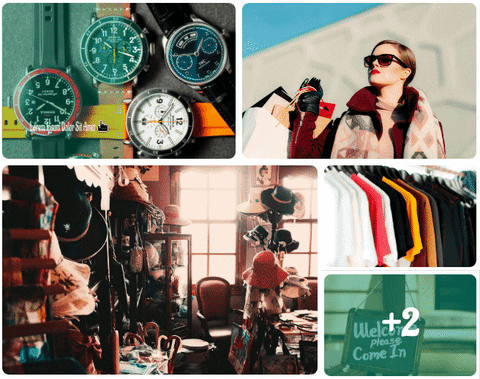
 Why do I need albums?
Albums are made, first of all, for the navigation. Users can easily find all the necessary information just in seconds with this feature. They separate the content, filter it, and find the desired image. Albums allow you to dramatically save the time. ![]()
![]() Attention!
Attention!
Albums can really improve user’s navigation experience
![]()
What is the first step?
First up, you should make sure that you have installed the Supsystic Photo Gallery plugin. For this, follow these simple three steps:
- Download it
- Upload to your WordPress plugins directory
- Activate.
Ok. I’ve already done it. What’s next?
Then, navigate to the New Gallery item in the left menu, select the gallery template, and type its name. Don’t forget to click the Save button, and let’s upload new photos! 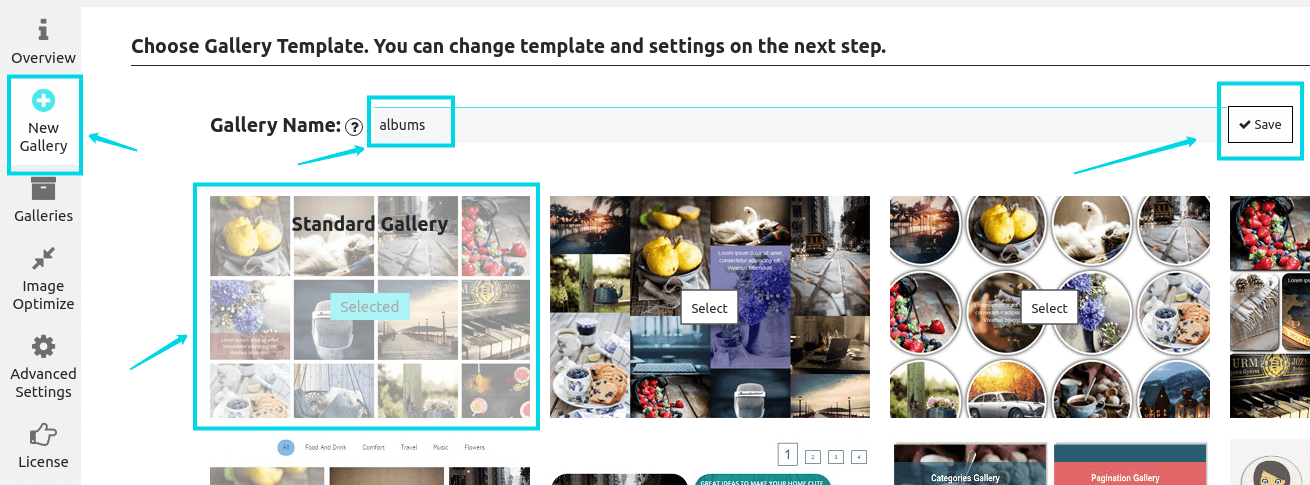 If you have already images in your gallery, you can skip this step. If no, find the Add images button, and choose the uploading source:
- WP media library
- Social networks
- Cloud services.
Wait just a few seconds and … woohoo! You have just created a new gallery. Let’s move on!
How can I create the first album?
We want to divide all our images into three albums (it is similar to categories):
- Nature
- Food
- Looks.
For this, find Categories Settings on Image list above the photos. It allows to create, add and delete tags for image categories. Do it in four steps:
- Tick the required photos
- Choose to Create New Category in the list
- Write its name
- Press Apply.
Then, you can make sure that the category is added. In the last columns click the Categories button and check it. 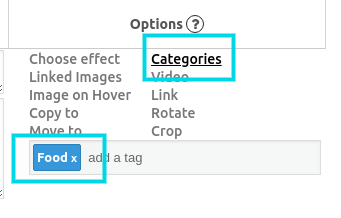
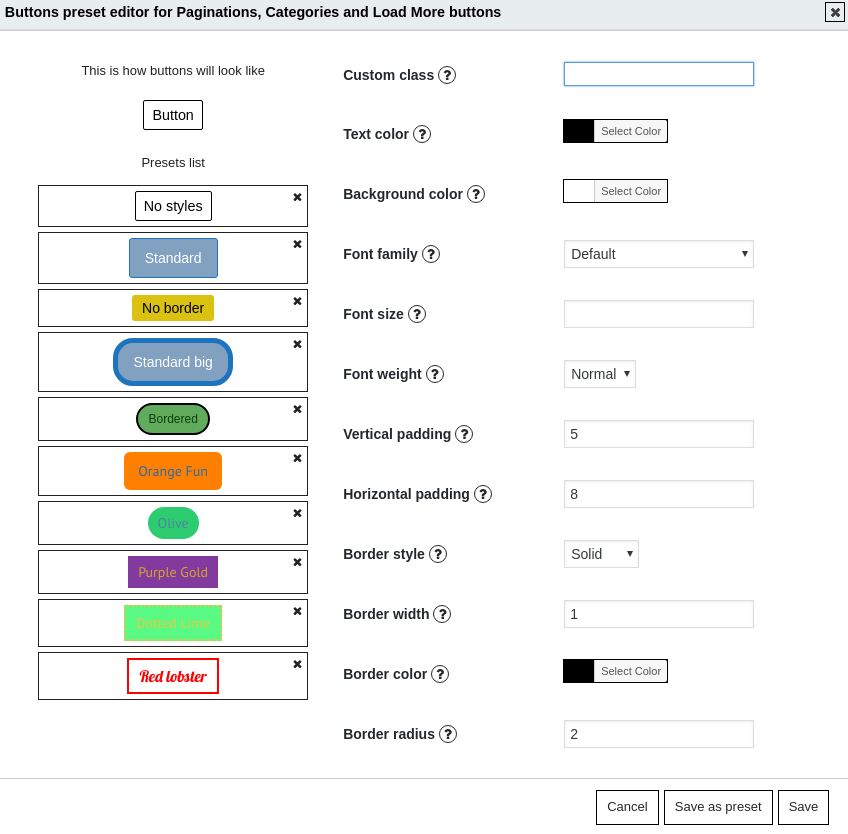
Can I design my category buttons?
Of course! Let’s return n the Main Settings Tab of our Gallery. There is a small step-by-step instruction:
- Navigate the Main tab
- Press Buttons
- Near the Custom Buttons item click the Show preset Editor.
 After all changes you have just made, click the Save button. That’s all! Now your images are sorted in a good and flexible way. You can create an unlimited number of albums. While still here, try out the Supsistic Social Share Button plugin.