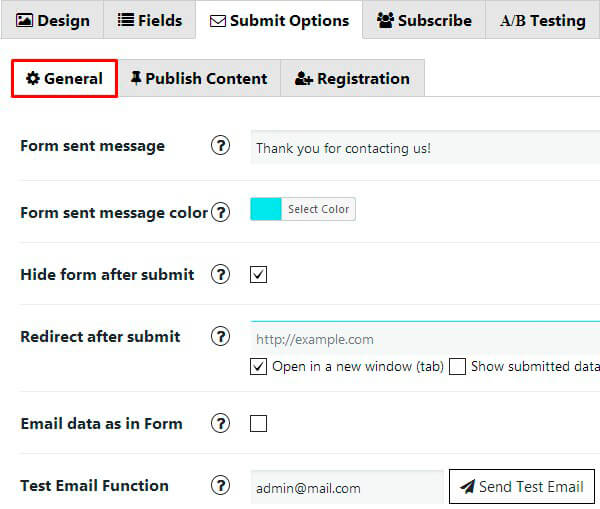
The most important thing in any business in the Internet – is the reaction of your user. Usually, the positive memory about the service on your site guarantees you the next purchase of this user or at least, some advertisement among his friends. Customer-centricity of Contact Form plugin lies in the Submit Options tab. Open it by following the path Contact Form by Supsystic (on the admin panel) -> Your Contact Form -> Submit Options tab. Here you can adjust your form in General settings tab, Publish Content and Registration features.
On General tab you can customize next options:

- Form sent message – Message, that your users will see after success form submition
- Form sent message color – Choose a color for the text message that your users will see after success form submition
- Hide form after submit – By default form will be hidden after successful submit, but you can disable this here – and after submit form will be just cleared.
- Redirect after submit – If you want – you can redirect user after Form was submitted. Just enter required Redirect URL here – and each time after Form will be submitted – user will be redirected to that URL. Just leave this field empty – if you don’t need this functionality in your Form.
In addition you can: - Open in a new window – If you want to redirect URL in a new window switch the option.
- Show submited data – After user will enter all data in contact form, and form will be submitted – he will be redirected to page with his submitted data. Enter in the text field above – link to page, where you inserted shortcode
[supsystic-form-submitted]– and check results. Don’t forget to enable “Save contacts data” option too. - Email data as in Form – By default email data from form will be listed in one column. But you can enable this option – and all data will be listed as they are in form: if in row there are 2 fields – 2 fields will be in email, etc.
- Test Email Function – Email delivery depends from your server configuration. For some cases – you and your subscribers can not receive emails just because email on your server is not working correctly. You can easy test it here – by sending test email. If you receive it – then it means that email functionality on your server works well. If not – this means that it is not working correctly and you should contact your hosting provider with this issue and ask them to setup email functionality for you on your server.
WPCom_Markdown class is not exists - Save contacts data – Store each contact form submission – into database, so you will be able to check all your form submit data. Nice new option – Export the data in CSV file. Everything for your comfort!
- Send only Field values – By default we will send field labels + values like: Field Label: Field Value. But if you need to receive only values – you can disable sending Field Values here – just check this checkbox and it will be done.
- Facebook Conversion – Tick to enable Facebook Pixel and Custom conversion.
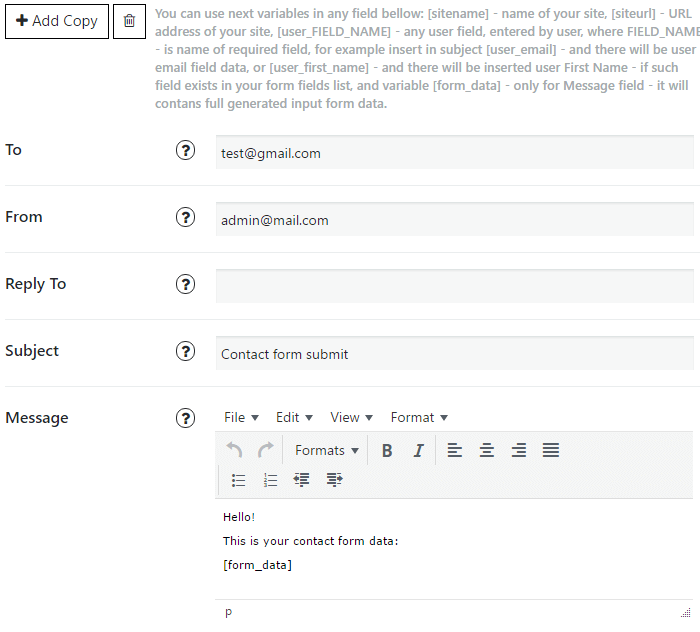
- Add additional data to submit – this button helps you and send not only one copy but several (the more you click – the more you have) to your email. Or different ones
Besides here you will be able to customize how would look like the email letter with data from contact form.

- To – Email where we need to send contact form info. Can enter several email addresses, separated by comma “,”
- Reply To – Useful option, for those who want to economize the time. Insert there a variable [user_email] and it will automatically generate the user adress, if you want to reply on this message in your inbox, like an adressant
- Subject – Set one email subject for all forms and it will be easy to find your customers data in inbox
- Message – Identify the view and content of your message. But be attentive: WPCom_Markdown class is not exists
Need some more info about our plugin? Please, visit Contact Form WordPress plugin page.