How to customize markers in the Supsystic Ultimate maps plugin
There is one thing that helps users more deeply and easily understand your content and information on the website – maps. Whatever business you are running – it will be always useful. Let’s think: a travel blog is much more interactive when your audience can see what places you have visited, a post with city cafes overview is much easier to understand with their points on the map and your offline stores are much quicker to find when people not only see the addresses but also their locations. So, there are a lot of reasons why do you need a map on your site. And today we will focus on how to customize them, especially markers, using Supsystic Ultimate maps plugin.
Read our previous blog post to know more about Supsystic Ultimate maps plugin
 Why I need Ultimate maps plugin instead of Google maps plugin?
Recently, we have already explained the unpleasant situation which occurred with us and bills from Google. If you are not read this, you can do it now. Briefly, Google has changed their pricing policy making it so expensive to use their maps. So, we have developed a new plugin – Supsystic Ultimate maps plugin, where we gathered all alternatives to Google maps, that are free of charge or more cheaper, like:
- Bing maps
- Leaflet maps
- Mapbox
- Thunderforest.
Which features does the plugin have?
Supsystic Ultimate maps plugin have a number of useful features that help you to customize your maps:
- KML layers
- Responsiveness
- Clusterization
- Maps templates
- Shapes
- Unlimited maps.
And, of course, you can set as many markers as you want, and customize them without any difficulties.
How to add a new marker?
First of all, install and activate the Supsystic Ultimate Maps plugin. Next, create and design your new map. You can learn how to do it in our docs. So, after all these steps are done, you can now add new markers. Go to the Markers tab and click New button inside the tab. 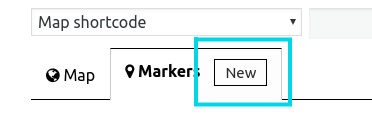 You will see the empty fields which you need to complain:
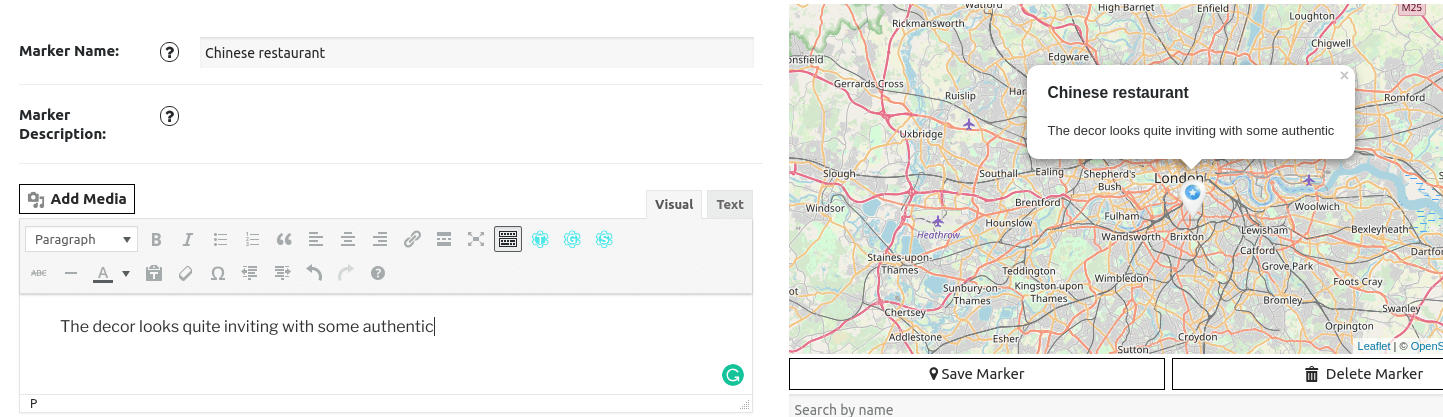
- Marker name: here write the marker title
- Marker description: the text that will appear in marker info-window PopUp. Keep it simple and short. Here you can also choose the text’s formatting style and add media files.
It looks great!! But I want more options!
Well, you’ll have it! Scroll down the page, and you will see new fields. Icon: it is your marker’s badge. Users can choose it amongst existing or upload new. ![]() Address: you can point a location on the map or type here. When you will write it here the fields with Marker coordinates – Latitude and Longitude will be filled automatically.
Address: you can point a location on the map or type here. When you will write it here the fields with Marker coordinates – Latitude and Longitude will be filled automatically. 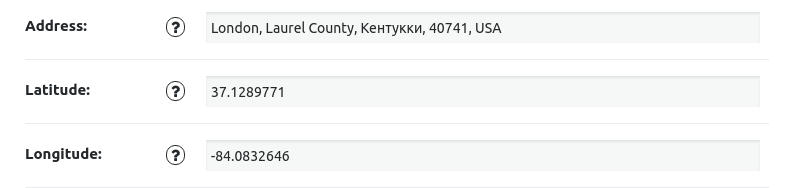 The next field is Marker category. Let’s explore what is that and how to create it.
How to create a marker category?
In order to create a new Marker category, find in the left plugin’s menu Marker Categories tab. Here such options with the category are available:
- Add
- Edit
- Delete
- Search by Title.
Write the title, choose the Parent category if you have it, select a background color and cluster icon. 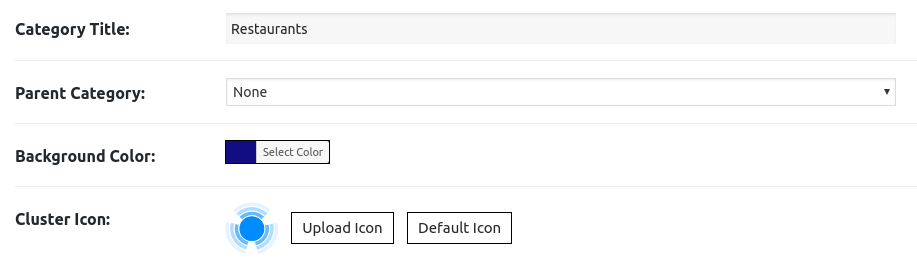 So, now let’s Save it and add to our justed created marker.
What is the last step?
The last step is to set up a Marker Link, which will be opening by click on the marker.  After you’ve created a new marker do not forget to Save it. You can see immediately the results in the right top corner live preview.
 ![]()
![]() Attention!
Attention!
Do not forget to save your changes!
![]() Also with Supsystic Ultimate maps plugin you can:
Also with Supsystic Ultimate maps plugin you can:
- Create multiple markers for one map
- Edit markers that you had created before
- Remove the marker from the map
- Change the order of markers by dragging it manually
- Sort markers by Id or Title.
 Bravely use all these options!