 Suppose, you’ve been running a membership site for a long time. You’ve gathered a good base and formed an excellent reputation. In fact, one of the ways you can earn money is to create your own online store.
What allows you to do an e-commerce feature?
The membership e-commerce feature was designed to enable you to monetize your community and get additional profit. It is a necessary tool for informational agencies, professional networks, and people who create and sell their digital products, like courses or photos. With e-commerce extension, you can:
- Create membership levels according to their purchases
- Make a dripping content, meaning post your content on a regular basis
- Provide your customers with different payment methods
To tell the truth, the Membership plugin has great potential, even those who don’t know the programming can create an attractive and simple membership site. And we will show you how. In this demo, we have created a site with paid courses. You can check and play with it. 
How to add an e-commerce extension?
First of all, you can follow these steps:
- Navigate to Plugins -> Add New
- Search for “Membership by Supsystic”
- Install and, then, activate the plugin
- You will have a new admin menu item titled “Membership by Supsystic” – click on it.
![]()
![]() Attention!
Attention!
Note, that e-commerce extension is a PRO feature, that has to be purchased
![]() After buying, you will find a unique download link in your personal account, download the file and let’s move on. Now you need to navigate to Plugins -> Add New -> Upload. You have to upload just the downloaded file – it will take just a few minutes. After that, do not forget to Activate the plugin and enter the license key. To do this follow the simple instructions:
After buying, you will find a unique download link in your personal account, download the file and let’s move on. Now you need to navigate to Plugins -> Add New -> Upload. You have to upload just the downloaded file – it will take just a few minutes. After that, do not forget to Activate the plugin and enter the license key. To do this follow the simple instructions:
- Click the Membership by Supsystic in the WordPress left menu
- Press the License tab on the left navigation menu of the plugin
- Enter your email and license key
- Click “Activate Addon” button.
Hoooh, we’ve done this. And now will be the most interesting part – we start to customize your future site.
How to adjust membership levels?
Our first station is adjusting membership levels. For this, go to E-commerce tab on the left navigation menu inside the Membership plugin. Here you will see 7 windows:
- Membership levels
- Payments
- Currency
- Dripped Content
- Orders Settings
- Statistics.
 In a first tab, you can create new levels, sort them or delete them. In order to create a new one, click Add New button and fill in these fields:
-
- Name
- Description
- Registration button name
- Purchase button name
- Price
- Recurring Subscription
- Categories and Specific Posts in a Categories section.
 Click the Save button.
How to set payments?
As we wrote above, you can choose payments methods from the list:
- PayPal Standard
- Authorize.net
- PayPal PRO
- 2Checkout
- Stripe.
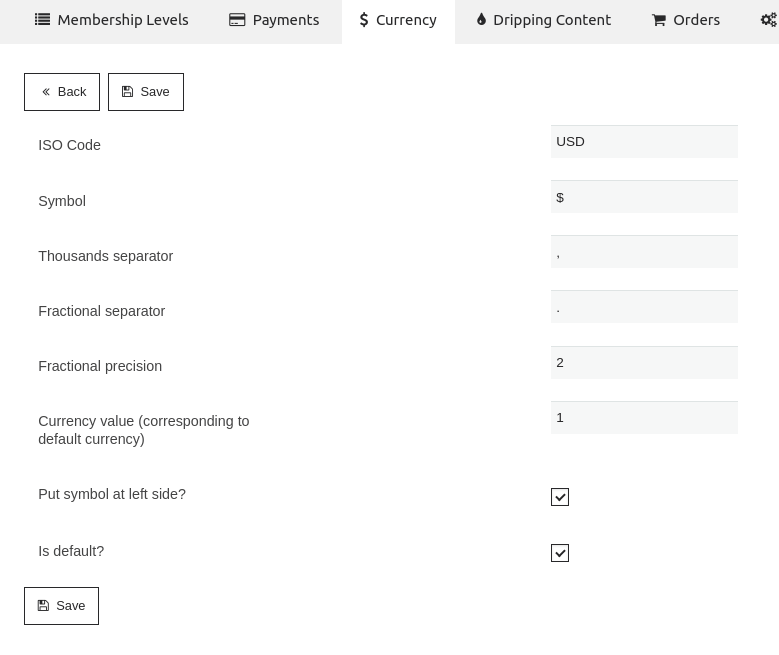
How to configure currency?
In this section, you can create, search, edit, and delete all the information related to currencies. Click Add New and insert the following information:
-
- ISO Code
- Symbol
- Thousands separator
- Fractional separator
- Fractional precision
- Currency value (corresponding to default currency)
- Put the symbol on the left side
- Is default
What else?
The supsystic Membership plugin allows you to create dripping content, manage order settings and view statistics. To create a dripping content, you need to go to any Post / Page or other content edits on your site – and enable Dripping there. You can read about this in our previous blog post. Order tab allows you to see your orders, edit them, sort and delete. In Settings tab you can establish:
- Order Admin Email
- Order Admin Email content.
To analyze your performance, go to the Statistics tab. It allows you not only to see the total results but also to choose a statistics diagram view and group it by
- Hour
- Day
- Week
- Month.
After tuning all the settings, you will get the results like in our example at the beginning. Of course, it seems that there are a lot of things, but, believe: once you sort out, you can create a fascinating membership site. Discover the Best WordPress Plugins at Supsystic.com