
Membership Site with Premium Content
If you are an expert in some field you may have a will to monetize your skills. For example, if you are the expert in web-design you should know that there are millions of people that want to become web-designers but have no time or will to waste year in universities. Such an audience is more likely to subscribe to courses from expert they trust to. And you can launch such courses and become an expert that offers knowledge. The best way to earn on learning courses online is to launch membership site. Membership site allows you to enforce paid plans for an access to restricted content and thus you can earn on content. If you already have videos, articles, blog – or any other learning materials in open access – you can make it a base for your courses. If you already have a YouTube channel your subscribers are to become your first audience for the membership site you are going to launch. So if you are ready to start it is time to clear what services you will offer on your membership site. For such a business model it is better to:
- grant paid access to content – videos, articles etc
- provide paid consultations (user gets consultations for free if subscription plan is purchased)
- let users to communicate
- let users to create content
In order to make your membership site more attractive you need provide appropriate content access policy. It should look like this:
- There is a free content available for all visitors.
- There is a free content available only for signed up users.
- There is a content available only for those who purchased membership plan.
If you implement such content access policy you will both keep the most valuable monetized and gather new members and income due to the free content. It is up to you how many membership levels to implement however, let’s start from three levels:
- BASIC
- INTERMEDIATE
- ADVANCED
Basic and Intermediate plans will open access to some premium content on the website. Advanced level allows users to access all premium content on the website. So let’s try to create such a website step-by-step.
Creating Membership Website with Supsystic Plugin
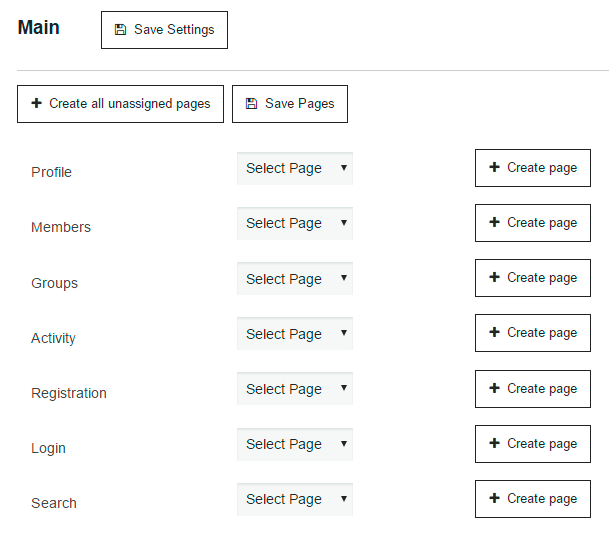
After you got website on WordPress the first thing you need to do is to install and activate Membership by Supsystic plugin. Press Plugins -> Add New in the WordPress admin menu and enter Membership by Supsystic in the Search. Press Install Now, then Activate plugin. After plugin is activated you get to the Welcome page where you can see support info on Membership plugin. Follow small step-by-step guide of Membership plugin. 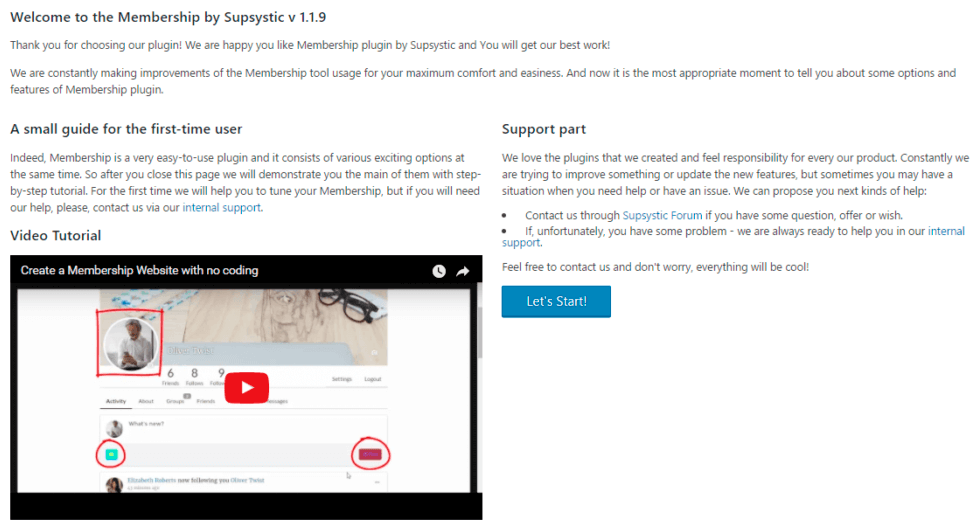 After this you need to create membership pages. Go to Membership plugin settings -> Main tab -> Pages section. To create all pages at once click the “Create all unassigned pages” button.
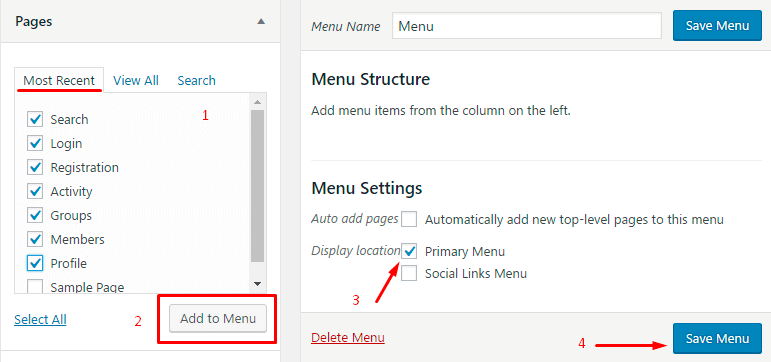
  Check the list of created pages in Pages section of WordPress menu. In order to provide appropriate site navigation for your users – it will be better to add these pages to website Menu. Go to Appearence -> Menus. Here you will be able to add membership pages to your menu or create new menu for your site. Set this menu to be Top Menu and choose pages you want to add to this menu. Press Save Menu button.
  Now when all pages are created let’s see how Profile page looks.
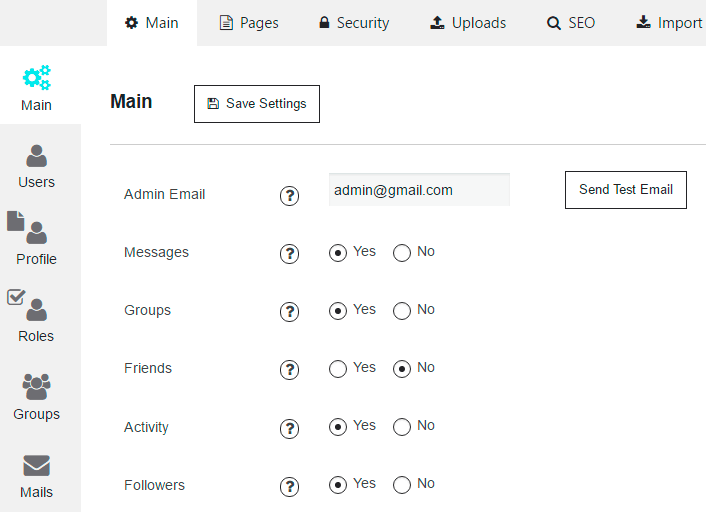
 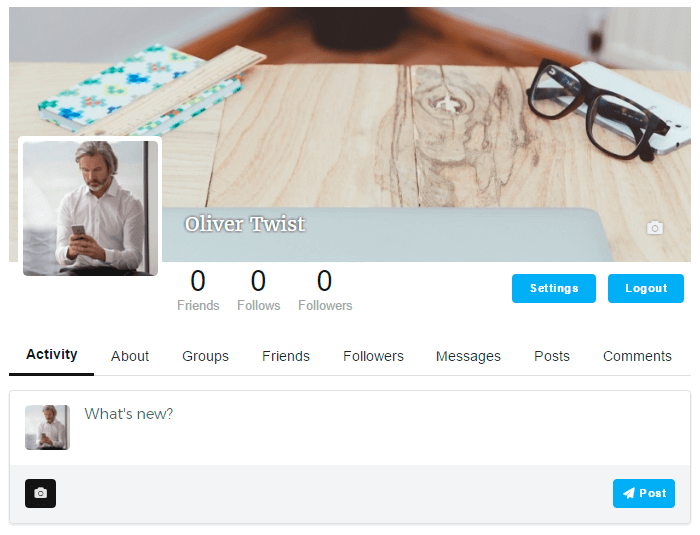 As you see there is a place for avatar, cover image and user name, social counter (follows, followers, friends). In order to set photos for avatar – click on avatar -> Upload photo -> choose the photo -> crop it as you need and Save. To set cover image for your profile – click on a camera icon in the bottom right corner of the cover and repeat procedure with uploading photo. Also you can set default custom images for avatar and cover photos in backend Membership settings -> Profile tab. Let’s disable Friendship – we don’t need this function. This can be done on Main tab of plugin menu. Also here you can enable/disable other options for your Community, such as Groups, Followers, Messages etc.
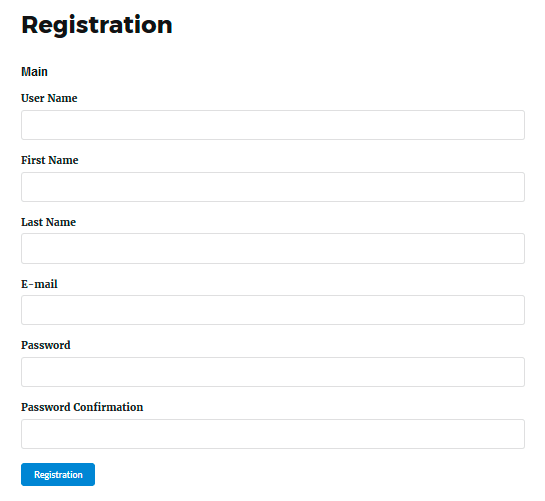
  Now let’s look through the Registration page.
  We can add new Section with additional fields. Go to Profile -> Registration Fields. At first we are adding new section for new fields. Click “Add Section” button and set the name. Then we need to add some fields like city, hobbies and others. Click Add Field to do this.
  What fields we need to create?
- City – to know where new member is from. This will help us to accomplish our marketing goals in future.
- Hobby – if we know interests of our new members we are able to make a common portrait which will help us to add new products and offers that answer needs of our members.
- Gender – we will know whether our courses are more popular among men or women.
- Skill Level – we need to add this field to know what does user think about his knowledge level in web-design.
Creating of the new field includes next steps –
- Set the field label.
- Choose the type of field – text, email, password, media, numeric, date, scroll list, dropdown list, radiobutton, checkbox, Google Recaptcha.
- Secify the field description.
- Choose the section for field.
- Activate the field statuses – Registartion, Required, Enabled.
 For example, how to create “Gender” field.
 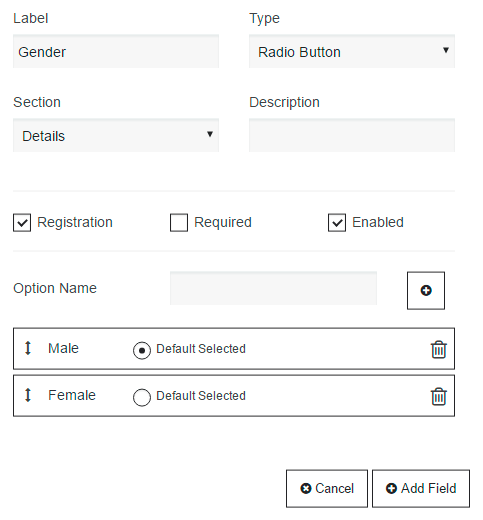 So we have entered Label and chosen Radio Button type. After this is done let’s fill other standard fields and create values for radiobuttons. There are only two options for this question – Male and Female. Now when all new fields are added we need to Save Fields. To see the updates – go to Registration page from browser where you are not logged in or logout from site in current browser.
 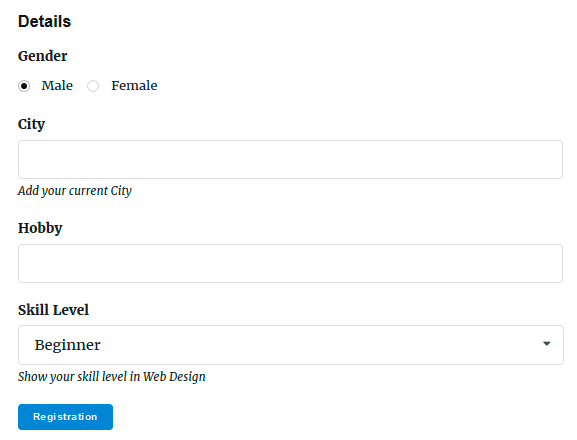 As you can see all added fields were activated and we have our registration page finished. Now let’s adjust Roles for our membership site. There are three roles by default in membership plugin:
- Membership Administrator – has an access to all functions – admin area and others. Generally it is you or the person you assign to this role.
- Membership User – person that has signed up to your website. He can view paid content after he purchases subscription plan.
- Membership Guest – can only view free content on the website.
To add new role go to Roles tab and press Add new role, set the name. Then you can adjust settings for this role. We don’t need new roles for now, so let’s cofigure default roles. 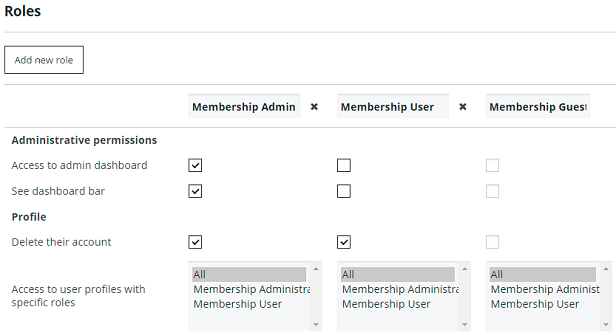 Membership Administrator has to possess all rights – so all checkboxes must be enabled. Membership Guest can only view free content – so all checkboxes are disabled. Membership User (Subscriber) has no administrative permissions, he can delete his account and can access profiles of other subscribers. He can also change privacy settings. Subscriber can create, read and join groups. But he cannot block groups. Besides he can send messages, has access to members, groups and global activity pages. All social features are available as well. Friendship feature is disabled on our site, however we can leave Add remove friends enabled. Now we can get to creating membership levels for our Community. As already stated there will be three membership levels – Basic, Intermediate and Advanced. In order to implement paid levels we need to use Membership Ecommerce Addon. It allows you to add and adjust membership levels, set payment options, enable dripping content and others. After installing and activating E-Commerce extension – go to Ecommerce tab -> Membership Levels. Let’s create Basic Plan Subscription. Click “Add New” and specify all needed parameters. Set the name and description of the subscription plan. For Registration and Purchase buttons you can left default names or rename them.
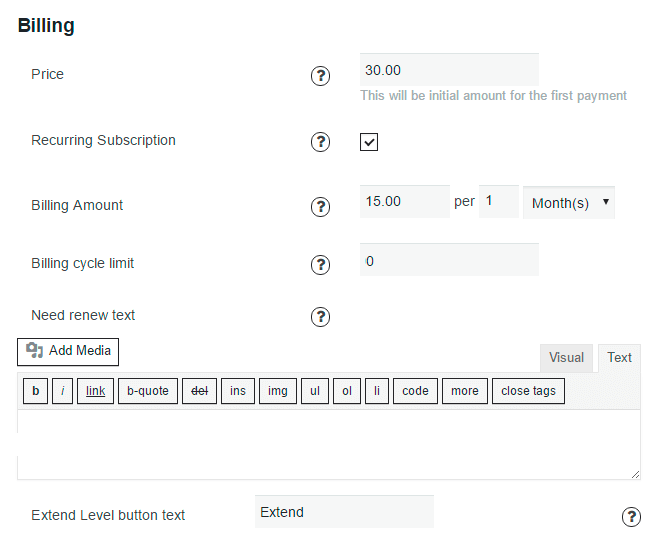
 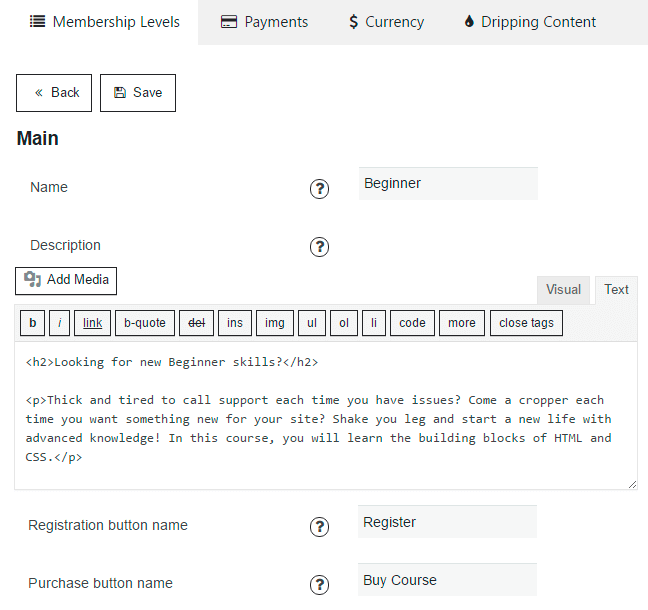 Now let’s set Billing options. Price is set as 30$ for subscribing to plan. This will be initial amount for the first payment. As we are running business model with monthly payment for subscription, we enable Recurring payment option and fill al needed values. There is no Billing Cycle Limit for this subscription plan – you need to set if your course is limited by time period.
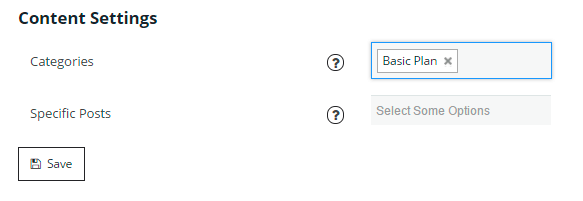
  Next section of membership level – Content Settings, here we can choose available post categories or pages/posts for this level. So we need to create post category, enable this category for content (posts) which will be available for Basic Plan only and choose this category for Basic Level.
  Save all changes. Let’s add next membership levels Intermediate and Advanced. Level settings adjustment is done in the same way as for Basic Plan level. Don’t forget to set higher price for other plans. Advertisment of subscription plans your clients can find on pages with paid content. There will be displayed description of the membership level with appropriate button – “Register” for non-logged in users and “Buy Now” button for already registered. Therefore pay special attention to the description of the level. Check the example of creative description of membership levels.
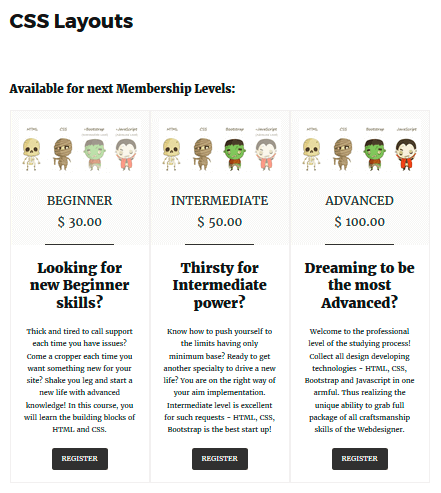
 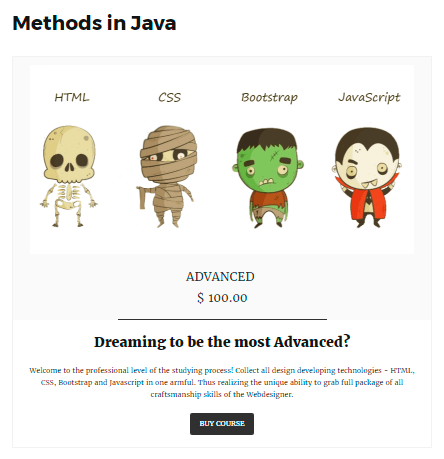 If your post will be available for several membership levels, it will look like –
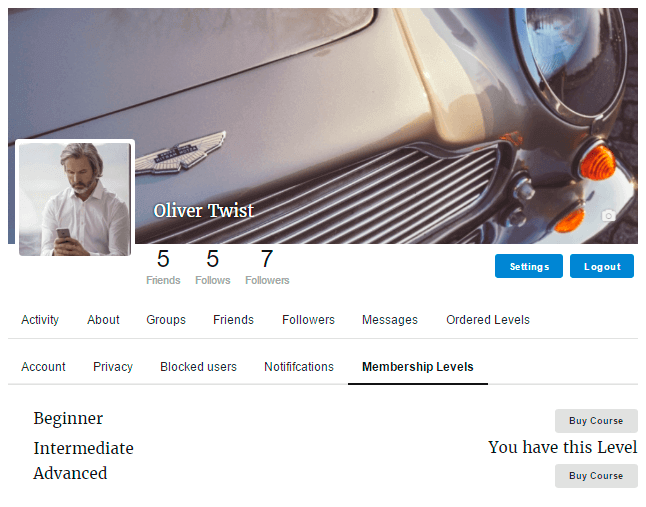
  Also users can purchase subsription plans in their Profile settings.
  Besides you can locate subscription purchase offer wherever you want and add Purchase button using special shortcode. Here is the shortcode
 [supsystic-membership-level-add-url id="1"] , where 1 – it is ID of your membership level. Paste this shortcode as a link for some text on the page. Note that you need to add it only in Visual editor. Now we should to adjust Payments settings. Go to Ecommerce -> Payments. You only have to choose payment system and enter your payment details. PayPal is the most popular payment system, so we have chosen it for our tutorial. 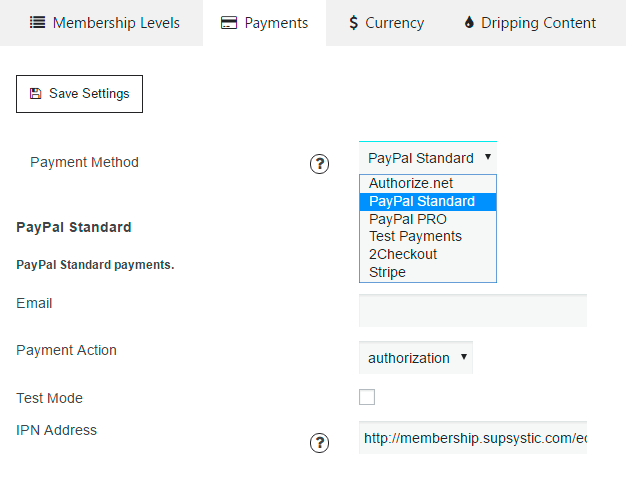 Before checking how it works on frontend we need to create unassigned pages for Checkout and Checkout Success. Go to Main -> Pages, and create needed pages. Now let’s see how purchase process looks like. When you press Purchase button you are redirected to Checkout page. We have configured all necessary options for our community with paid courses, now you need to create all content for the website and make additional adjustments for further goals. You can check the of Membership site with paid courses of Webdesign, which was customized using Membership by Supsystic. In conclusion, some more useful tips for your online business.
- Go to Design tab -> Menu, here you can enable “Logout” link for menu and configure Login and Registration links.
- If you want to limit access for all site content to non-logged in users, go to Main tab -> Security and enable “Site Accessible to Logged In Users” and “Protect all Pages” options. In this case all non-logged in users, when opening any page of your site, will be redirected to Login page.
More information about all Membership advantages, extensions and demos you can find on our Supsystic site, check Membership plugin page and Membership Documentation.
