A carousel shows many images in the space of one. Visitors swipe or click through a trip, a product range or a set of client logos without scrolling past a long wall of photos, and the page stays short and calm. Done well, it looks like a feature of the site rather than a widget bolted on.
This guide builds an image carousel in WordPress with the free Photo Gallery by Supsystic plugin, from the first click to the finished page. Our example is a fictional tour operator, Northbound, that shows its seven-day Iceland trip day by day. At the end you will also see a logo carousel that runs without stopping, and where WooCommerce product carousels fit in.

What you need
- WordPress with any theme. The carousel works in the block editor, in Elementor and anywhere a shortcode works.
- Photo Gallery by Supsystic, free on WordPress.org and used on 27,000+ sites. Install it from Plugins → Add New Plugin (search for “Photo Gallery by Supsystic”) or download it here.
- Four or more images. Landscape photos of the same size and mood make the calmest carousel.
Step 1. Pick the carousel type
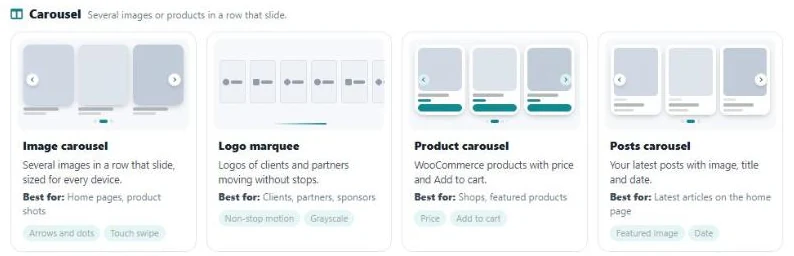
Open Photo Gallery by Supsystic → Add new. A five-step wizard starts with the question “What are you making?” and shows a picture of every layout. Scroll to the Carousel group:
- Image carousel: several images in a row that slide, sized for every device.
- Logo marquee: client or partner logos that move without stopping.
- Product carousel: WooCommerce products with price and an Add to cart button.
- Posts carousel (Pro): your latest posts with image, title and date.
Step 2. Add your images
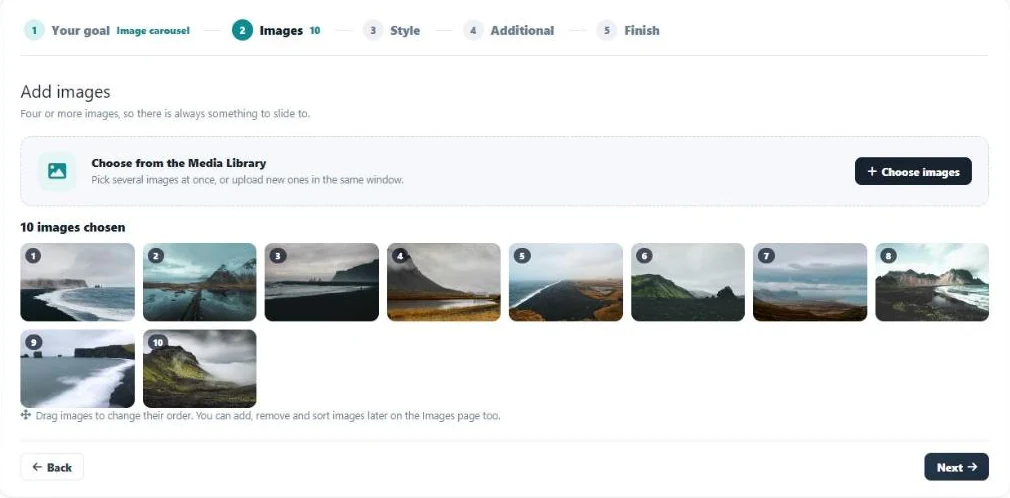
Click Choose images and pick the photos in the Media Library, or upload new ones in the same window. The wizard numbers them in order; drag a thumbnail to move it. We used ten photos from the Iceland trip.
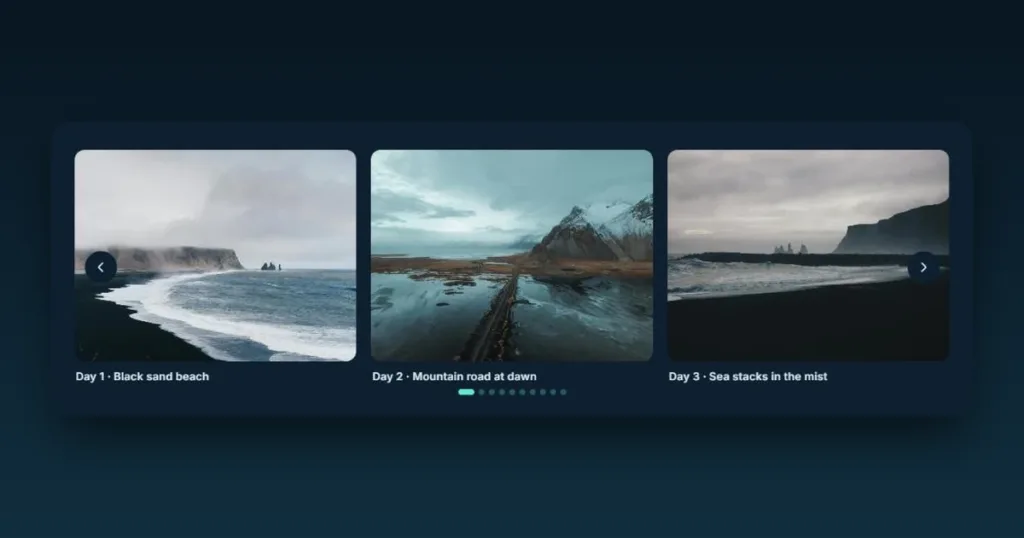
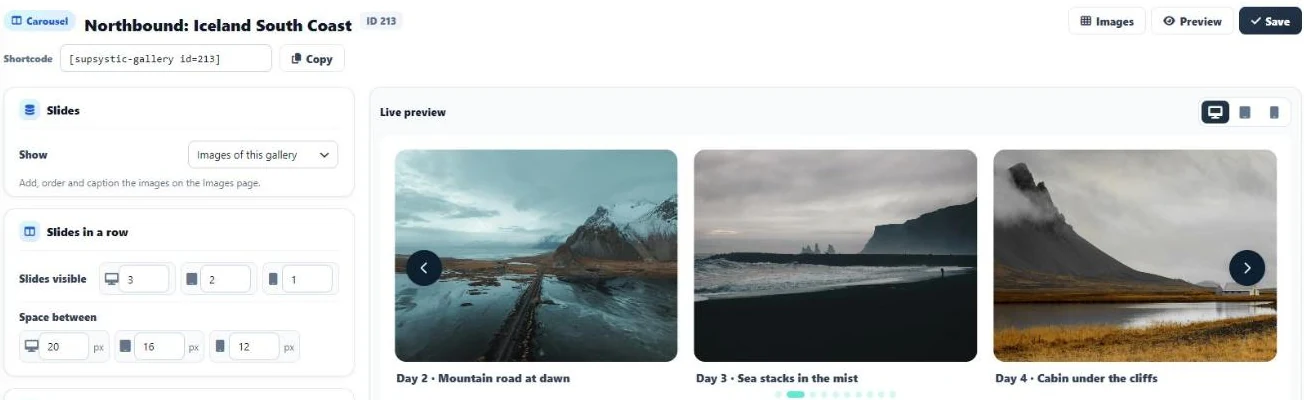
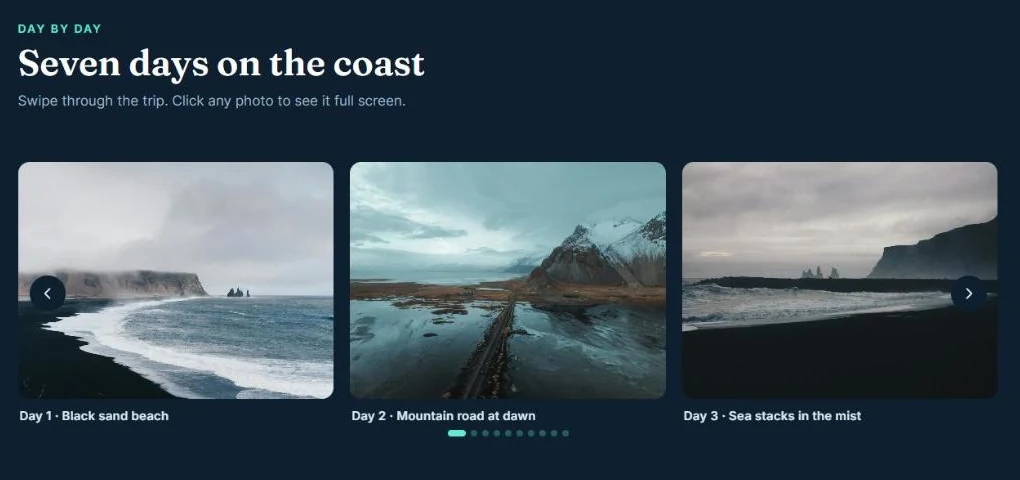
The text under each slide comes from the image’s caption in the Media Library. Our captions follow the trip: “Day 1 · Black sand beach”, “Day 2 · Mountain road at dawn” and so on. You can also edit captions on the gallery’s Images page.
Step 3. Choose a style
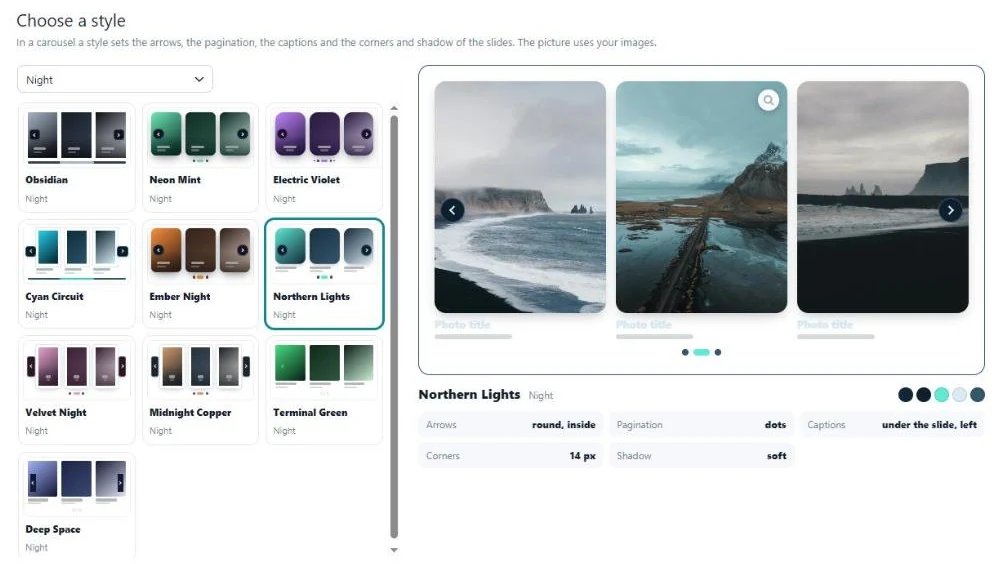
A style sets the arrows, the pagination, the captions, the corners and the shadow in one click, and the preview on the right uses your own images. The plugin has five free styles (Clean, Soft, Framed, Dark and Minimal) and 100+ Pro styles in ten collections such as Studio, Nature, Ocean, Night and Seasonal.
For a moody Icelandic trip we picked Northern Lights from the Night collection (Pro): deep navy, round arrows and a mint accent.
Step 4. Turn on autoplay, arrows and the lightbox
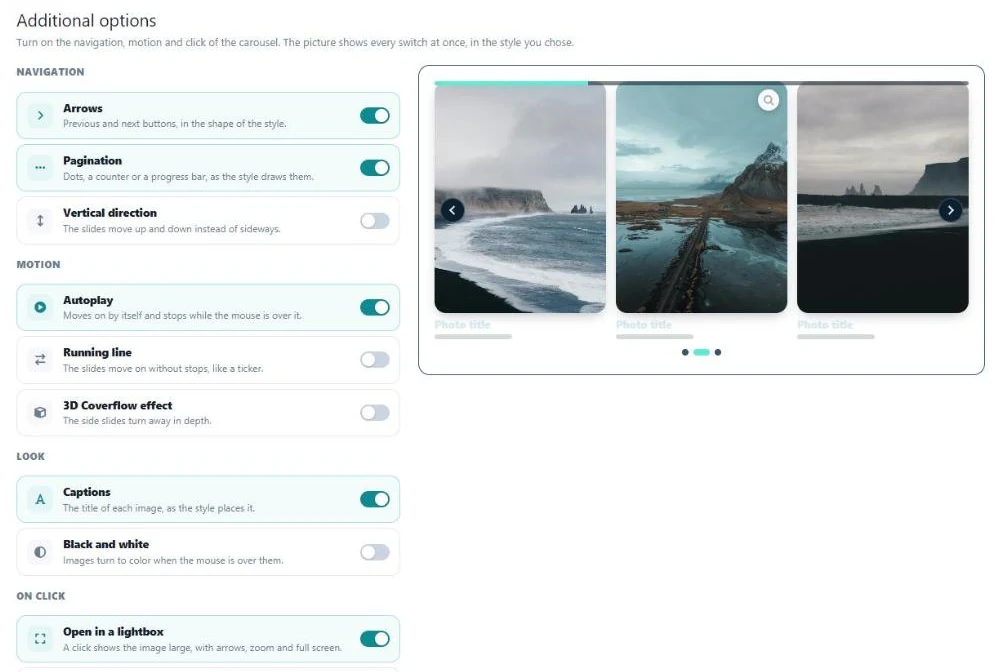
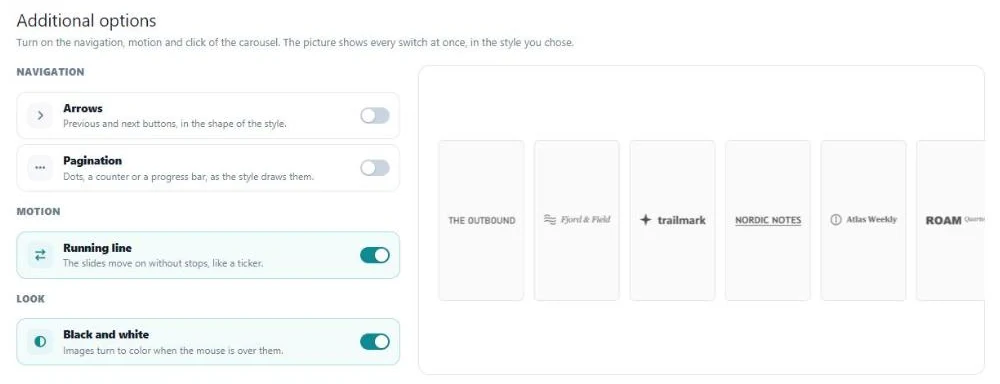
The Additional step is a list of switches with a preview that shows every change:
- Arrows and Pagination (dots, a counter or a progress bar, as the style draws them).
- Autoplay: the carousel moves on by itself and stops while the mouse is over it.
- Running line: the slides move without stops, like a ticker.
- Captions and Black and white (images turn to color on hover).
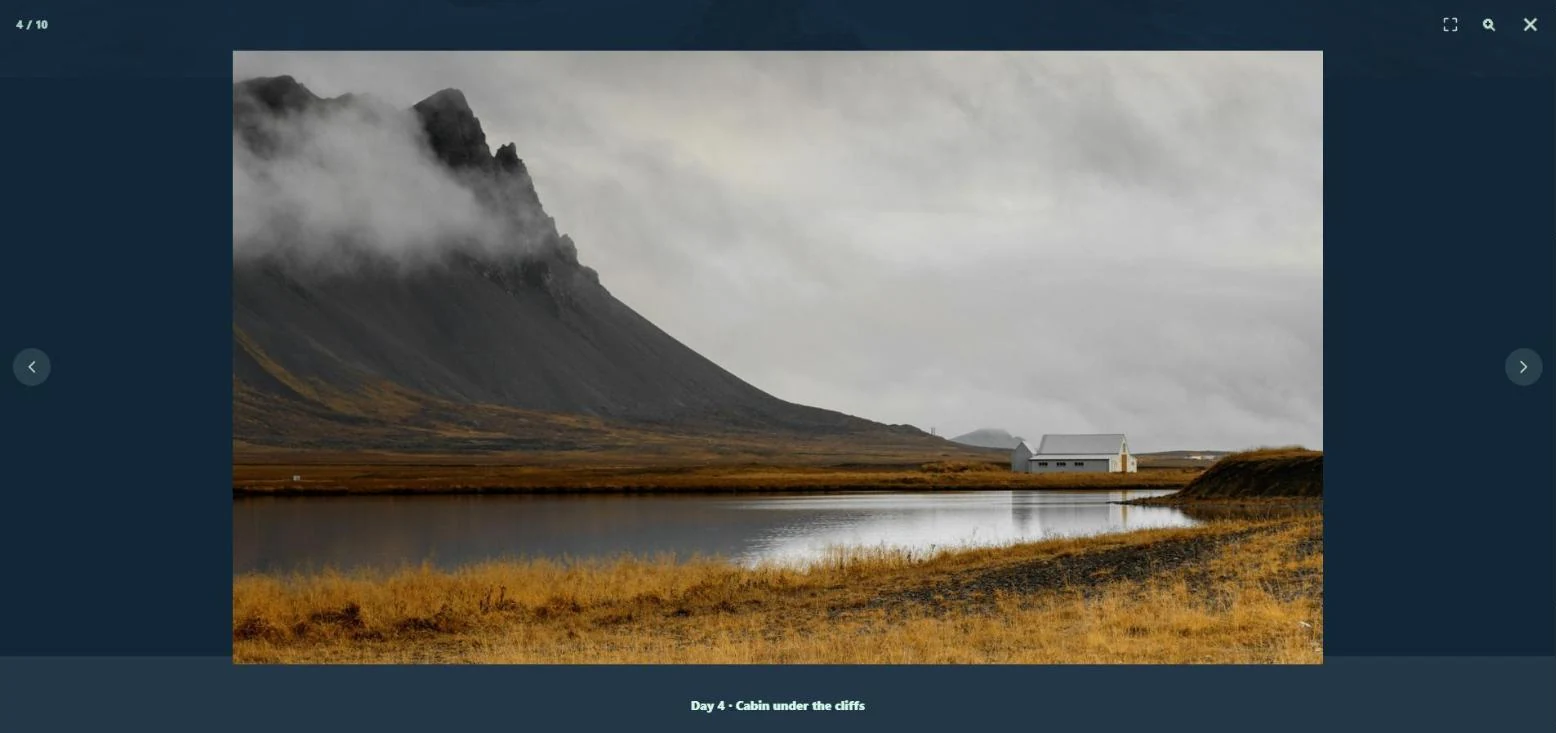
- Open in a lightbox: a click shows the image large, with arrows, zoom and full screen.
- 3D Coverflow, Vertical direction and Lightbox thumbnails and slideshow are Pro.
Give the carousel a name (only you see it) and click Create gallery. The editor opens with a live preview.
Step 5. Fine-tune slides per device
The editor shows every setting next to a live preview with desktop, tablet and phone buttons. The ones that matter most for a carousel:
- Slides visible: set separately for desktop, tablet and phone. We use 3, 2 and 1.
- Space between the slides, again per device.
- Height: an aspect ratio (we use 4:3), a fixed height per device, a part of the screen or the natural image height. Image fit fills and crops or shows the whole image.
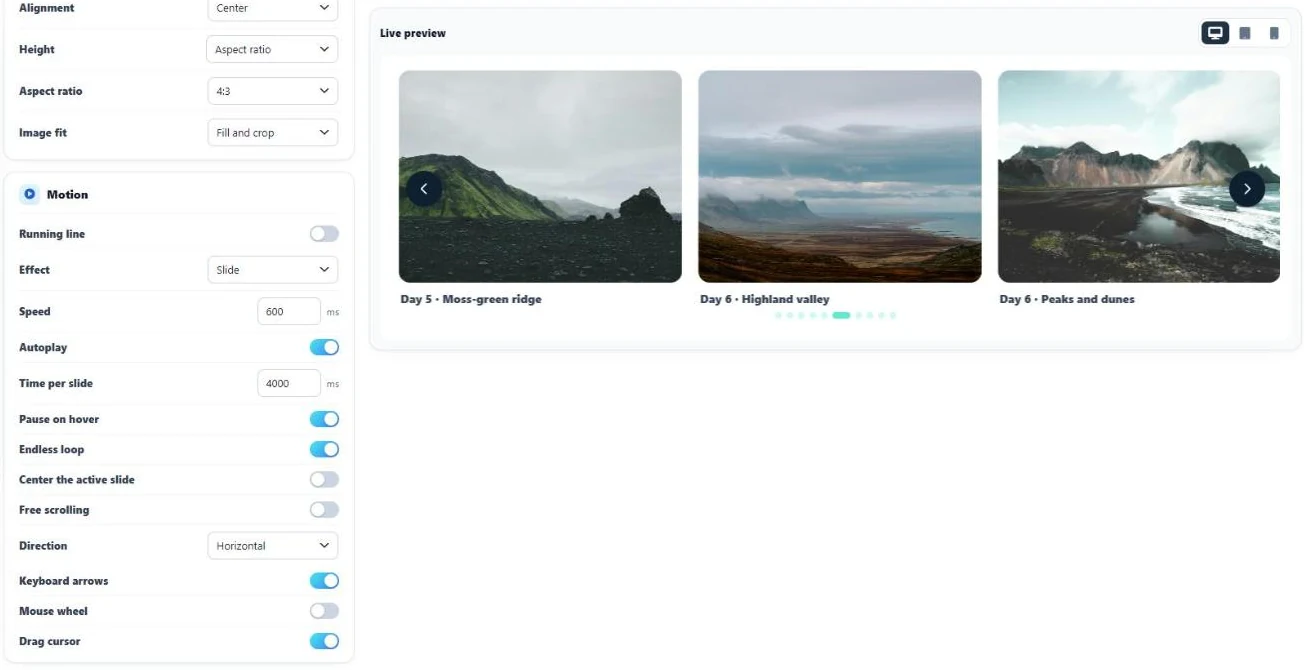
The Motion section controls how the carousel moves: the effect (Slide or Fade; Coverflow, Cube, Flip, Cards and Creative are Pro), the speed, the time per slide for autoplay, pause on hover, an endless loop, a centered active slide, free scrolling, keyboard arrows, the mouse wheel and the drag cursor.
Click Save. The shortcode of the carousel is shown at the top of the editor, for example [supsystic-gallery id=213].
Step 6. Add the carousel to a page
There are three ways to place the carousel, and all of them show the same carousel:
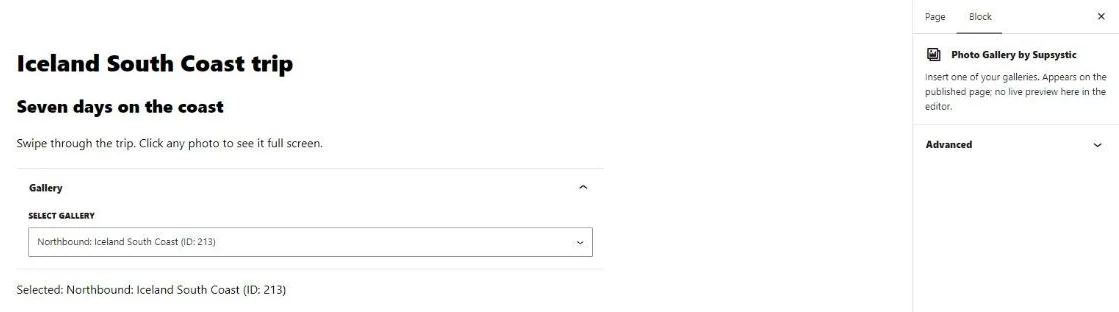
- Block editor: add the Photo Gallery by Supsystic block and pick the carousel in Select gallery. It appears on the published page.
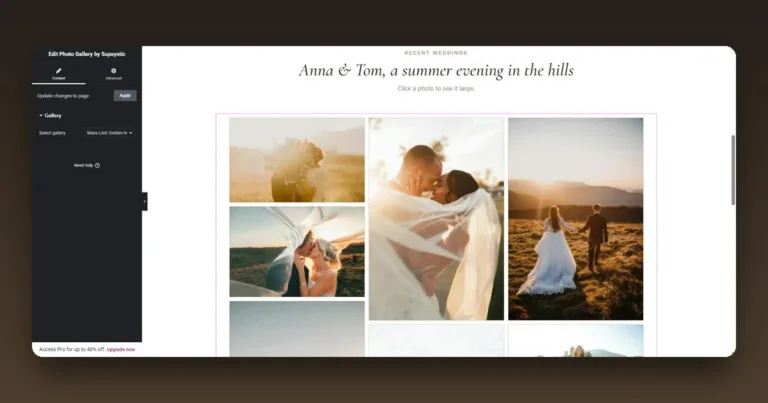
- Elementor: drag the Photo Gallery by Supsystic widget onto the page and pick the carousel in its list. That is how the Northbound page is built.
- Shortcode: paste the shortcode into any page, post, widget area or page builder.
Tip for Elementor: switch off Site Settings → Lightbox → Image Lightbox in Elementor so only the gallery’s own lightbox opens when a visitor clicks a photo.
The result
On the published page the carousel slides on its own every four seconds, stops when the mouse is over it, and answers to arrows, dots, a swipe or the keyboard. The style matches the dark section it sits in.
A click opens the photo in the lightbox, colored by the same style, with the caption, a counter, zoom and full screen. Visitors can page through the whole trip there.
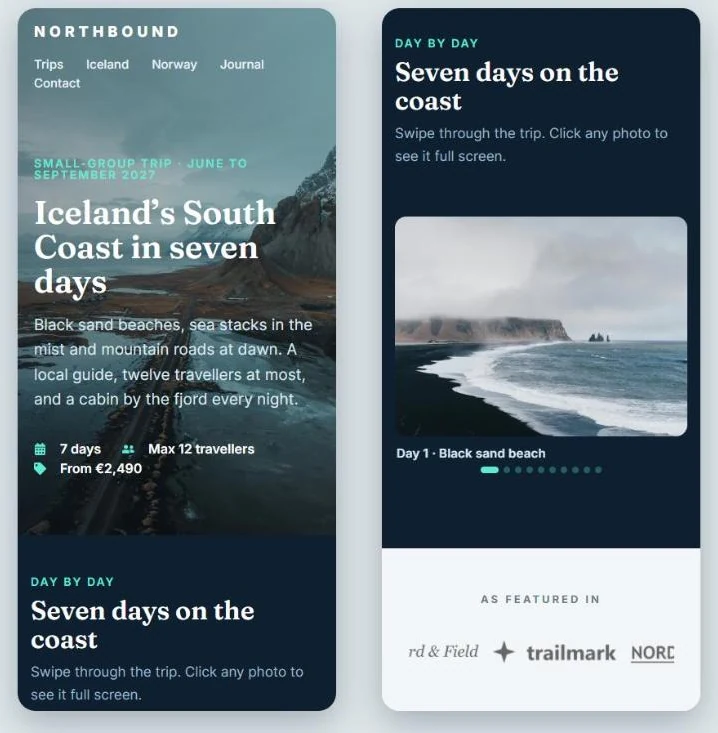
On a phone the carousel shows one slide at a time and visitors swipe. The arrows are hidden on phones by default, so the photo gets the full width.
Bonus: a logo carousel that never stops
The “As featured in” strip on the same page is a Logo marquee, built with the same wizard. Running line and Black and white are on from the start: the logos move without stops in gray and turn to color under the mouse.
For a slim strip, set the height to a fixed 90 pixels, choose Show whole image so no logo is cropped, and show five logos on a desktop and two on a phone.

Product carousels for WooCommerce
If you run a shop, pick Product carousel in Step 1. The slides come straight from WooCommerce: the product image, title, price, rating, a sale badge and an Add to cart button. You choose how many products to show, the order, and whether to show only products in stock, on sale or featured. Taking products from chosen categories only is a Pro option. The cards use the colors of the style, or keep your theme’s shop look with one switch.
Tips for a carousel people actually use
- Six to twelve slides is plenty. Pick the photos that tell the story and leave the rest for a full gallery.
- Write captions that add something. “Day 3 · Sea stacks in the mist” tells a story; “IMG_2041” does not.
- Keep autoplay slow. Four seconds per slide with a pause on hover lets people read the caption.
- Use photos of the same shape and mood. A 4:3 ratio with Fill and crop keeps the row even.
- Link slides when the photo is a door. Set the click to open a link instead of the lightbox, and every slide can lead to a tour, a product or a case study.
FAQ
Is the carousel free?
Yes. Image carousels, logo marquees and WooCommerce product carousels, autoplay, arrows, dots, captions, the lightbox, per-device settings and five styles are free. Pro adds the posts carousel, 100+ more styles, the 3D effects, the vertical direction, category filters for products, and lightbox thumbnails and slideshow.
Does the carousel work on phones?
Yes. You set how many slides show on desktops, tablets and phones, and visitors swipe through the slides on touch screens.
Can a slide open a page instead of the lightbox?
Yes. Set the click action to a link and give each image its own link, for example to a product or a tour page.
Can I add the carousel with Elementor or the block editor?
Yes. The plugin has a Photo Gallery by Supsystic block for the block editor, a widget of the same name for Elementor, and a shortcode for everything else.
Can I have several carousels on one page?
Yes. The Northbound page has two: the photo carousel and the logo marquee. Each one keeps its own style and settings.
Can it show my WooCommerce products?
Yes. Choose Product carousel and the slides come from your shop with price, rating, sale badge and Add to cart.
Build your first carousel
Photo Gallery by Supsystic is free on WordPress.org and is used on 27,000+ WordPress sites. Install it, run the wizard and your first carousel can be on a page in a few minutes.
Download Photo Gallery free | See Pro plans | Explore Photo Gallery
More: Carousel example · Gallery examples · Getting started guide · Add a gallery to your site · All free plugins