Step 1: Installing WP Photo Gallery Plugin by Supsystic
In WordPress, navigate to Plugins > Add New. Search for “Photo Gallery by Supsystic” and click Install Now. When the installation has completed click “Activate Plugin”. You will have a new admin menu item titled “Gallery by Supsystic”.
Installing Gallery by Supsystic PRO
In your personal account on the supsystic.com, you will find a unique download link after purchase. After downloading the file (supsystic_gallery_pro.zip), navigate to Plugins > Add New > Upload and upload the file. When the installation has completed, click “Activate Plugin”. After activation of the PRO version, you need to enter license key (you can find it in your personal account on our site). To do this follow next steps:
- Go to the Gallery by Supsystic in WordPress navigation menu.
- Click License tab on the left navigation menu of plugin.
- Enter your email and license key.
- Click “Check” button.
With Gallery by Supsystic PRO you have such possibilities as –
- Load more gallery images with scroll or button
- Custom Buttons
- Create gallery with categories
- Create gallery with pagination
- Create gallery with posts
- Import images from Flickr, Tumblr and Facebook Accounts
Step 2: Creating Gallery by Supsystic
- On the left navigation menu click “New Gallery”.
- Enter the name of gallery.
- Choose gallery template. You have the ability to choose one of 7 templates:
- Standard Gallery (with fixed grid)
- Vertical Gallery (without distance between images)
- Rounded Gallery (with fixed grid and border option)
- Horizontal Gallery (with shadow option)
- Categories And Icons (with pre-settings for categories and icons) (PRO feature)
- Post Feed And Pagination (with pre-settings for adding posts and pagination) (PRO feature)
- Post Feed Slide Up (with Slide Up layout style) (PRO feature)
- Post Feed Description (with the Description layout style) (PRO feature)
- Mosaic Gallery (PRO feature)
- Click “Save” button.

On the next steps you can change the settings of gallery template.
Step 3: Adding images to the Grid Photo Gallery
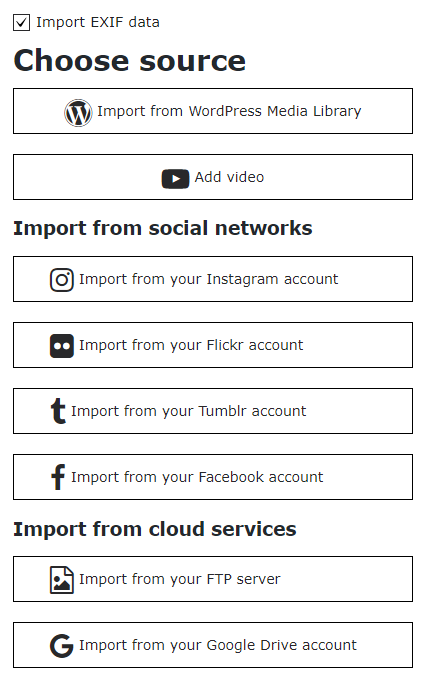
With responsive photo gallery plugin you can import images from –
- WordPress Media Library
- Instagram Account
- Flickr Account (PRO feature)
- Tumblr Account (PRO feature)
- Facebook Account (PRO feature)
- Import from your FTP server (PRO feature)
- Import from your Google Drive (PRO feature)
-
- Click on “Add Images” button.

- Choose Import from WordPress Media Library – mark those images that you like or need. If there are no images that you need, click the Upload Files tab – here you can drop files anywhere to upload or select files from your computer.
- Click on “Choose Image” button.

Then you’ll need to enter the folder name and press Parse. Note that images folder must be in wp-content\uploads\ directory.Also with WordPress Photo Gallery plugin you can import photos from remote server. Just tick the corresponding checkbox, fill in host, username, password and port and press Parse. 
- Click on “Add Images” button.
Check this page to view more information about all Import Images abilities of Photo Gallery plugin.
- To manage or change properties of images click “Images List” button.

- Change the order of images – simply by dragging them manually.
- Delete images.
- Add new images from different sources to the grid gallery – click “Add Images” button and select the source to import from.
- Caption tab – add caption to an image.
- Caption effect tab – add effect to the caption.
- SEO tab – add tags for search requests.
- Link tab – attach links to an image – it will go to the link when you click the image.
- Video tab – attach video url – it will be displayed in a pop-up image when you click on a picture.
- Categories tab – add tags for image categories.
- Linked images tab – add linked images to the chosen image.
More detailed information about Images Settings you can find here.
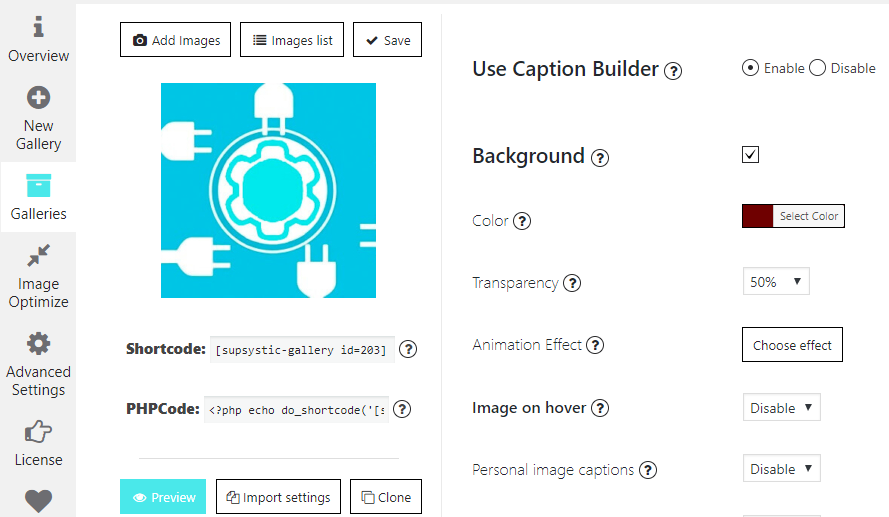
Step 4: Customizing the Gallery
To get back to the settings of gallery – сlick “Properties” button.
Here you can change default options of gallery template. Simply navigate the corresponding tab to change gallery properties:
WPCom_Markdown class is not existsStep 5: Preview settings
After you change some settings – with responsive photo gallery plugin, you can immediately see the result in a live preview in the left bottom corner.
- Images radius
- Border option
- Shadow option
- Caption effect
- Font style
In order to see how the other options of responsive image gallery look – you should click on “Preview” button and will be able to see the whole gallery in a new tab of your browser.
Step 6: Displaying the Photo Gallery on the website
Under the window with image preview you can see the shortcode of gallery.
Copy and paste the shortcode into your post or page and Gallery by Supsystic plugin will automatically create the gallery on your page using the settings you choose above.
Here is a full video tutorial how to create and customize Pricing Table by Supsystic:
Back to WordPress Gallery Documentation
Back to WordPress Gallery plugin main page