How to create a social network powered by WordPress
In our previous blog post, we discussed the most popular blog types according to Google search. But, WordPress opportunities is much wider. In fact, it is one of the best tools for creating your own site just in a few clicks, and developing will take as much time as making a sandwich. Since we started talking about the kitchen, let’s cook today a social network utilizing WordPress!
 Necessary ingredients
 Necessary ingredients
Here is the list of all you need to create an awesome social network:
- WordPress (installed locally or on your web server)
- Membership plugin by Supsystic
- A couple of minutes
- Smile :)
 Preparation
 Preparation
In the beginning, make sure that you have installed WordPress. On the Internet you can find a tone of available tutorials:
- Installing WordPress
- How to install WordPress
- WordPress Tutorial – how to install WordPress on my computer
You can use this or find something else. Ok, suppose, that all was fine and without difficulties. You now have a running WordPress on your computer. The next step is to install and activate a Membership Plugin. For this purpose:
- Go to Plugins > Add New
- Type “Membership by Supsystic” in search field
- Click Install Now
- Wait several seconds
- When the installation has completed click “Activate Plugin”
- You will have a new admin menu item titled “Membership by Supsystic”.
Click on it and start cooking an awesome website!
 Cooking
 Cooking
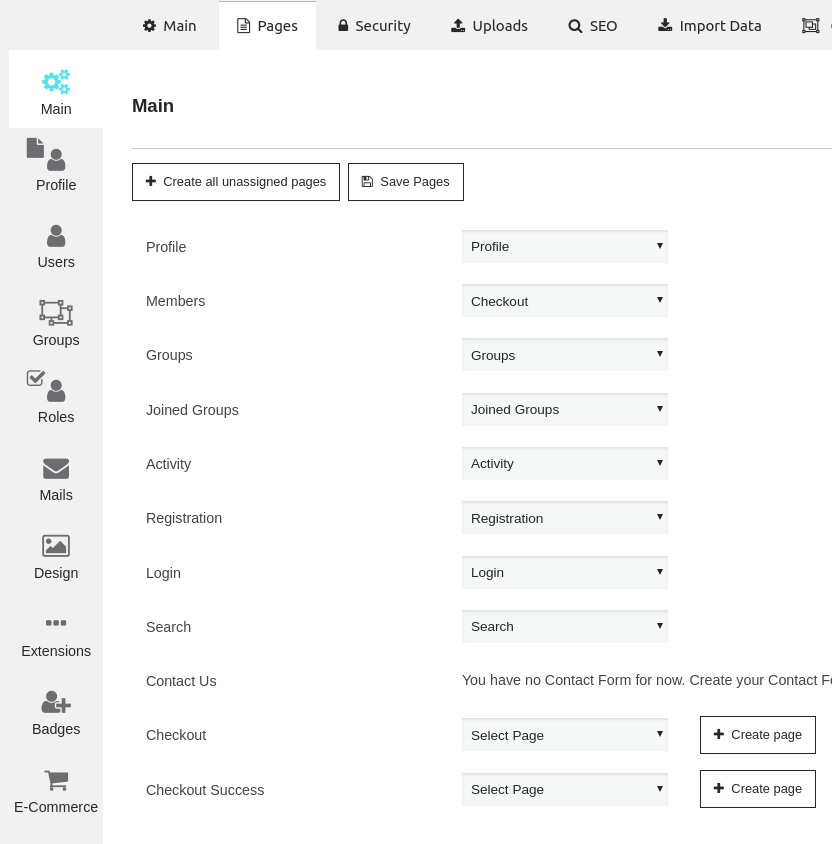
 The first window you will see after installation look like this one below. It has several tabs on the top and on the right.  Also, there are the main settings with different options. It’s worth mentioning, that you can easily enable or disable each component anytime. When you tune each component, let’s move to the Page tab. Here you can:
- Set a profile
- Adjust group and activity settings
- Customize page links for general Membership Directories
 The next step is a Security page, where you can set the Global site access, block some IP address, and Redirect from backend login screen to the membership login page. Every option has a tooltip with more detailed description.
  Here is a quick overview next 6 tabs:
- Uploads page allows you to customize image settings
- In SEO tab you can edit titles and meta description
- In Import data choose the import source. Currently, we support: BuddyPress, Ultimate Member
- Groups tab allows users to write a group category name, and choose groups sorting
- Report page show reports
- In the Content tab, users can add other plugins to display for membership users on the frontend.
As for the items on the right panel, the allow you to manage and customize:
- Users profiles
- Groups
- Roles
- Mails settings
- Design options
- Add extensions, badges, and e-commerce features
We prepare for you a detailed guide on how to use our Membership plugin builder.
 Bon Appetite!
 Bon Appetite!
So, as you can see the meal “Social network site on WordPress” is easy to prepare. There are no special and expensive ingredients. Try and share with us your experience!