 Do you want to build a fully customizable membership site? For this, you need to install a Membership plugin. It allows you to make online communities with:
- Front-end registration&login
- Custom users roles
- Friends
- Social activities
- Dripped content, etc.
There are so many useful features! And one of them is Social network integration. To know more – read our post.
Why do I need a Social Network integration?
Do you like social media like Facebook, Twitter, and Instagram? If yes – bravely skip this section, and if no, here is the list of arguments to persuade you to enable the social network integration in your membership site:
- Share your content with the social network followers
- Increase the reach
- Increase the engagement level
- Increase the traffic to your site
- Get new followers, etc.
![]()
![]() Attention!
Attention!
Social network integration allows you to increase the reach and engagement levels
![]() Supsystic Social network integration has a number of advantages:
Supsystic Social network integration has a number of advantages:
- Import data from Social Networks to Membership Activity
- Export data from Activity to Social Networks
- Import/Export data by hashtags
- Simultaneous posts in networks and community.
There is how it looks at the end. 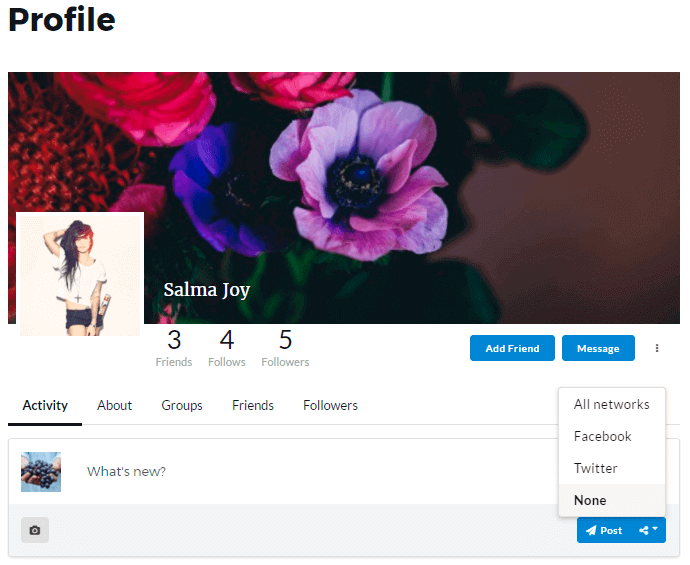
How to integrate the Membership plugin with social networks?
Supsystic offers you integration with two main social media platforms:
- Twitter.
And the process is simple and fast.
Step 1: Install and activate the Membership plugin
First of all, Social network integration is a PRO feature, that you need to purchase on the supsystic.com. After you’ve done this, you will see a unique download link. Leave it now and make, firstly, these steps:
- Navigate to Plugins -> Add New
- Search for “Membership by Supsystic”
- Click Install Now
- Wait for several seconds
- Click Activate.
And only after that, let’s return to the download link. What you need to do now is to download the file named membership_by_supsystic_social_network_integration.zip and go to Plugins -> Add New -> Upload and upload it. To activate the PRO addon, enter the license key.
- Go to Membership by Supsystic in a WordPress navigation menu.
- Click the License tab on the left navigation menu of the plugin.
- Enter your email and license key.
- Click the “Activate Addon” button.
So, now you can move to Step 2.
Step 2: Enable social media integration
To adjust the Social network integration you needn’t do any hard or time-consumed work. It takes only several seconds:
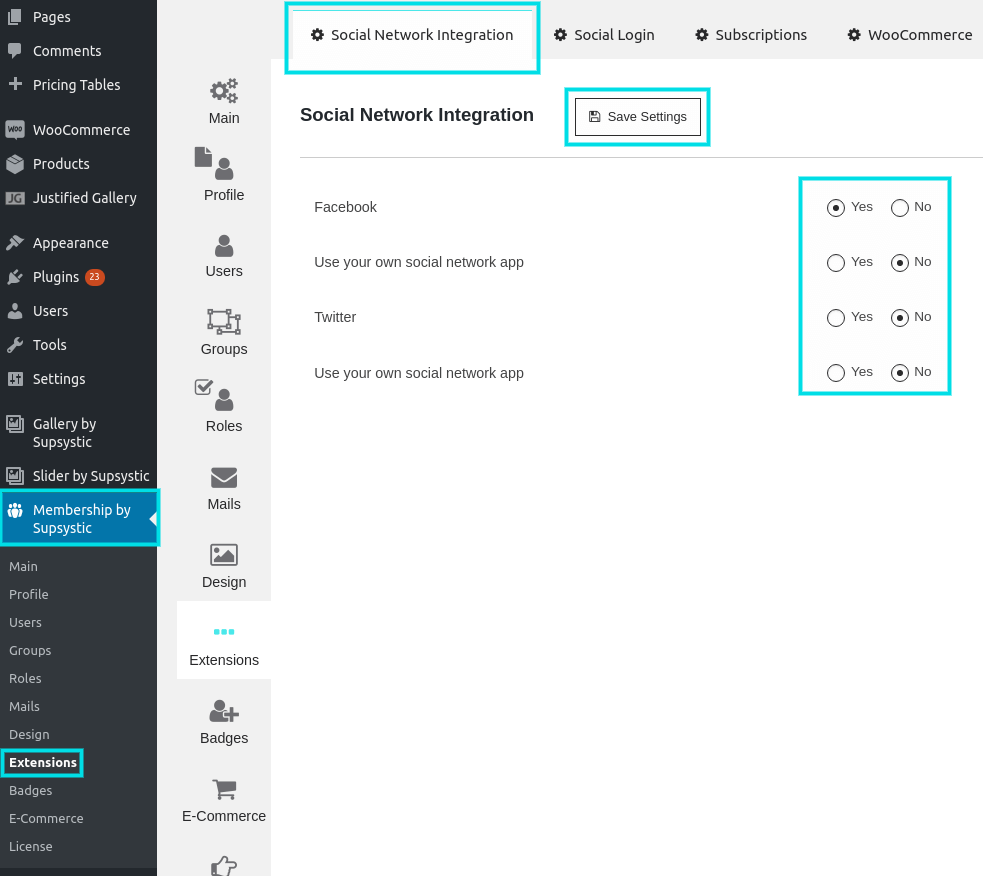
- Go to Membership by Supsystic -> Extensions
- Jump to the Social Network integration tab
- Enable Yes (where you need it)
- Don’t forget to Save this.
 As we mentioned above, the Membership plugin provides you with Facebook and Twitter integration. And each network has its own settings. For example, if you want to use your own social network app, you need to check it and fill in the Facebook App ID and Facebook App Secret.
 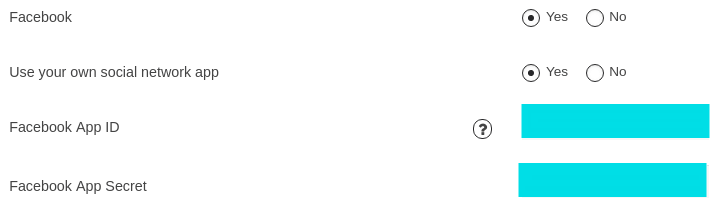 And the same situation is with Twitter.
 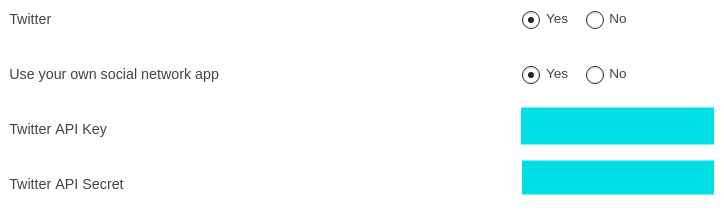 So, as you can see the plugin’s builder creates a convenient way for social network integration. And everybody can do it just in a few minutes! Download your WordPress plugins from the most trusted and secure sites like Supsystic.