Ultimate Maps Plugin is the best an alternative to Google Maps. It’s the most complete and user-friendly mapping solution for WordPress. Customization and settings are so easy! Let’s look the main steps in your map creation.
Step 1: Installing Ultimate Maps by Supsystic
In WordPress, navigate to Plugins -> Add New. Search for “Ultimate Maps” and click install. When the installation has been completed click “Activate Plugin”. You will have a new admin menu item titled “Ultimate Maps”.
API Keys
After you’ve got your plugin installed, it’s highly recommended to add your own API keys for Mapbox, Thunderforest, Bing Maps to settings in order to prevent errors, when page can’t load Maps correctly. To avoid this, you should go to Ultimate Maps plugin settings and find there “User API key” point. If you already have your API key, then just insert it in the form.
Step 2: Creating Ultimate Map
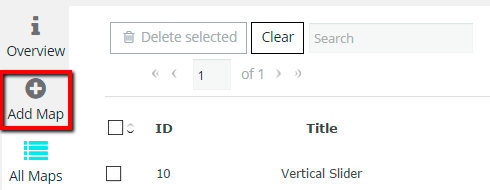
- On the left navigation menu click “Add Map”.

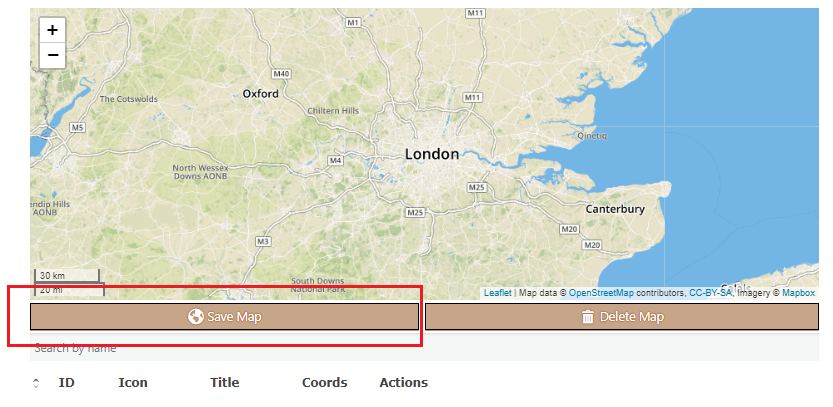
- Enter the name of map.
- Click “Save Map” button.
Step 3: Customizing the Map
You can find Main Settings section on the Map tab. It allows you to establish:
- Map name
- Map width
- Map height
- Navigation bar Mode
- Additional Navigation Options
- Map type
- Markers Clusterization
- Info window
All detailed info about Maps properties settings you can find here.
Don’t forget to press the “Save map” button after you change the map settings.
After every map option change – with Ultimate Maps, plugin, you can immediately see the result in a live preview in the right top corner.
Step 4: Creating/Editing Markers for the Ultimate Maps by Supsystic
- Click “Add New Marker” button – in the center of the map will appear a marker.

- Set the name of marker.
- Set the address of the marker – start typing and then choose the address from the list. Or you can just click on a point on the map.
- Set additional maps markers configuration:
- add marker description – besides text, you can attach images, links and videos;
- select the icon for the marker – you can choose it after click “Choose icon” button;
- Save marker.

Also you can create Marker Categories. For this go to Marker Categories tab of Ultimate Maps plugin and here is possible to –
- Add Category
- Edit Category
- Delete Category
- Search by Title
To create new one click Add Category button. In new window you can establish:
- Category Title – type your category name inside the field
- Background Color – tick needed color for marker icon background
- Cluster Icon – Upload Icon you like or go back to Default Icon variant for your markers category
When you have’ve created the marker on the Marker Tab, scroll down till you find Markers Category, set the one you created for current marker and click Save Marker button.
Shapes (Pro) option
You have ability to add shapes to the map, with a help of which you can highlight the certain area. 
Here you can make the next settings:
- Shape Name – the title of your figure.
- Set the colors for lines and fill, Opacity, Line Weight.
- Draw the shape. With Poly-line type you can create a series of straight segments on the map. With Polygon type you can choose the certain area enclosed by a closed path (or loop), which is defined by a series of coordinates. With Circle type you can create round figure with different size and opacity to mark the area you need.
- Figure’s points list – you can search the point by address (just start typing in Address field), type the Latitude and Longitude of point in appropriate fields or activate Add by Click button, and then draw figure on the map by clicking on it.Also in the Ultimate Mas you can:
- Create multiple shapes for one map.
- Edit shapes that were been created before.
- Remove the shape from the map.
- Change the order of shapes simply dragging it manually

Step 5: Export/Import Option
On the left navigation menu click “Maps Import / Export”. Here you can export or import maps and markers.
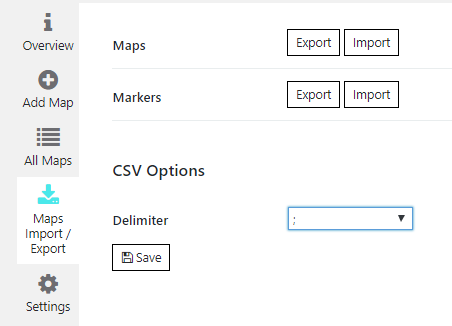
- To export maps or markers – click “Export” button and “Maps from Ultimate WordPress Plugin.csv” or “Markers from Ultimate WordPress Plugin.csv” file will be downloaded on your computer.
- To import maps or markers – you need to click “Import” button and choose the .csv file.
Step 6: Displaying Google Map on the website
- PHP Code
- Shortcode
You can find PHP code and shortcode in dropdown list above the plugin tabs.

Important! Shortcode must be inserted in a text editor page, and not in the visual.