After you have created and customized map, you can add markers on it following these instructions:
Go to Markers Tab and click “New” button – in the center of the map will appear a marker.
Here you can set:
- Marker Name – your marker title;
- Marker Description – write text description, that you want to appear in marker popup info-window. Here you can add video, image or link for more detailed description;
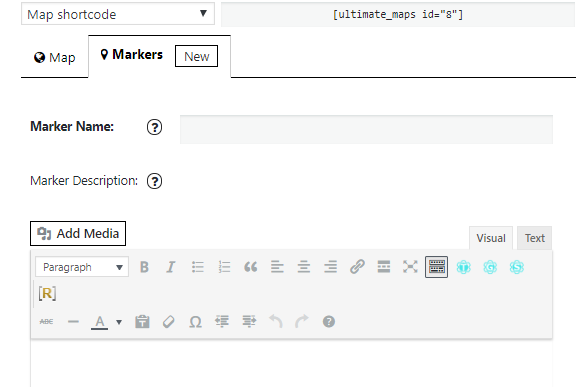
- Icon – your marker icon, that appears on your map for this marker. You can choose one of examples that are already exists on site —
 or add your own unique style by clicking Upload Icon you prefer;
![]()
- Address – search your location by address, just start typing here;
- Marker coordinates – Latitude and Longitude;
- Marker Category – choose marker category, if you have already created some;
- Marker Link – add a link for opening by click on the marker, besides you can allow to open it in a new window;
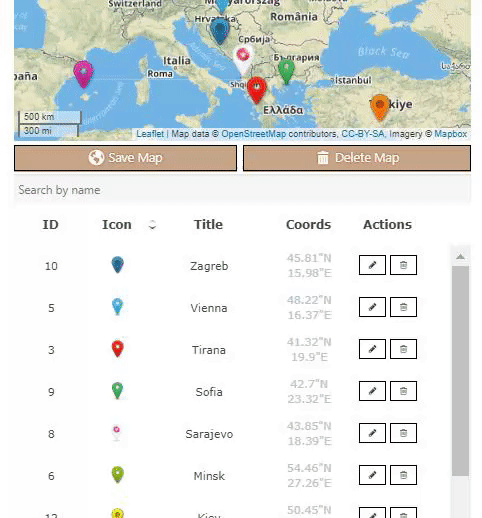
Also in Ultimate Maps Plugin you can:
- Create multiple markers for one map
- Edit markers that you had created before
- Remove the marker from the map
- Change the order of markers by dragging it manually
- Sort markers by Id or Title
Don’t forget to click the Save marker button after you change the marker settings.
Every change of the marker you can see immediately in the right top corner live preview.