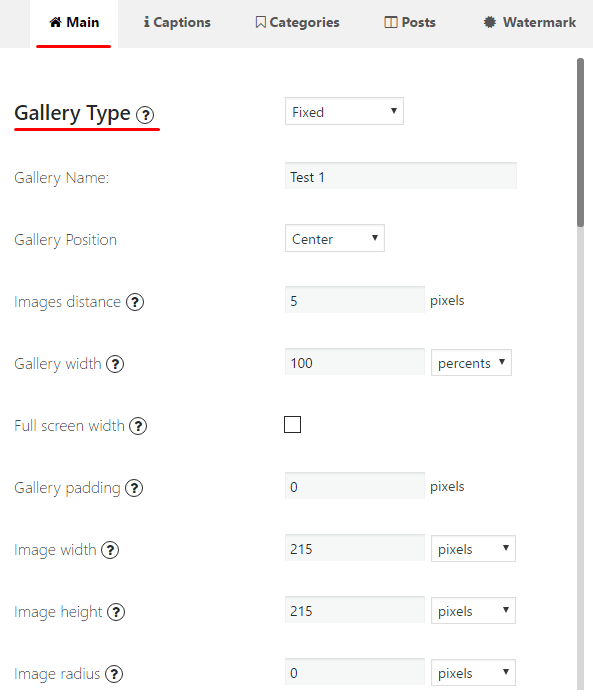
Having created new gallery, the window with Gallery back-end appearing opens in front of you. This is the Main Settings of your WordPress Gallery. Here you can upload photos to you gallery from different sources, adjust it’s various front-end look and show cast accordingly to your wishes.
Here you can:
- Choose Gallery Type – there are several gallery types: Fixed, Horizontal, Vertical, Fixed Columns, Mozaic (PRO);
- Change Gallery Name;
- Select Gallery Position. It can be situated right in the center of your page. Or you can change it to the left or right position.
- Images Distance – set the distance between pics;
- Gallery Width – type the width of the responsive image gallery;
- Full screen width option makes your gallery occupy the entire width of the page’s content;
- Gallery Padding – set the padding of your gallery;
- Establish Images Width and Height;
- Image Radius – set the radius for pictures’corners – due to this option you will have wonderful rounded or circular galleries.
All the values of these options, except for images distance and gallery padding, can be set in pixels or in percents. Images distance and gallery padding can be set only in pixels.

Also in this block you can set:
- Image crop quality – just select the required percentage;
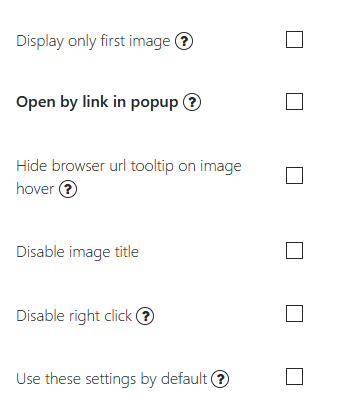
- Display only first image – when this option is enabled, only first picture from this gallery will be seen on the website. The other pictures will be seen in the popup window after clicking on the first picture.
- Open by link in popup – when one clicks on the link, which you can find below this option, the photos of gallery will be opened directly in popup.
- Disable right click – prohibit users to save photos from your gallery.
- Disable image title
- Use these settings by default – All new galleries you create after enabling the option will be created with these settings by default (even gallery type). Important! This feature may be enabled only in single gallery at once.
