Transfer to CDN (A Content Delivery Network or Content Distribution Network) function can maintain and accelerate the content of your WordPress site. You can find it At the Image Optimization Tab of Gallery Plugin.
Firstly, you need to create keyCDN. You can do it by following next steps:
- Open the site and register on https://www.keycdn.com/
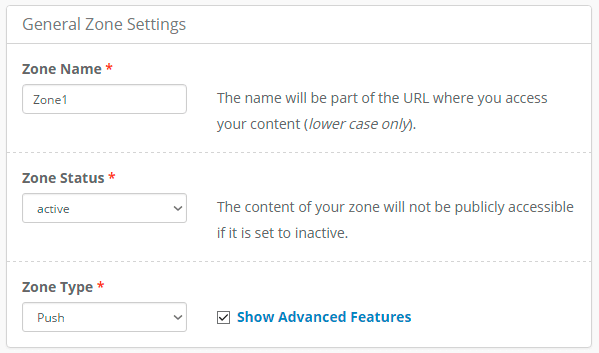
- After that open Zone Tab and click on Add Zone.
- Fill the points:
- Zone Name – choose the name of the new zone;
- Zone Status – here you should choose Active to create open-for-public content;
- Zone Type – here you should choose the Push option.
 WPCom_Markdown class is not exists
- Save settings.

In the end you will receive information like this:

After creating new zone, transfer the information from KeyCDN to the Image Optimize Tab.
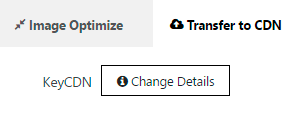
- In the Image Optimize Tab choose Transfer to CDN Tab;
- Click on Change Details;

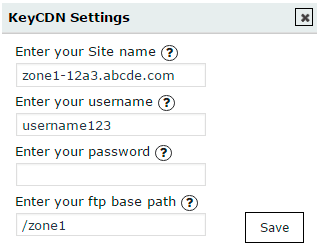
- Fill the KeyCDN settings:
- Site name – type your zone URL;
- Username – enter your username from the KeyCDN;
- Password – enter your password from the KeyCDN;
- FTP base path – enter the root path of your zone.

- Save settings.
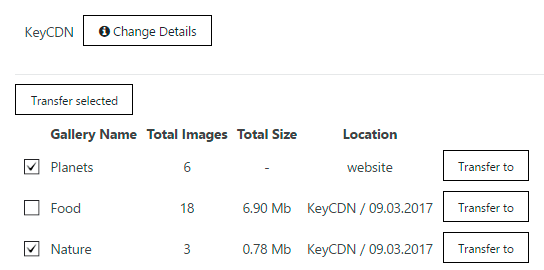
After that you can transfer your media data to KeyCDN in three steps:
- Select galleries;
- Click on Transfer Selected;

- Click on Start Transfer
In the end you can see the information on transfer for each gallery:
- Gallery name
- Total images
- Total size
- Location


