What is «Google Maps Easy»? Actually, it’s our plugin, that displays custom style Google Maps. Set markers and locations with text, images, categories and links. Customization of a standard and dull Google Maps has never been so easy! Let’s try?
Step 1: Installing Google Maps Easy by Supsystic
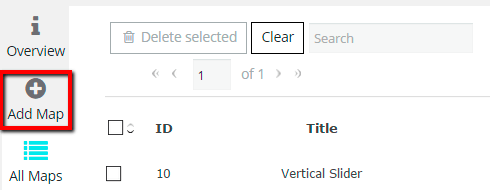
In WordPress, navigate to Plugins -> Add New. Search for “Google Maps Easy” and click install. When the installation has completed click “Activate Plugin”. You will have a new admin menu item titled “Google Maps Easy”.
Installing Google Maps Easy PRO
In your personal account on the supsystic.com, you will find a unique download link after purchase. After downloading the file (google-maps-easy.zip), navigate to Plugins -> Add New -> Upload and upload the file. When the installation has completed, click “Activate Plugin”.
After activation the PRO version, you need to enter license key (you can find it in your personal account on our site). To do this follow next steps:
- Go to the Google Maps Easy in WordPress navigation menu.
- Click License tab on left navigation menu of plugin.
- Enter your email and license key.
- Click “Activate” button.
With Google Maps Easy PRO you have such possibilities as –
- Positioning of Map type, Zoom, Street view and Pan controllers
- Custom map controls
- +300 stylization theme for your maps
- Different Markers lists
- Full screen button
- Print button
- Different figures (highlighted areas right on the map)
- Create Traffic, Transit, Bicycling, Heatmap and KML layers
- Hide POI and Countries Attributes
- Center map on current user location
- Add markers on frontend
Google Maps API Key
After you’ve got your plugin installed, it’s highly recommended to add your own Google Maps API key to settings in order to prevent errors, when page can’t load Google Maps correctly. To avoid this, you should go Google Maps Easy plugin settings and find there “User API key” point. If you already have your API key, then just insert it in form. Otherwise read this article, that explains how to get one.
Since June 22, 2016 – required!
Step 2: Creating Google Maps, easy
Step 3: Customizing the Map
You can find Main Settings section on the Map tab. It allows you to establish:
- Map name
- Map width
- Map height
- Control Bars Settings
- Additional Navigation Options
- Stylization
- Info window
Check this page to view detailed information about all this Map options.
WPCom_Markdown class is not existsAfter every change the map option – with Google Maps Easy WordPress plugin, you can immediately see the result in a live preview in the right top corner.
Step 4: Creating/Editing Markers for the Google Maps Easy by Supsystic
- Click “Add New Marker” button – in the center of the map will appear a marker.

- Set the name of marker.
- Set the address of the marker by using the address field or fields with marker coordinates. Or you can just click on a point on the map.
- Save marker.
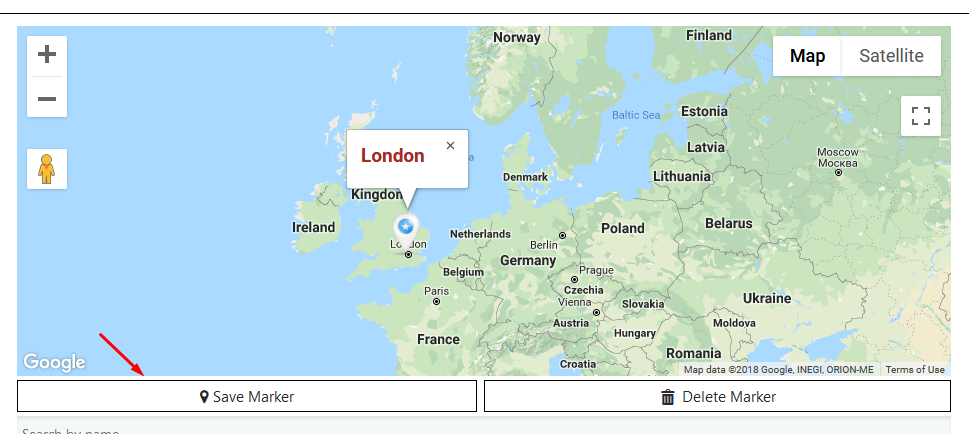
At this point you have the ability to set google maps markers configuration:
-
- add marker description – besides text, you can attach images, links and videos;
- select the icon for the marker – you can choose it after click “Choose icon” button;
- set the address of the marker – start typing and then choose the address from the list.
In order to read more about Markers properties go to this page.
You can also create Marker Categories.
This guide gives you additional filtering options Marker Category Filter .
Also please check this guide about Markers Categories.
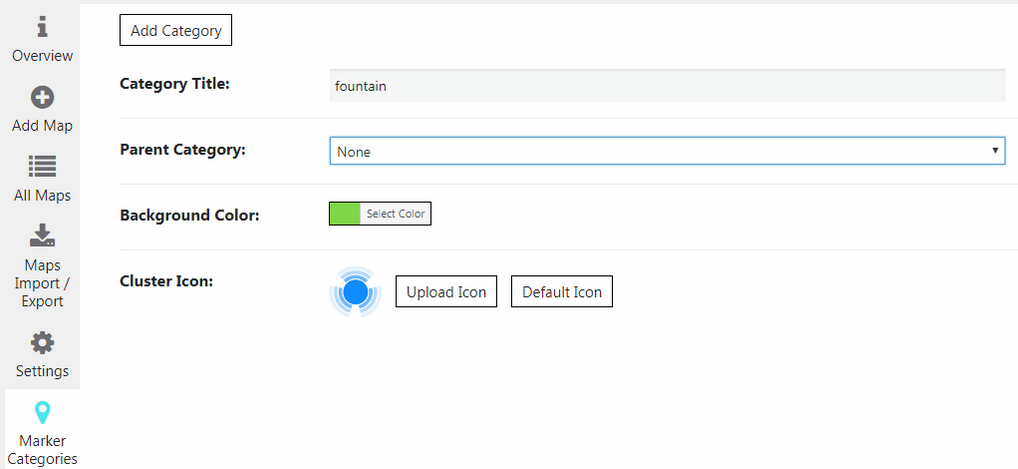
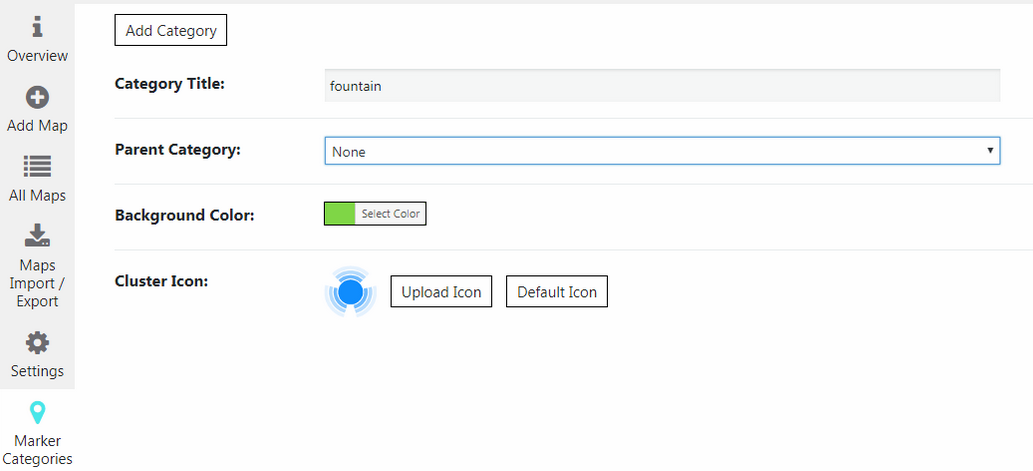
To create new one click Add Category button. In new window you can establish:
- Category Title – type your category name inside the field
- Parent Category -this option allows you to select a parent category.
- Background Color – tick needed color for marker icon background
- Cluster Icon – Upload Icon you like or back to Default Icon variant for your markers category
When you have created the marker on the Marker Tab, scroll down till you find Markers Category, set the one you created for current marker and click Save Marker button.

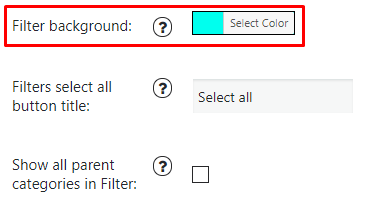
In Map Tab Settings you can select Filter background color for sidebar.
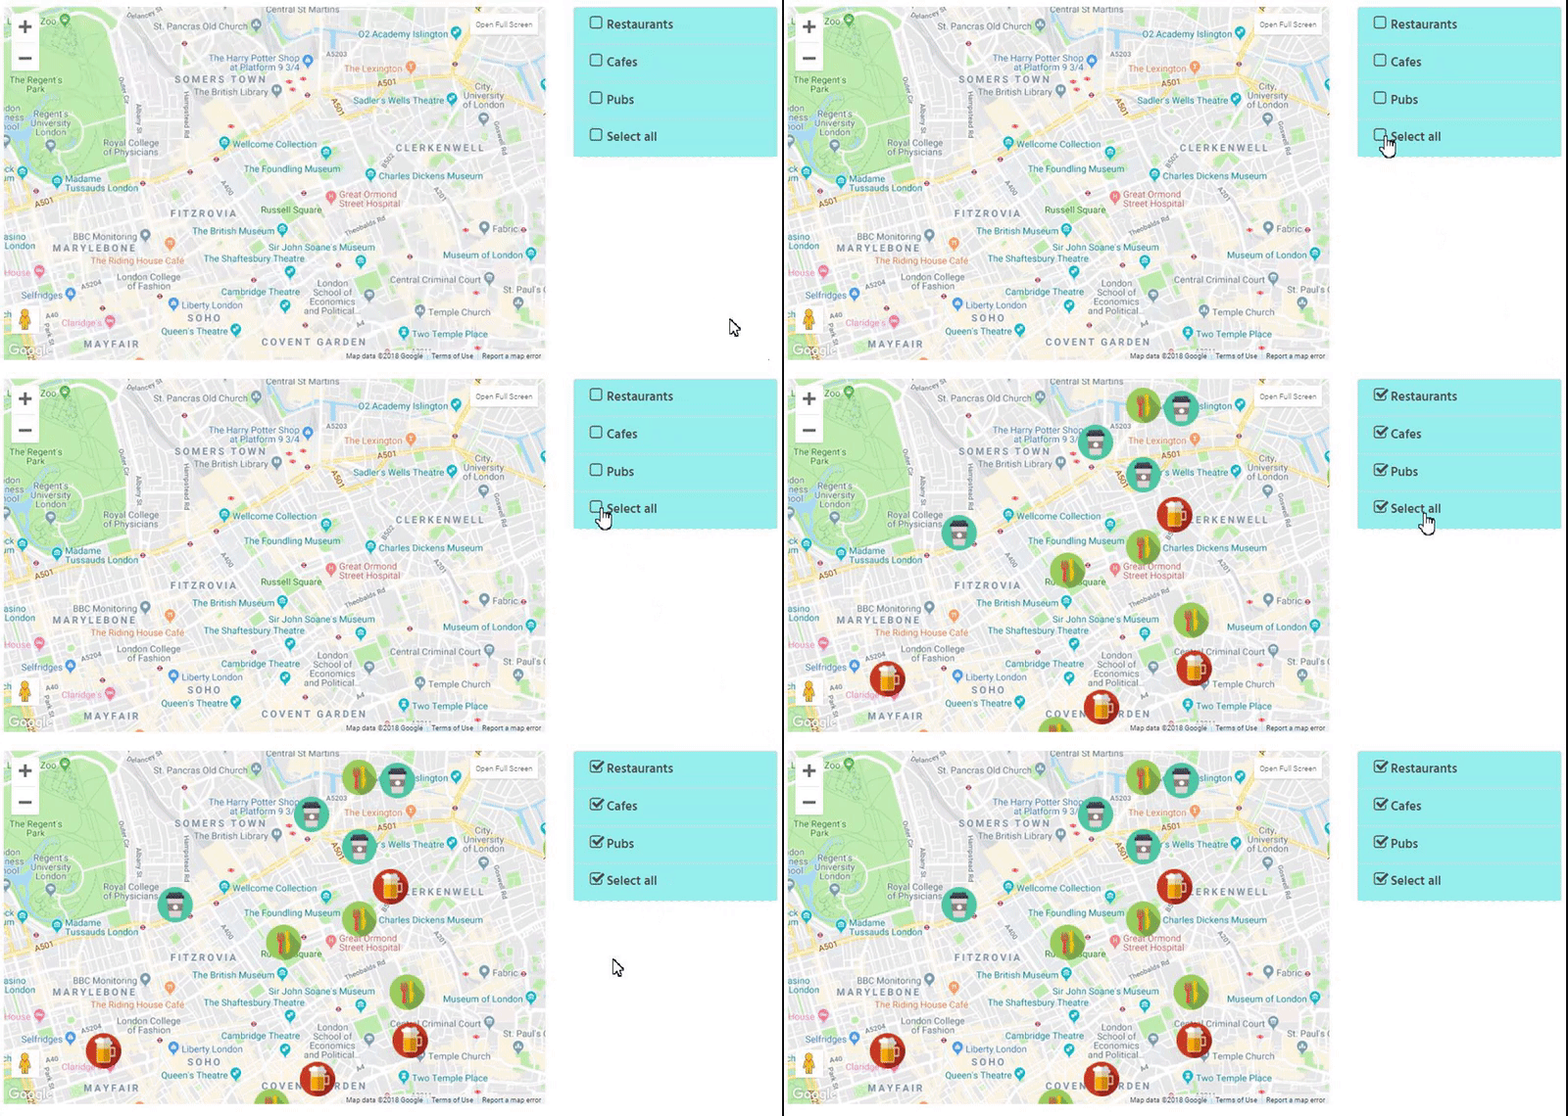
In Map Tab Settings you can Enable Filters select all button title if you want to select and display all category by 1 click:
In Map Tab Settings you can Enable Show all parent categories in Filter to Show parent categories even if they have no markers, but their child categories have.

Step 5: Adding figures to Map.
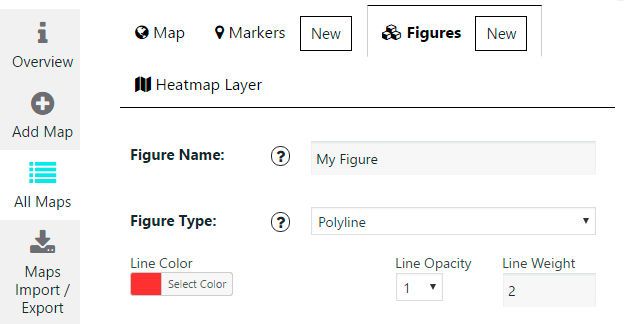
After you create and customize your map, you can add figures to it. This option is very useful if you want to highlight the certain area on the map. To create a figure go to Figures Tab and click “New” button.
Google Maps by Supsystic offers you such opportunities of figures configuration:
- Figure Name – the title of your figure.
- Figure Type – “Polyline”, “Polygon” and “Circle” types are available. With Polyline type you can create a series of straight segments on the map, whereas with Polygon type you can choose the certain area enclosed by a closed path (or loop), which is defined by a series of coordinates.
With Circle type you can create round figure with different size and opacity to mark the area you need. - Line color, Line opacity and Line weight. For polygon and circle types there are also fill color and fill opacity.
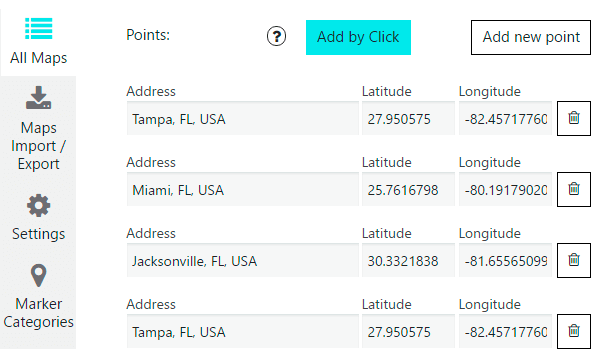
- Figure’s points list – you can search the point by address (just start typing in Address field), type the Latitude and Longitude of point in appropriate fields or activate Add by Click button, and then draw figure on the map by clicking on it.
Also in Google Maps Easy you can:
- Create multiple figures for one map
- Edit figures that you had created before
- Remove the figure from the map
- Change the order of figures simply dragging it manually
WPCom_Markdown class is not exists
Every change of figure you can immediately see in a live preview in the right top corner.
Step 6: Adding heatmap layer.
Heatmap Layer (PRO feature) is a visualization used to depict the intensity of data at geographical points. Areas of higher intensity will be colored red, and areas of lower intensity will appear green.
Heatmap using points of layer to calculate and display the relative density of the points on the map as a smoothly varying set of colors, from cold (low density) to warm (high density).
Heatmap layer can be used for mapping the locations of point objects. They are useful if you have too many points which need to place on the map, or many points which are too close to each other, making it difficult to distinction. They are well suited for the displaying of layers with a lot of point objects.
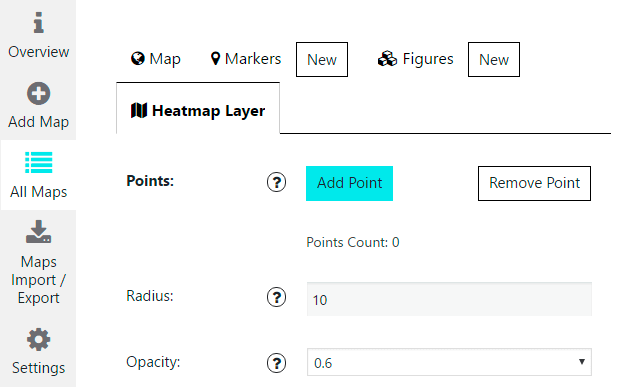
Right after you have created your map, you can begin to compose heat layer on it. On the Heatmap Layer Tab you can find next settings of this feature:
-
- Add Points – draw each point by click on map. To remove points you need to activate “Remove Points” button and delete necessary point by click on it or just click on “Delete Heatmap Layer” button to remove all Heatmap Layer points.
- Radius – the radius of influence for each data point, in pixels.
- Opacity – the transparency of the heatmap, expressed as a number between 0 and 1.
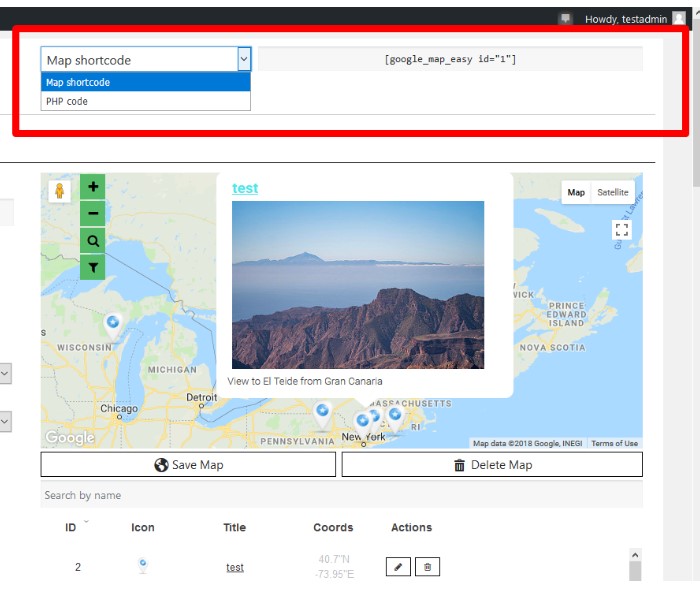
Under map live preview you can see the shortcode. Copy and paste the shortcode into your post or page text editor and Google Maps Easy by Supsystic plugin will automatically create the map on your page using the settings you choose above.
Step 7: Export/Import Option
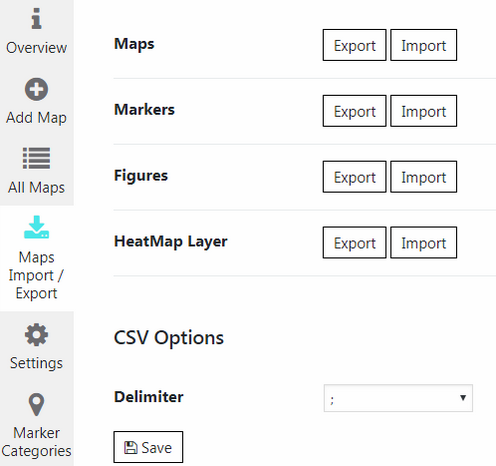
On the left navigation menu click “Maps Import / Export”. Here you can export or import maps, markers, figures and heatmap layer from/in .csv file.
Step 8: Displaying Google Map on the website
PHP Code
In general php code can be inserted at any place of the page code – to display exactly in this place, for example in the header or footer of the page. Besides it can be inserted in the code of template of the theme – to display on all pages.
Shortcode
You can find PHP code and shortcode in dropdown list above map preview.

Ratio of parameters and their values are shown in the table below. Any parameter at the same time can receive only one value.
| Parameter | Values / - separator 1 - enable 0 - disable "value" - change to specific value | Shortcode Example |
|---|---|---|
| dbl_click_zoom | 1 / 0 | |
| draggable | 1 / 0 | |
| enable_bicycling_layer | 1 / 0 | |
| enable_full_screen_btn | 1 / 0 | |
| enable_trafic_layer | 1 / 0 | |
| enable_transit_layer | 1 / 0 | |
| height | "number of pixels" | |
| language | "required language code" | |
| map_center | "x coordinate"; "y coordinate" / "marker id" | |
| map_type | ROADMAP / HYBRID / SATELLITE / TERRAIN | |
| marker_category | for filter markers on map by marker group (several categories - divide by commas) | |
| marker_clasterer | none / MarkerClusterer | |
| marker_show_description | for opening marker description by default (enter marker id) | |
| markers_list_type | slider_simple / slider_simple_title_img / slider_simple_vertical_title_img / slider_simple_vertical_title_desc / slider_simple_vertical_img_2cols | |
| mouse_wheel_zoom | 1 / 0 | |
| overview_control | none / opened / collapsed | |
| pan_control | 1 / 0 | |
| pan_control_position | TOP_CENTER / TOP_LEFT / TOP_RIGHT / LEFT_TOP / RIGHT_TOP / LEFT_CENTER / RIGHT_CENTER /LEFT_BOTTOM / RIGHT_BOTTOM / BOTTOM_CENTER / BOTTOM_LEFT / BOTTOM_RIGHT | |
| street_view_control | 1 / 0 | |
| street_view_control_position | TOP_CENTER / TOP_LEFT / TOP_RIGHT / LEFT_TOP / RIGHT_TOP / LEFT_CENTER / RIGHT_CENTER / EFT_BOTTOM / RIGHT_BOTTOM / BOTTOM_CENTER / BOTTOM_LEFT / BOTTOM_RIGHT | |
| type_control | none / DROPDOWN_MENU / HORIZONTAL_BAR | |
| type_control_position | TOP_CENTER / TOP_LEFT / TOP_RIGHT / LEFT_TOP / RIGHT_TOP / LEFT_CENTER / RIGHT_CENTER / EFT_BOTTOM / RIGHT_BOTTOM / BOTTOM_CENTER / BOTTOM_LEFT / BOTTOM_RIGHT | |
| width | "number of pixels (percents)" | |
| width_units | px / % | |
| zoom | from "1" (entire world) to "20" and more (streets and individual buildings on road map) | |
| zoom_control | none / DEFAULT | |
| zoom_control_position | TOP_CENTER / TOP_LEFT / TOP_RIGHT / LEFT_TOP / RIGHT_TOP / LEFT_CENTER / RIGHT_CENTER / EFT_BOTTOM / RIGHT_BOTTOM / BOTTOM_CENTER / BOTTOM_LEFT / BOTTOM_RIGHT |
