This tutorial to help you easily get started to use WooCommerce Product Table and create a searchable, filterable, responsive table. All information about the plugin that you could need:
1. Installation
2. Creating Product Table
3. Adding products to the table
4. Set the table properties
5. Customizing the Product Table
6. Preview
7. Add a Table into website content
Step 1: Installing the WooCommerce Product Table
In WordPress, navigate to Plugins > Add New. Search for “WooCommerce Product Table by Supsystic” and click install. When the installation has completed click “Activate Plugin”. You will have a new admin menu item titled “WooCommerce Tables by Supsystic”.
Installing WooCommerce Product Table PRO
In your personal account on the supsystic.com, you will find a unique download link after purchase. After downloading the file, navigate to Plugins > Add New > Upload, and upload the file. When the installation has completed, click “Activate Plugin”. After activation of the PRO version, you need to enter license key (you can find it in your personal account on our site). To do this follow the next steps:
- Go to the WooCommerce Product Table by Supsystic in a WordPress navigation menu.
- Click the License tab on the left navigation menu of the plugin.
- Enter your email and license key.
- Click the “Check” button.
Step 2: Creating a Product Table
- On the left navigation menu click “Add new table”.
- Enter the title of the table.
- Click “Ok”.

Step 3: Add WooCommerce products to the table
Plugin uses the product data already created with WooCommerce (WooCommerce > Products) .You can add products to WooCommerce manually or import them using a CSV/XML import, and they will be displayed in the WooCommerce Product table.
-
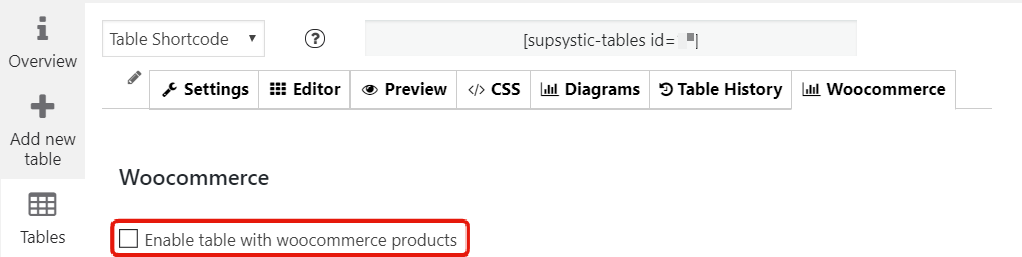
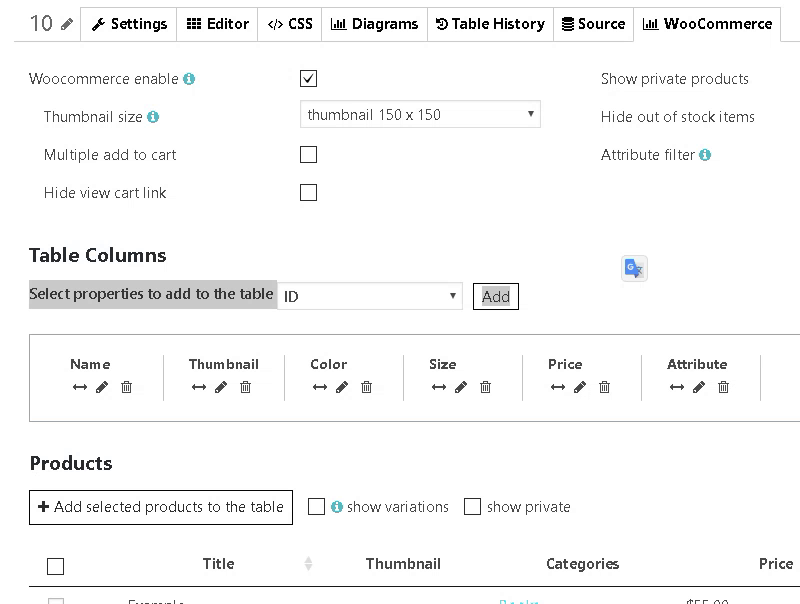
- Move to the WooCommerce Tab and enable checkbox.
- Select the necessary items and add them to Manage Table Content. Where is an option to remove selected products or some of them. You can use Search for products to add the certain items.
- You can also add products automatically by a convenient option.
- Move to the WooCommerce Tab and enable checkbox.
Step 4: Set the table properties
WooCommerce Product Table is a plugin that gives you full product data control and allows to build a table according to your exact needs.
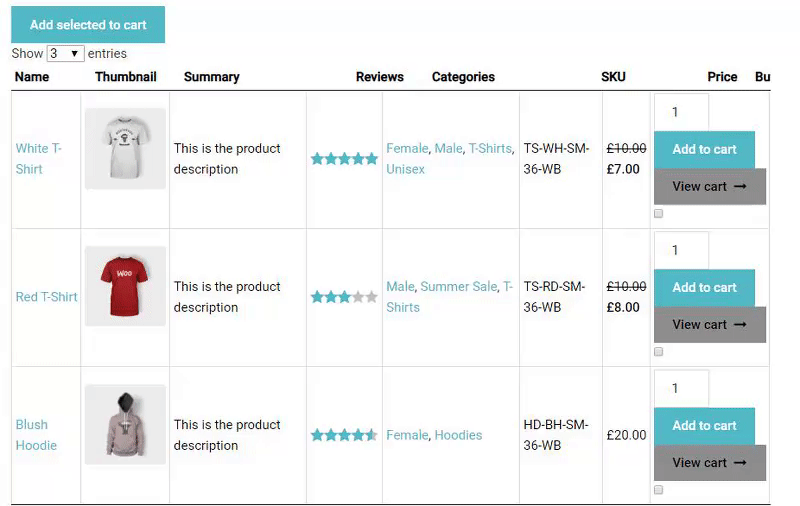
The plugin supports the following properties:
- Name
- Attributes
- Categories
- Tags
- SKU
- ID
- Add to cart button
- Summary
- Date
- Price
- Reviews
- Thumbnail
You can display each type as a separate column in the product table. Also, you can make your own custom column title, simply edit the default one.
- Move to the Manage Table Columns constructor.
- Select the Properties of the table you want to display.
- Change order or edit the title if necessary.
- Click the Save button and check the created table in preview mode.
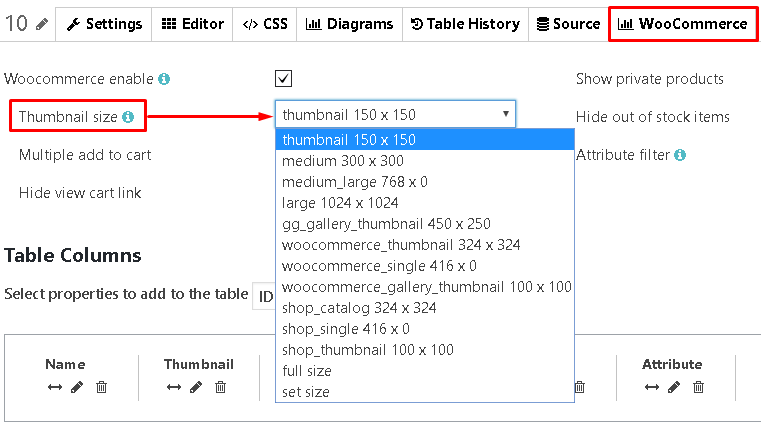
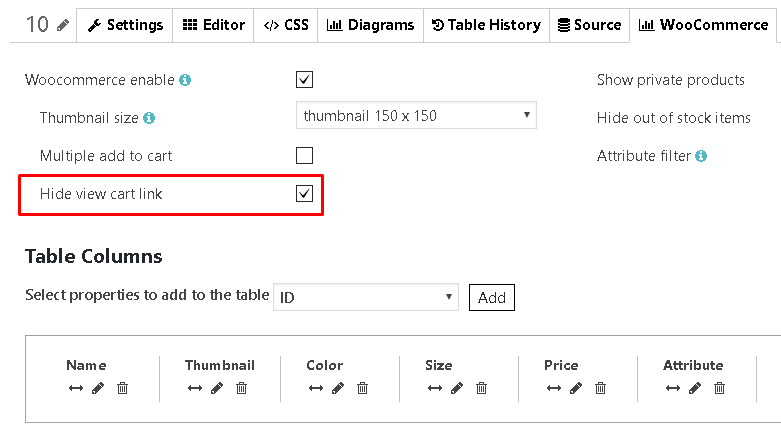
The additional settings for the Thumbnail size and Multiple add to cart optionlocate in the WooCommerce tab:
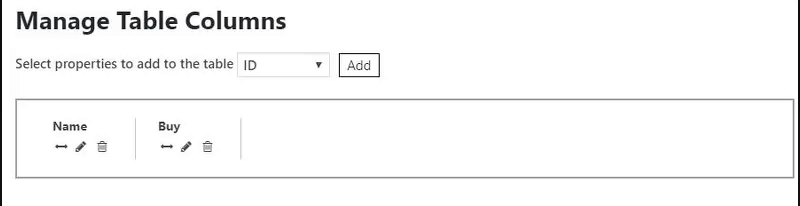
In order to add Quantity selector and Multiple add to cart you need:
- Enable Multiple add to cart option.

- Move to the Manage Table Columns constructor.
- Add the “Buy” Property.
- Change order or edit the title if necessary.
- Click the Save button and check the created table in preview mode.
Thumbnail size. Here You can set the Thumbnail size in the drop-down menu.
Hide view cart link. You can set visibility of the cart link.
Show private products. Here you can turn on the visibility of private products.

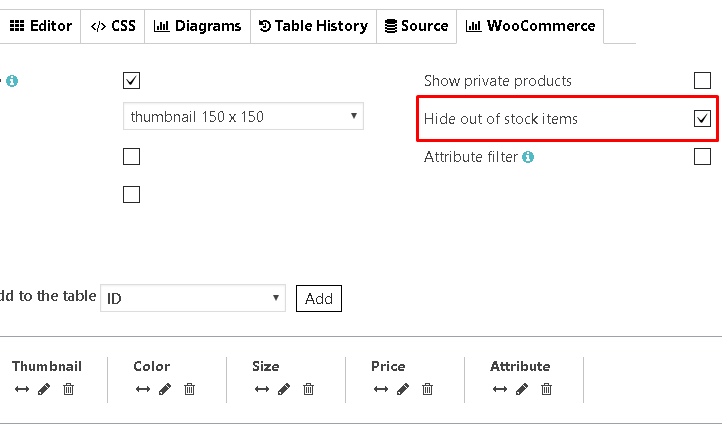
Hide out of stock items. You can also hide yours out of stock items.
Step 5: Customizing the Product Table
-
Main
Here you can select the elements of the table that will be displayed on the site page.

- Caption – the name of the table above the table.
- Description – description of the table between title and table.
- Signature – signature under table footer.
- Header – the table head.
- Footer – the table footer.
- Fixed Header – allows fixing the table’s header during table scrolling.
- Fixed Footer – allows fixing the table’s footer during table scrolling.
- Fixed Table Height – if you check fixed header or fixed footer this option will appear to set the table’s height and create a vertical scroll.
- Fixed Columns – allows fixing columns during table scrolling.
- Left/Right Columns Count – a number of columns to fix by the left/right side of the table.
- Auto index – add an auto index to your table. Here you can use the first column as an index or create a new column for this purpose.
Here you can see the appearance of every Table element:

-
Features
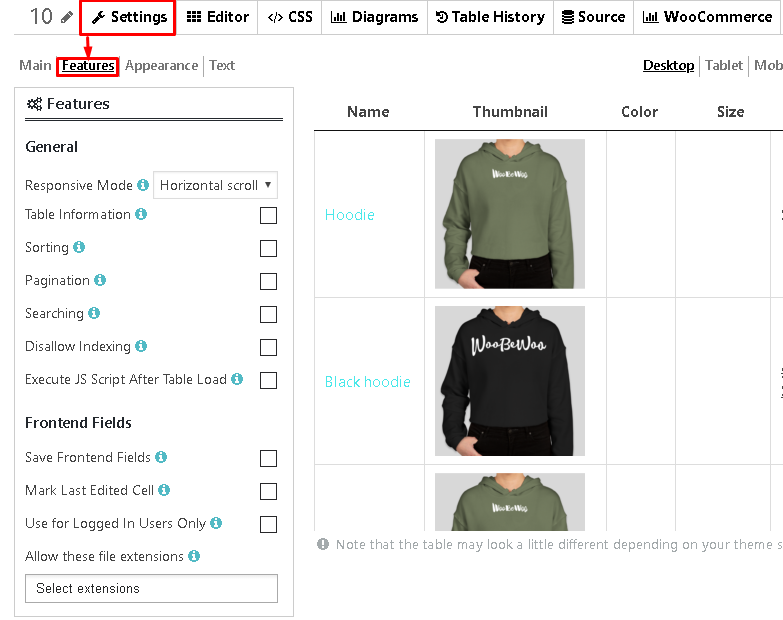
- Responsive Mode. Standard Responsive mode – in this mode if table content doesn’t fit all columns become under each other with one cell per row.
Automatic column hiding – in this mode table columns will collapse from right to left if the content does not fit to parent container width.
Horizontal scroll – in this mode scroll bar will be added if table overflows parent container width
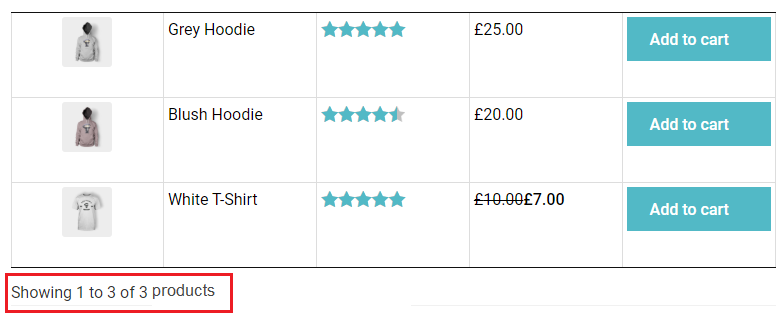
Disable Responsivity – default table fluid layout - Table Information – display information about table entries.
- Sorting – sort data by ascending or descending.
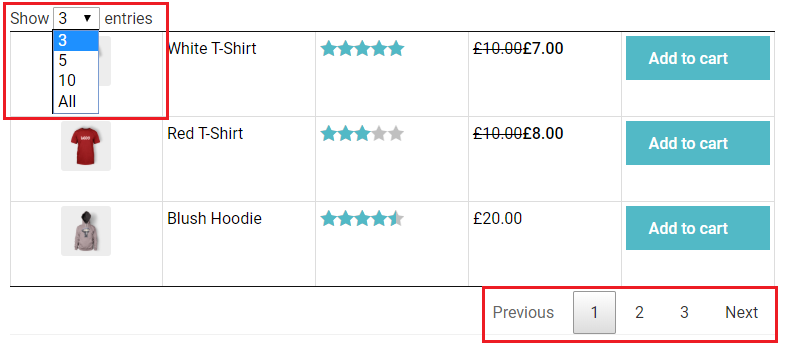
- Pagination – enable page control, divide the content of the table into discrete pages – lets users tap through a series of related pages.
- Pagination List Content – Here you can set the number of rows to display on one Pagination page. Establish several numbers separated by a comma to let users choose it personally. The first number will be displayed by default. Since that the number of Pagination Pages will be recounted also.
- Pagination Size – large, medium, small.
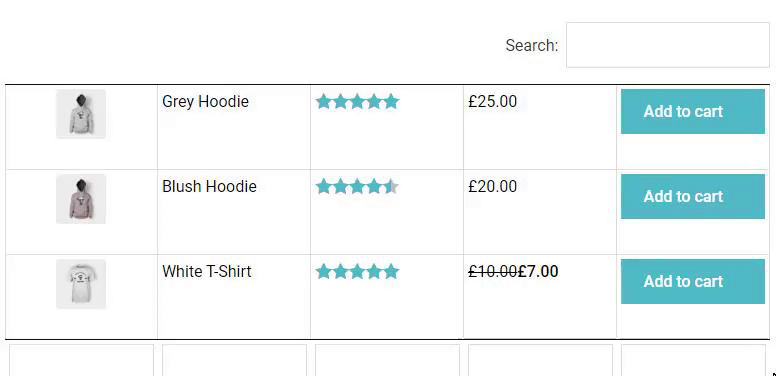
- Searching– enable search by the table. Global search and search for each individual column available.
You can apply multiple individual column searches with the global search for complex searching options to be presented to the user.
- Disallow Indexing – disable table indexing for search bots.
- Execute JS Script After Table Load – Allows to execute custom Java Script code after a table is loaded.
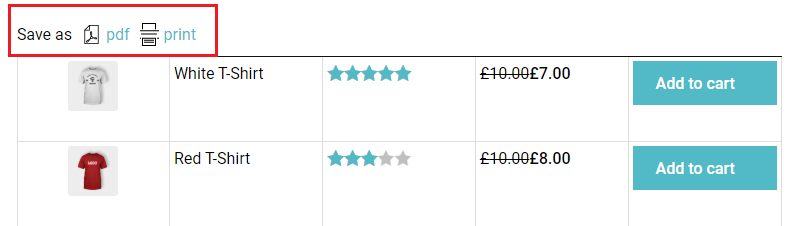
Export / Import – allow printing the WooCommerce table and export to PDF on front-end.
-
Appearance
Here you can choose a visual style of the table.
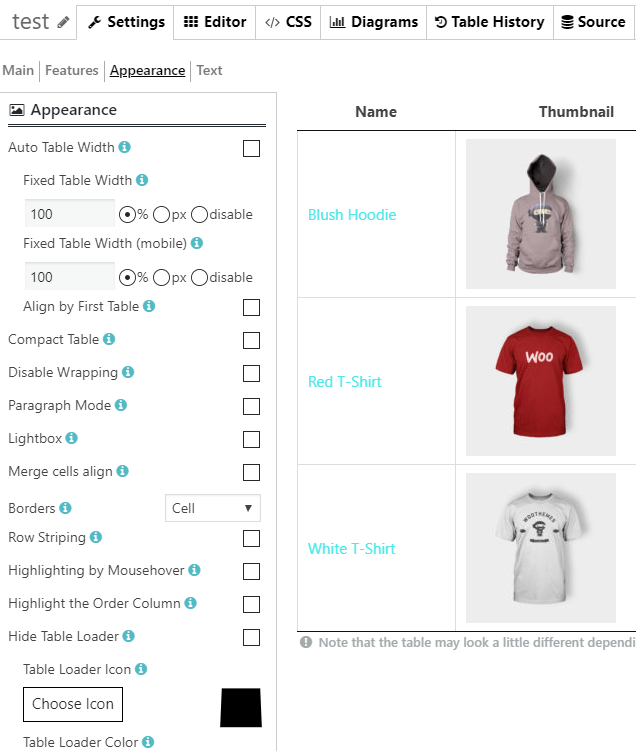
- Auto table width – automatic detection of the cell width. If checked – width of table columns will be calculated automatically for table width 100%.
- Fixed Table Width/ Fixed Table Width (mobile) – Set fixed table width in px or %. Choose “disable” to make the table width adjust by table content.
- Compact Table – decrease the amount of white space in the table.
- Align by First Table – if checked, this table will be resized by first Supsystic table on the page. Important! This option makes sense only if the table is not on responsive mode or responsive mode is disabled. Also if the first table has a different count of columns or different settings, their sizes may not be equal.
- Disable Wrapping – disable wrapping of content in the table, so every word in the cells will be in one single line.
- Lightbox – add lightbox to images
- Borders – add borders around a table: cell, row, none.

- Row striping – for example – you use a table, but the table’s rows are difficult to separate visually, especially when there are many columns (or multiple lines to a row) – add row striping to a table, it will display rows background in two similar shades of colour to alternately.
- Highlighting – enable row highlighting on mouse over.
- Disable wrapping – disable wrapping of content in the table, so all text in the cells will be on a single line.
- Highlight the order column – highlight the column that the table data is currently ordered on.
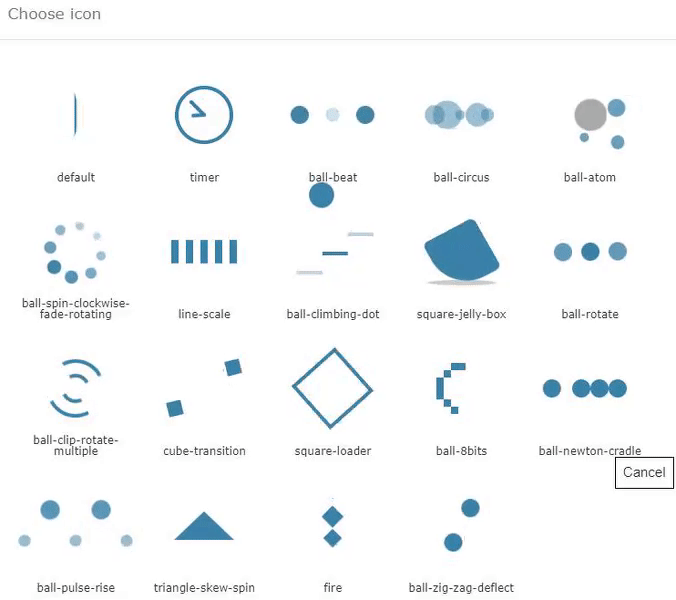
- Hide Table Loader – enable/disable table loader icon before the table will be completely loaded.
- Table Loader Icon and colour – choose the style of the loader:
-
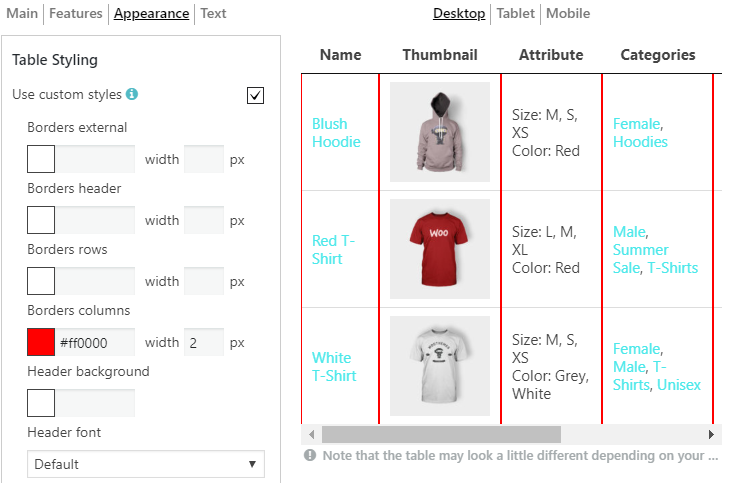
Custom table styling
Choose your custom table styles below. Any settings you leave blank will default to your theme styles.
Borders external. Set the border colour and width in px: 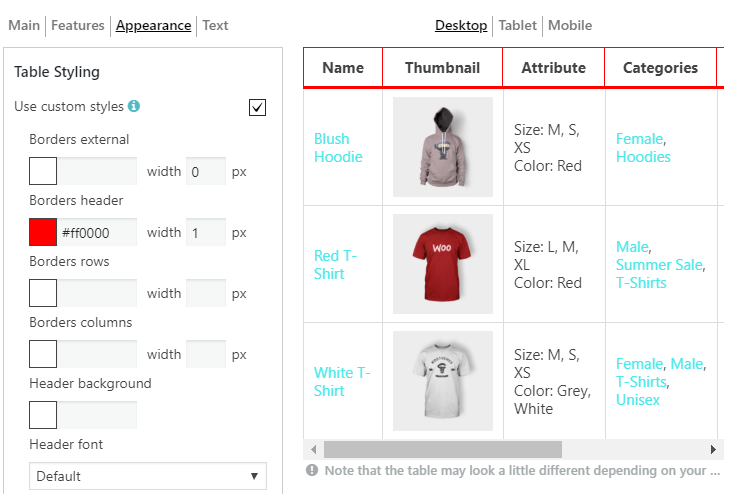
Borders header. Set the colour and width for a header. These settings apply to a header, footer and “search by columns” field. 
Borders rows 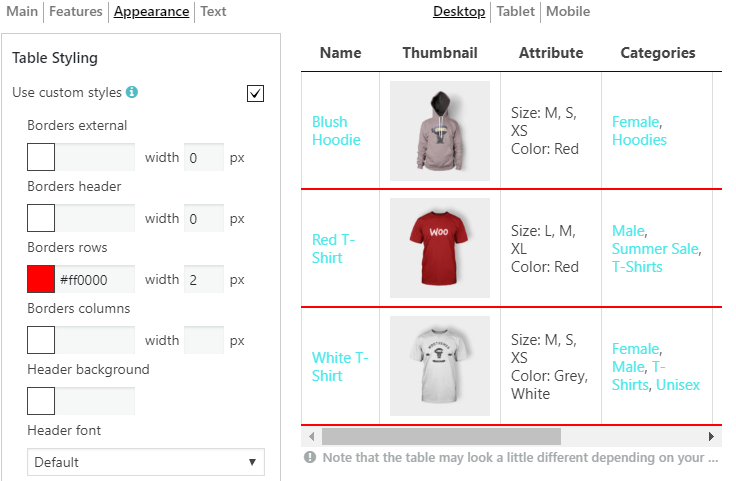
Borders columns
Header background. These settings apply to a header, footer and “search by columns” field. 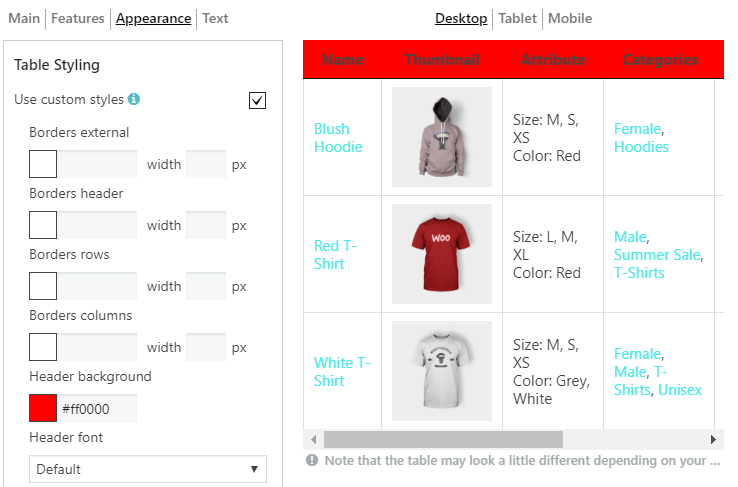
Header Font. Select the font for a header (the same for a footer), font size and colour: 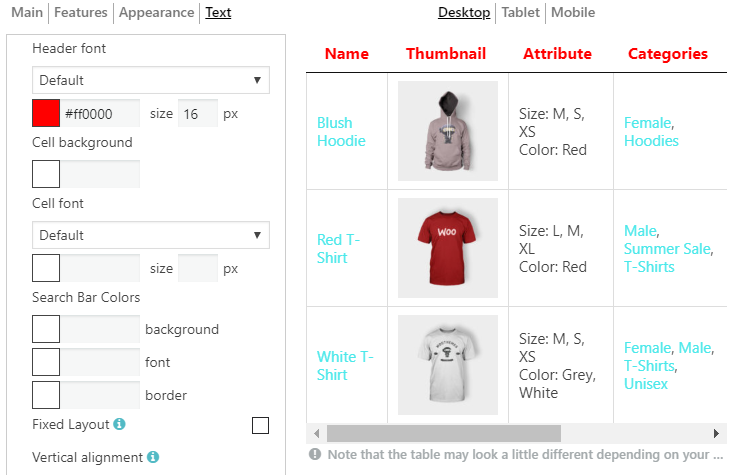
Cell background 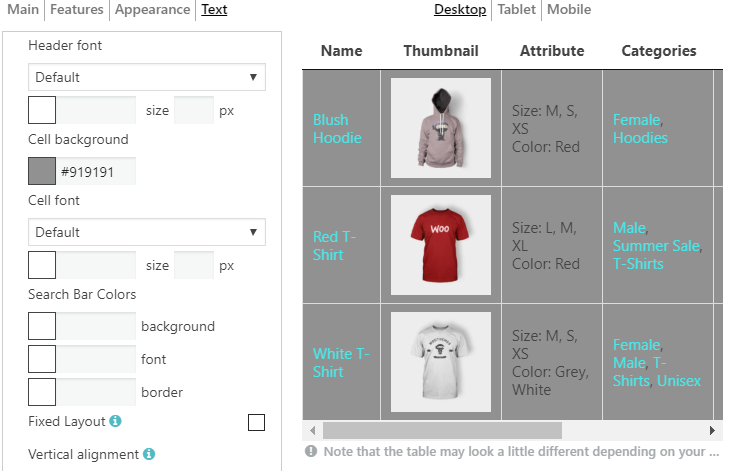
Cell font. Select the font for cells, font size and colour: 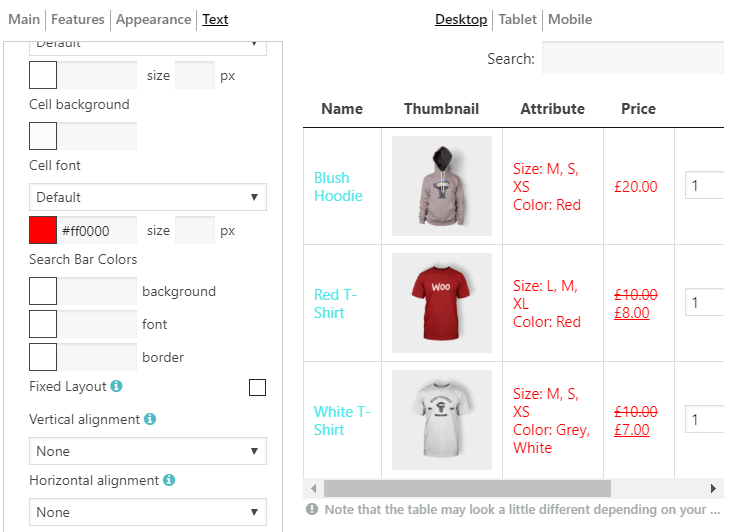
Search Bar Colors. Here you are able to set the colour of background, font and border: 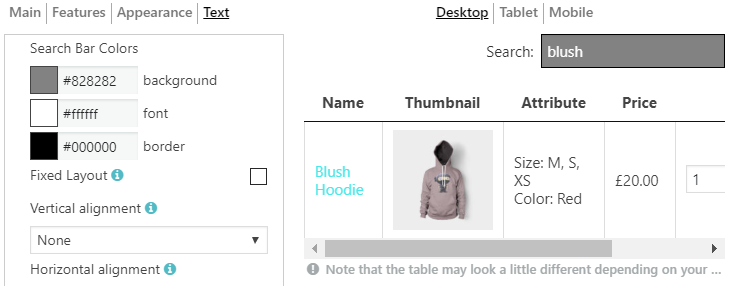
Fixed Layout – set all columns of the same width.
Vertical alignment – set vertical alignment of table cell contents.
Horizontal alignment – set horizontal alignment of table cell contents.
Pagination Position – set pagination buttons position, left, centre, right.
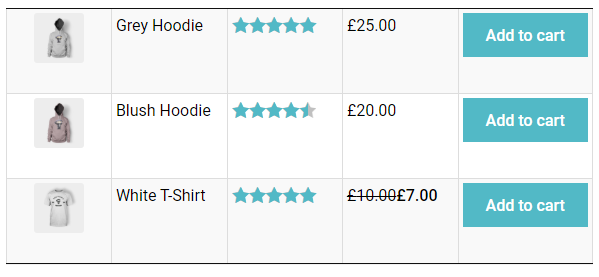
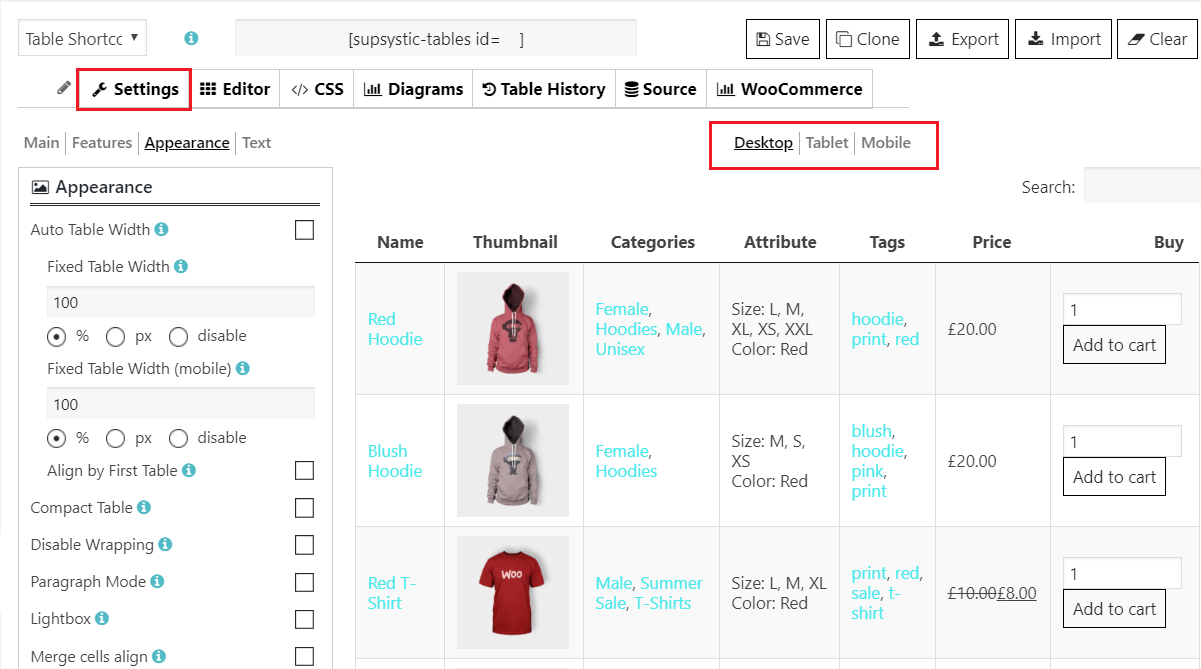
Step 6: Preview
After you made some settings for a table, you can immediately see the result in preview – for desktop, tablet and mobile. Open the “Setting” tab and check the table. Note that the table may have minor changes depending on the style that your theme has.
Step 7: Add WooCommerce Product table into website content
There are different ways to add a table to your site, using shortcodes:
- Table shortcode
- PHP code
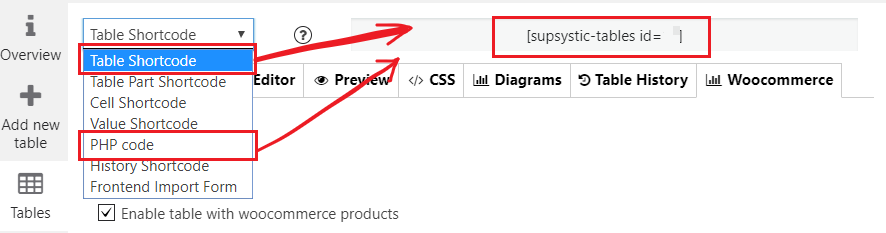
Also, Table shortcode and PHP code can be found on the left navigation menu if you click “Show All Tables”.
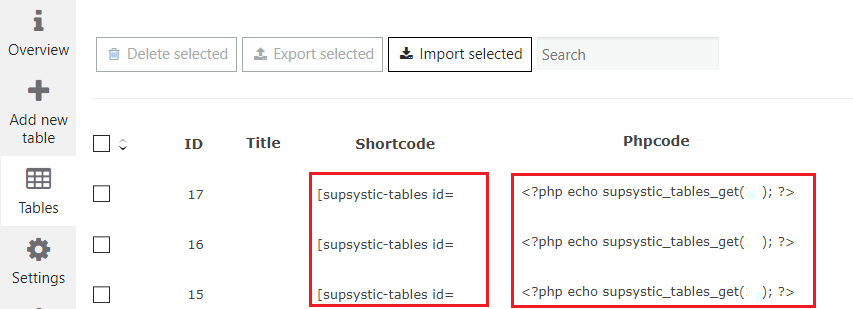
- Select the table you need and copy the shortcode. Or choose a code from the drop-down menu and copy the code.
- Paste the shortcode into your post or page and WooCommerce Product Table plugin by will automatically create a table on your page.
WooCommerce Product Table is the perfect way to create a beautiful, responsive table with a custom design. With these simple settings, your WooCommerce Product Table will enhance the shop’s user experience and increase conversions!
All the examples of WooCommerce Product Table you can find here.