To attract the customers and provide as much information as possible about the product to make their decision easier, you need to add the attributes to the product.
Using WooCommerce Product Table plugin, you can create a well-organized table with drop-down filters by attribute.
WooCommerce Attributes are information about product properties, f.e. size, colour, gender, etc. Its is a key for better selling to provide extra data to let customers search for products by necessary parameters.
In order to display attributes and filters in the Product Table Plugin, you need:
- Each product should be listed as a WooCommerce product.
- Set the product attributes in Products – Attributes section:
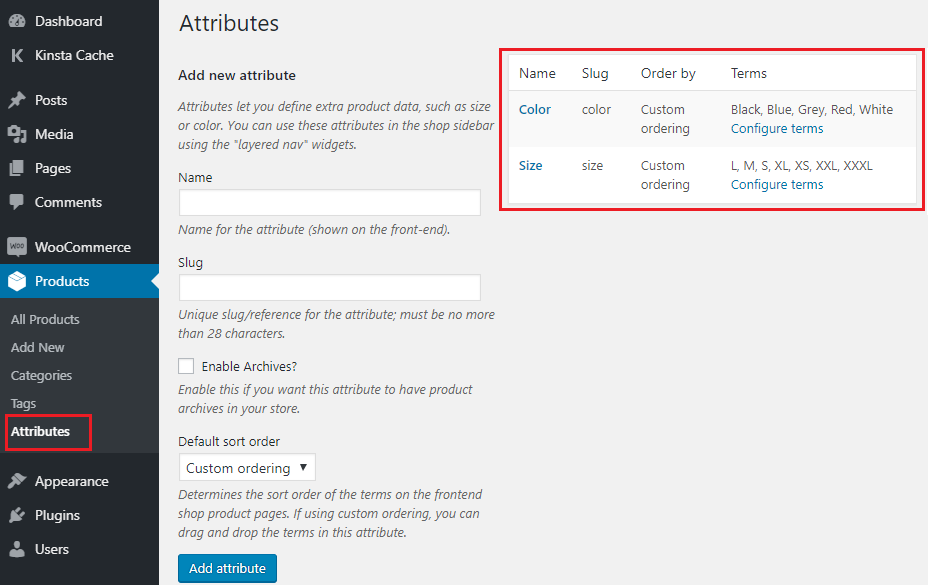
- Add the name, slug and other information and press Add new attribute. The new attribute will be added to the list of attributes in the right.
After this, if you open product or create the new one, move down to the Product data section, click on the Attributes tab, and select a necessary attribute from the drop-down list:
- Save attributes and update a product.
Now you can select the attribute for filters and add dropdown menus above the table.
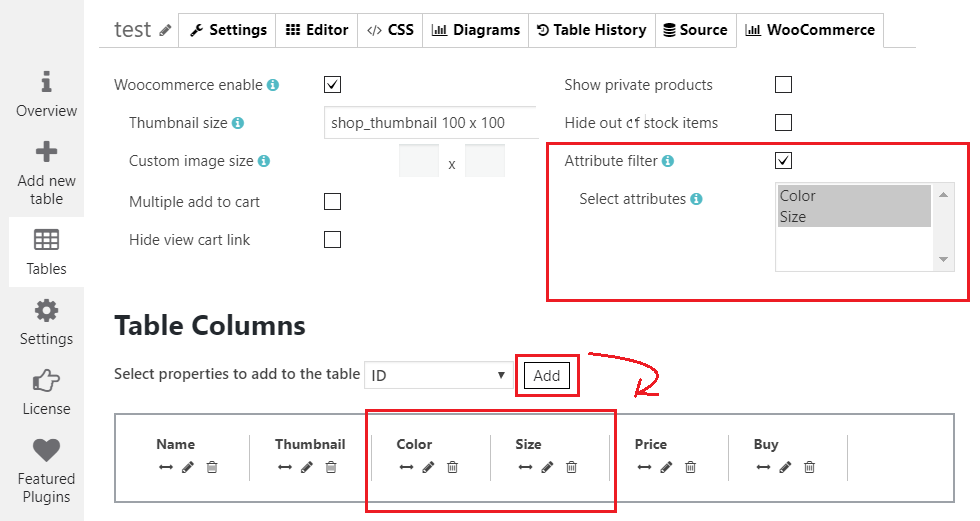
- Add the attributes as columns to the Product table. FIlters work only with enabled attribute columns…
- Enable Attribute filter option
- Select the attributes for filtering. Use Ctrl to select more than 1 attribute.
As a result, you can sort and filter by any attribute in the table.