Step 1: Installing WooCommerce Pro Addon
In WordPress, navigate to Plugins > Add New. Search for “Membership by Supsystic” and click Install Now. When the installation has completed click “Activate Plugin”. You will have a new admin menu item titled “Membership by Supsystic”.
Then, in your personal account on supsystic.com, you will find a unique download link after purchase. After downloading the file (membership_by_supsystic_woocommerce.zip), navigate to Plugins > Add New > Upload and upload the file. When the installation has completed, click “Activate Plugin”. After activation of the PRO addon, you need to enter license key (you can find it in your personal account on our site). To do this follow next steps:
- Go to the Membership by Supsystic in WordPress navigation menu.
- Click License tab on the left navigation menu of plugin.
- Enter your email and license key.
- Click “Activate Addon” button.
Step 2: Adjusting WooCommerce Settings
Open Extensions tab in order to find WooCommerce settings. They contain Main and Roles sections. On the Main tab it is possible for you to enable next parameters:
- When user bought any product assign role – this option provides you ability to assing new role to the membership user, after he/she made a purchase of any product on your site.
- When user bought specific product: assign role – if you enable this option, after user purchase special product on your site he/she will get a new role, accordingly to the rule you have created at the Roles Tab.
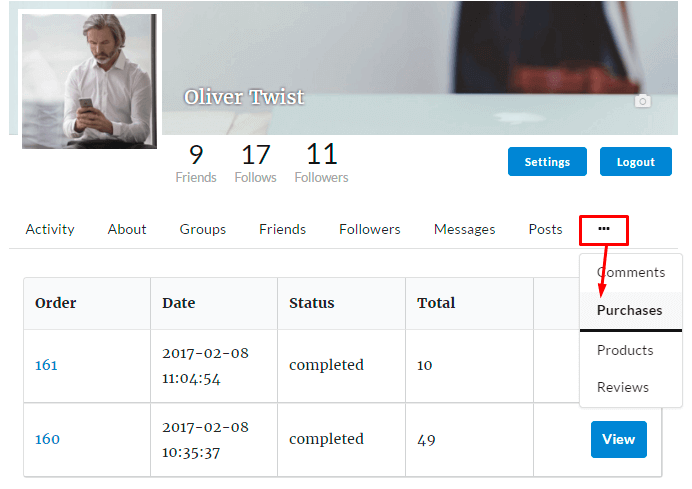
- Show purchases in profile – tick here to let users see their purchases in personal accounts.

- Show bought products in profile – check this option to provide the ability for users see products they have bought on your site.

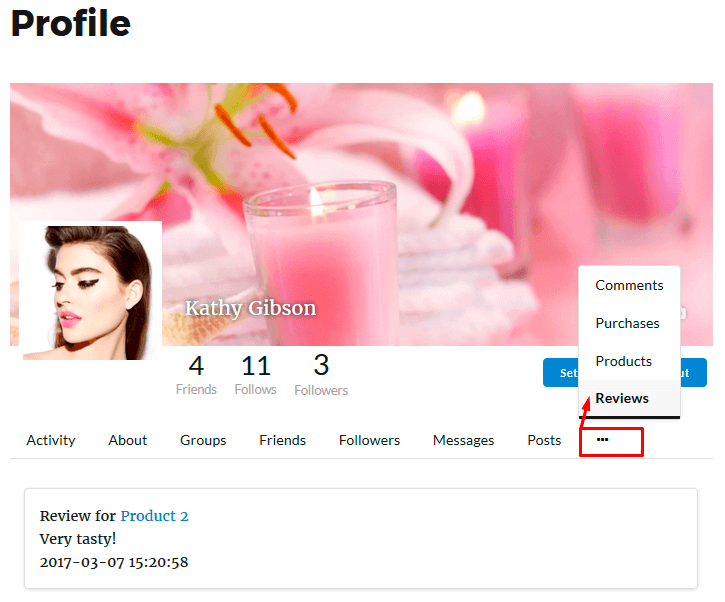
- Show product reviews in profile – you can enable displaying the reviews at the users profile about products he/she bought.

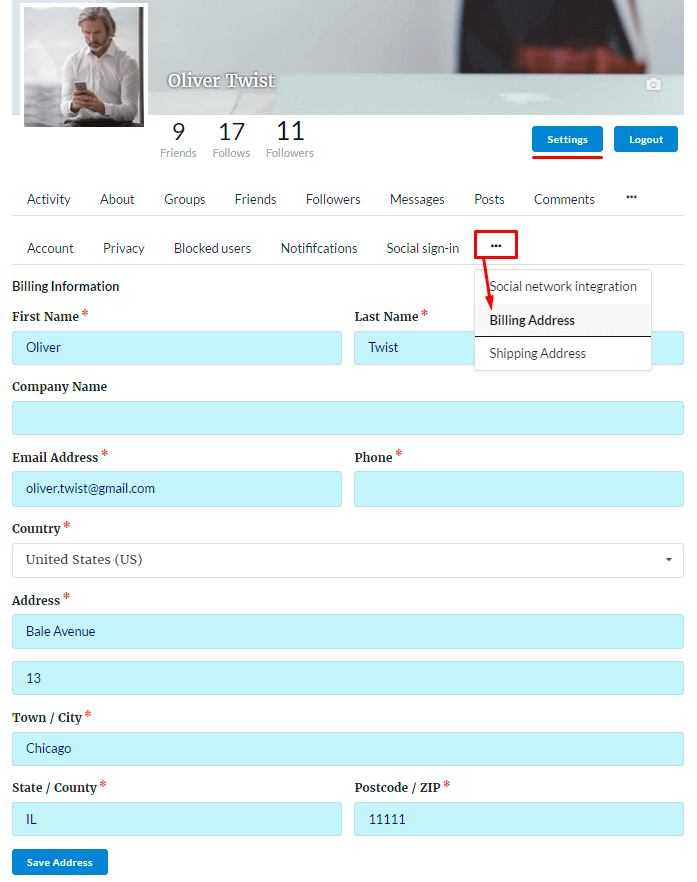
- Show billing address in user settings – turn on billing adress information of the user at his/her personal account settings. Thus it begin available to be edited at any time and presaved for future purchases.
- Show shipping address in user settings – turn on user shipping adress information at his/her personal account settings. Thus it begin available to be edited at any time and presaved for future purchases.
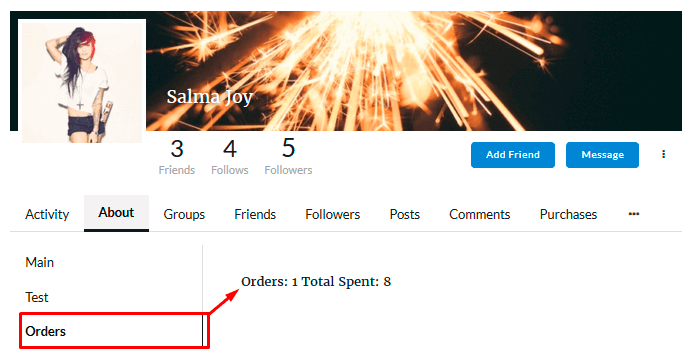
- Show orders in profile – show up monitoring user’s orders at his/her profile
- Show total spent in profile – switch on displayment of total spent money at users profile

- Show orders in members directory – let users see each others orders at Members Directory
- Show total spent in members directory – activate total spent money counter for every member at Members Directory


At the Roles tab you can establish conditions of assigning roles for purchasing special products.

For this click Create new Rule, choose product and role related to it, then Cancel or Create rule

Now, in the table below you can see the list of roles and products that are bonding with your rules.
Don’t forget to save changes.
Step 3: Using WooCommerce integration in your Membership account
Firstly Register or Login to Membership account. Then move to Settings Tab and find the the following Settings, that can help you to make purchases faster —
- Shipping Information – where to deliver the products of your purchases:
- First Name
- Last Name
- Company Name
- Country
- Address
- Town / City
- State / County
- Postcode / ZIP
Don’t forget to save changes.
- Billing Information – who will pay for the order
- First Name
- Last Name
- Company Name
- Email Address
- Phone
- Country
- Address
- Town / City
- State / County
- Postcode / ZIP

WPCom_Markdown class is not exists
WPCom_Markdown class is not exists


