Step 1: Installing Live Chat by Supsystic
To add live chat to website, you need to make just three simple following steps. First, download Live Chat, then upload your installation to the directory in WordPress (Admin Panel – Plugins – Add New). Click the button “Install” and wait until it has been completed. After this you can use your Live Chat (on admin panel you will have a new menu item “Live Chat by Supsystic”).

Installing Live Chat Pro by Supsystic
After purchasing, you will find your unique link in personal account of the site. Your task is to download an archive file live_chat_pro.zip in the directory Plugins. After installation and activation of your plugin, you need to enter the unique license key (which you have in your personal account).
Your steps are the following:
- Find the Live Chat by Supsystic in your admin panel of WordPress
- Click on it and find License tab
- Enter your email as login and license key
- Finish installation of your PRO version by clicking “Check”.
How can the PRO version of Live Chat by Supsystic help you?
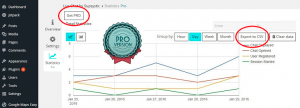
- The main reason for installation PRO version – better statistic. It helps you to range your statistics by Day, Week, Hour or Month.
- Look at your messages statistics and see the diagram graphic.
- Check your agent session statistics, message activity and rating.
- At last but not the least you can export and save all statistics as CSV file.
Step 2: Creating A New Agent in Live Chat by Supsystic
-
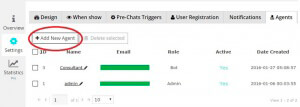
- Find and click Live Chat by Supsystic on your admin panel of WordPress
- Go to the Settings item and find “Agents” tab on control panel
- Click “Add new agent’ button
-
- Fill in the table “Add New User”. Fill the fields Name, Email, Password, User role etc. And click Add New User button. Read more…
Live Chat has an additional option: you can add any of your WordPress users as an agent. Just select your user and activate the button “Live Chat Agent” on User Profile screen.
Step 3: Choose your Design Template
You can customize the design of your own Live Chat. Choose the color, width, length and even the text.
-
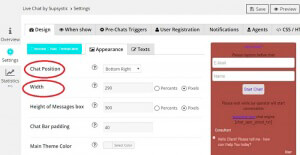
- Find Settings -> Design tab
- Choose options Chat Position, Width, Main theme Color, etc.
-
-
- On the “Texts” tab you can write your personal Chat Bar Title text, “Send Message” Button text, etc.
- Pay attention that on the right side of your screen you can see the result of your efforts
- If you don’t want to create something unique and want a quick result, just click the white button “Choose Chat Template” and find the best option for you.
- When you did everything, don’t forget to click “Save” button!
-
Check more information about Design options.
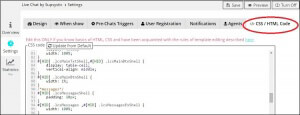
NB! If you are good at CSS or HTML Code you can customize your Chat Box in the corresponding tab in admin panel (Settings – CSS/HTML Code). The result of your coding you can see below the code boxes. You can see more details in this article.
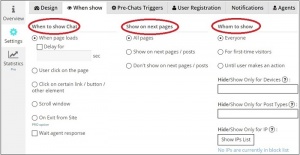
Step 3: “When show” tab on the admin panel
Lice Chat by Supsystic allows you to set timeline for your chat box.
On this page you can choose:
-
- When to show your Chat box
- Whether you want to show it on next pages
- Whom to show this box
- In addition, it allows showing box on some devices, just for some IPs, Countries or Languages. If you don’t understand something – move your cursor on Question mark.
Check more information about Displaying options.
Step 4: The autostart of your Chat Box
If you want to autostart your Chat Box, follow these steps:
-
- Find the Pre-Chat Triggers tab
- Click the button “Add Trigger”
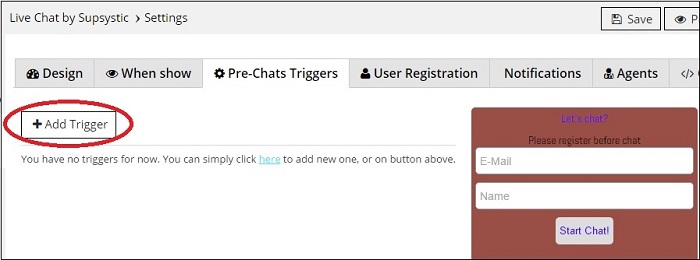
- Type a Trigger Name and choose corresponding conditions for activation of your chat
- Click the “Auto start chat” box and type the default message for auto-opened chat
- Don’t forget to click “Save” button.
To read about conditions or options that you can choose by adding Trigger click here.
Step 5: Notifications
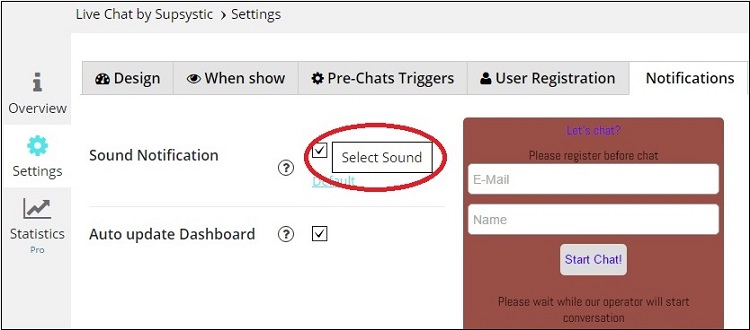
If you want to get some notifications when your chat has been opened, you can choose the options Sound Notification and Auto-update Dashboard there. By the way, you can select a sound for your notification there. You can view all Notification options simply check this page.
Step 6: Controlling
Live Chat by Supsystic has an additional option for its users – Dashboard, where you can find all the statistics. Just select the “Live Chat Dashboard” tab on the admin panel of WordPress and check it.

Back to the main page of WordPress Live Chat plugin