Step 1: Installing Social Login Pro Addon
In WordPress, navigate to Plugins > Add New. Search for “Membership by Supsystic” and click Install Now. When the installation has completed, click “Activate Plugin”. You will have a new admin menu item titled “Membership by Supsystic”.
Then, in your personal account on supsystic.com, you will find a unique download link after purchase. After downloading the file (membership_by_supsystic_social_login.zip), navigate to Plugins > Add New > Upload and upload the file. When the installation has completed, click “Activate Plugin”. After activation of the PRO addon, you need to enter license key (you can find it in your personal account on our site). To do this follow next steps:
- Go to the Membership by Supsystic in WordPress navigation menu.
- Click License tab on the left navigation menu of plugin.
- Enter your email and license key.
- Click “Activate Addon” button.
Step 2: Adjusting Social Login
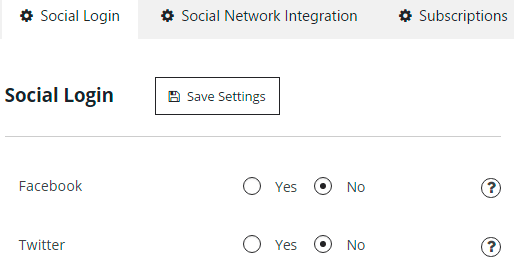
On the left navigation menu at Extensions Tab of Membership Plugin you can find Social Login Settings. Here you can enable next Social Networks for logging in to your Membership site:

Facebook has next additional settings —
- If you want to Use your own social network app – then you will need to fill in parameters below. If you disable it the plugin will use Supsystic app for Facebook
- Facebook App ID
- Facebook App Secret
In order to enter correct data for this parameters, please read this insrtuction.

Twitter has next additional settings —
- If you want to Use your own social network app – then you will need to fill in parameters below. If you disable it the plugin will use Supsystic app for Twitter
- Twitter API Key
- Twitter API Secret
In order to enter correct data for this parameters, please read this instruction.

Step 3: Registration/Login process
To use Social Login by new Membership users, firstly it’s needed to open registration page. Choose which Social network you want to explore for registration.

Then pass through the login to it and allow current site to have access to your social network account.

The registration page will open again and Name fields will be filled with you social network account data. Complete registration. In the new Membership account click Settings Tab and elect Social Sign-in Tab. Here you can see which Social Networks your Membership account is connected to.

Click Disconnect – to delete existed account bondings or Connect – to add to the new one.
WPCom_Markdown class is not existsAfter you have bonded your account with Facebook or Twitter to Membership site, the process of Login will take time, that is equal to simple page reloading. Just click Login with Facebook/Twitter and wait for Profile to load.
