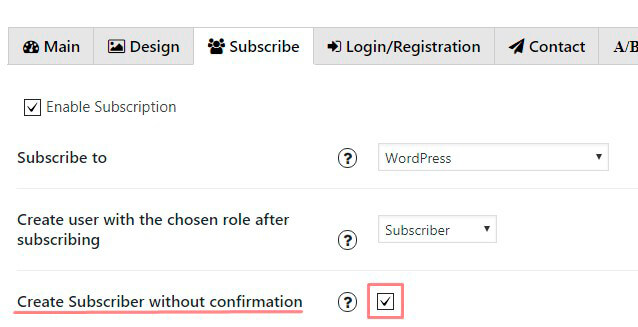
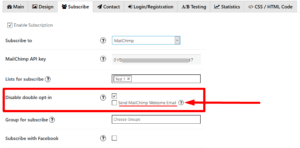
There are two various ways how to send to the users welcome e-mails. It depends on Create Subscriber without confirmation option that could be enabled or disabled:
Create Subscriber without confirmation Option Disabled in the follow case:
“Welcome Email” would be set. Confirmation e-mail will be sent to any subscriber at once he/she subscribes to the form. After receiving the letter, subscriber could verify the e-mail address. After verification the e-mail address “Welcome Email” could be sent in case you enabled it.
Create Subscriber without confirmation Option Enabled in the follow case:
If subscriber is created immediately without confirmation, he doesn’t not receive anything. Confirmation e-mail will not be sent to him and “Welcome Email” also will not be sent, whatever it was enabled or not. Creating and sending “Welcome Email” without confirmation will not work.
So if you Enable Create Subscriber without confirmation Option in Pop Up or Contact form plugin by Supsystic, you should disable the Send Welcome option.
So, please turn off “Send Welcome” option and save the popup.
If you’d like to do automatic sending of the letter for new subscribers, you’ll need to create an “Automation Workflow” for sending Welcome Email.
Here is a step-by-step guide for you:
- Login to the account at Mailchimp.com.
- On the top activate the button “Automation Tab”. Press the button “Create Automation Workflow”
- From the dropdown you are to select the list due to which the welcome e-mail would be sent to subscribers. In our case “Personal Users” is to be selected.
- A workflows list is visible on the right side. Select “Welcome Message”
- Next you are to bring the details in about the workflow and press “Next” at the bottom on the right side.
- Further on you are to look through “Trigger workflow with imported subscribers”. Press the button “Next” at the bottom on the right side.
- Add e-mails to the workflow. Press the button “Add Email”.
- When your 1-st e-mail added, the option To adjust when the e-mail should be triggered becomes visible.
If set up waiting time as “immediate” the e-mails would be sent at once, when the subscriber appears. Press the button to “Apply to all” and after this press “Save”. - After this press the button “Design Email” next to the Automation Email. It runs you to the Email Template and Design flow. Press the details and then press “Next” on the bottom on the right side.
- Select a template.
- Edit placeholder text by default.
- You are to be certain that “As soon as possible” is selected under “What time are e-mails to be sent?”
- Press “Save and Continue” at the bottom on the right side to get back to the automation workflow.
- A final checklist would become visible with all its items. Mark all the items in green, to begin the workflow.
- Press “Start Workflow”. Choose “Start Workflow” one more time using the confirmation modal.
- Well done! An automation workflow with functions of sending Welcome E-mails is set up. Subscribers would receive the letter immediately after subscription.
More detailed info you can find on Mailchimp official documentation here.

