Step 1: Installing WordPress Flipbooks by Supsystic
In WordPress, navigate to Plugins > Add New. Search for “Wordpress Flipbook by Supsystic” and click install. When the installation has completed click “Activate Plugin”. You will have a new admin menu item titled “Wordpress Flipbook by Supsystic”.
Installing WordPress Flipbook by Supsystic PRO
In your personal account on the supsystic.com, you will find a unique download link after purchase. After downloading the file digital-publications-supsystic-pro.zip, navigate to Plugins > Add New > Upload and upload the file. When the installation has completed, click “Activate Plugin”.
After activation the PRO version, you need to enter a license key (you can find it in your personal account on our site).
To do this follow next steps:
- Go to the WordPress Flipbook by Supsystic in WordPress navigation menu
- Click License tab on left navigation menu of plugin
- Enter your email and license key
- Click “Acivate” button
With WordPress Flipbook by Supsystic PRO you have such possibilities as
- Create pages with Add From PDF feature
- Facebook Import
Step 2: Creating Publication
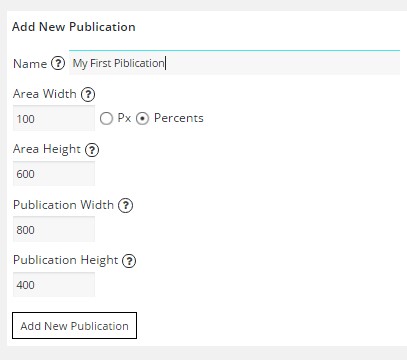
Creating your first publication is really easy with WordPress Flipbook plugin. Just install it, activate and use. Choose the name for publication, define its size and click button “Add New Publication”.


A few ways to create your publication:
- Add page feature
- Add from WP Gallery feature
- Add From FTP
- Add From PDF (pro-feature)
- Facebook Import (pro-feature)
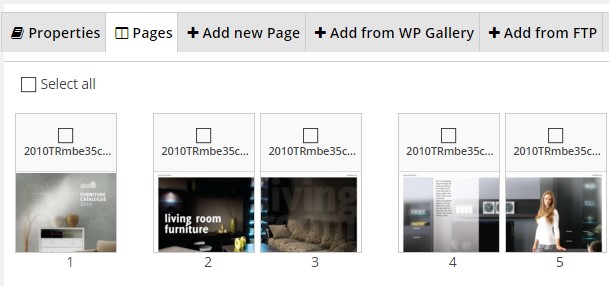
After you’ve added your pages it’s time to set them. Go to Pages tab and here are all your created pages.
- You can Select all pages and delete them
- And also you can delete just some of them – place your mouse on the page and you will see menu – choose trash bin symbol
- Move pages if you want to change their order. Just take this page by pressing the left mouse button and move page where you need
- Edit your page – click pencil symbol in the menu of a page
- Merge 2 pages in 1 – click arrow symbol
- Split your pages – click 2 arrows symbol

Step 3: Customize your Publication
When this part is ready – it’s time to set your online publications and make them look good. Go to the Properties tab.
- Name – change the name of publication if you need it.
- Set the size of your publication and area of publication. For example, a size of your publication is 600*400. So set it for Publication Width and Publication Height. And for Area Height and Area Width set just a little bit bigger size – 700*500. It helps your publication to look completely and won’t cut it.
- Area Background Type will be useful for making your publication interesting. You can choose None, Color or Image. The same setting is available for Pages Background Type
- Choose Cover Type and Flip Sound. You can disable sound, Set default or maybe you are very demanding and have own sound for flip – feel free to upload and use it. Cover type helps you to make publication looks like a magazine – it’s how your page will be covered – soft or hard.
- And of course, Transition Direction Left to Right or conversely. Transition Duration – choose speed for your publication.
- Choose how your customers will see your publication – Open Publication On Page. Select Content Indent – put 0 or nothing if you don’t want any intent of your pages. Bigger number for bigger indent.
- Zoom Level – choose a level of zoom, that will be set after you click on Zoom button.
- Features that help making your publication like a paper magazine: enable Show Gradients – make shadow in center of publication like shadow between pages in paper magazine; Volume Fake Pages – like you look at real magazine with pages, Border Shadow – pages will cast a shadow on the area.
- Toolbar Design can be Borderset – displays only border of toolbar and toolbar is transparent or Colorset – select the color for your toolbar. Of course, you can set your toolbar – add Shadow, Add buttons in your toolbar – Zoom (the effect of magnifying glass), Fullscreen (removes all fields for better view of publication), Search (useful if you have a big publication), Print/Export (your customers can download your catalog/publication), Page Numbers Field, Forward / Backward Buttons and color for buttons
To read all information about WordPress Flipbook Properties check this article.
Step 4: Preview settings
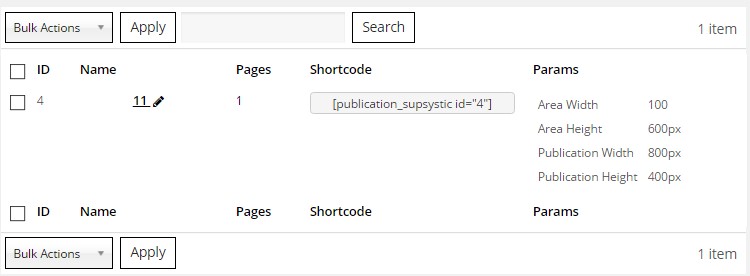
Click Preview to see how does your publication look and don’t forget to Save your setting. Copy the shortcode of publication and put it on your page or post, and enjoy Digital publishing solutions of Supsystic plugin.