Step 1: Installing Popup by Supsystic
In WordPress, navigate to Plugins > Add New. Search for “Popup by Supsystic” and click install. When the installation has been completed click “Activate Plugin”. You will have a new admin menu item titled “Popup by Supsystic”.
Installing Popup by Supsystic PRO
In your personal account on the supsystic.com, you will find a unique download link after purchase. After downloading the file (supsystic_popup_pro.zip), navigate to Plugins > Add New > Upload and upload the file. When the installation has been completed, click “Activate Plugin”.
After PRO version activation , you need to enter license key (you can find it in your personal account on our site). To do this follow next steps:
- Go to the Popup by Supsystic in WordPress navigation menu.
- Click License tab on left navigation menu of plugin.
- Enter your email and license key.
- Click “Check” button.
With the best Pop up Plugin by Supsystic PRO you have such possibilities as –
- More possible ways of opening and closing popup
- Set font styles and colors for popup text
- Subscribe to your newsletter via Facebook and add custom subscription fields
- Add login and registration forms to the popup
- Choose the layered style for showing popup on the screen
- Determine which popup design is more preferred by users using the A / B testing feature
Step 2: Creating Popup by Supsystic
- On the left navigation menu click “Add New Popup”.
- Enter the name of popup.
- Choose popup template. You have a huge variety of amazing templates.
- Click “OK” button.
During the next steps you can change the popup template.
Step 3: Setting configuration of Popup plugin
1. Main tab

Here you can set –
- When to show PopUp
- When to close PopUp
- Whom to show
- Show on next pages
- Time display settings
- Date display settings
- Days display settings
Check more detailed information about each of Popup Triggers you can in these articles.
2. Design tab
This tab allows you to –
- Change appearance of your wordpress pop up message:

- set the width of popup – in pixels or percentages;
- specify the background overlay opacity of popup;
- set image or color for backgrounds of blocks in popup;
- set label font style – Pro feature;
- set text font style – Pro feature;
- set footer font style – Pro feature;
- set responsive mode type;
- choose close button – includes a wide range of buttons;
- choose bullets for text blocks of popup.
- Change appearance of your wordpress pop up message:
Read more about Appearance Settings.
- Popup Location tab
 Here you can enable layered popup style (PRO feature).
By default all PopUps – have modal style: it appears on user screen over the whole site. Layered style allows you to show your PopUp – on selected position: top, bottom, etc. and not over your site – but right near your content. - Texts tab
 On this tab you have the ability to disable or edit blocks of popup – header, text block and footnote.Check more about Texts tab.
 - Social tab – here you need to enable social buttons:

- Here you can:
- activate facebook, google+ and twitter buttons
- choose social links design
- connect around 20 social networks to your PopUp, with various lists of design settings, using our plugin Social Share Buttons by Supsystic
- Popup Location tab
For more details about Social tab click here.
- Popup Opening Animation tab:
- there is a huge variety of animated effects of popup
- here you can set animation duration in milliseconds
Read more information about Popup Animations in this article.
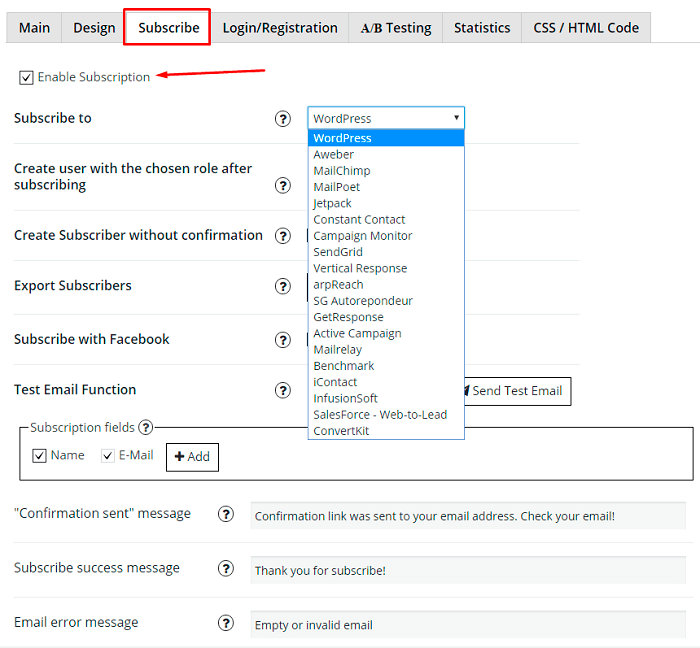
3. Subscribe tab
Here you can enable Subscription.

- If you select subscription to WordPress, you have the ability to create users after subscribe with special roles – Subscriber, Author, Contributor.
- In order to subscribe to Aweber you need to enter unique list id – check this page for more details.
- To subscribe to MailChimp you need to enter your MailChimp API key and name of list for subscribe. To find your MailChimp API key follow this instructions.
- To subscribe to MailPoet you must have MailPoet plugin installed on your site.
- To subscribe to Constant Contact you must have been authorized in Constant Contact.
- To subscribe to Campaign Monitor you must have been authorized in Campaign Monitor.
- To subscribe to SendGrid you need to enter your SendGrid Username and SendGrid Password.
- To subscribe to Vertical Response you must have been authorized in Vertical Response.
- To subscribe to arpReach you need to enter your arpReach intake form Action URL.
- To subscribe to SG Autorepondeur you need to enter your SG Autorepondeur User ID, SG Autorepondeur List ID, SG Client Activation Code.
- To subscribe to GetResponse you need to enter your GetResponse API key
- To subscribe to Active Campaign you need to enter your Active Campaign API URL, API key
- To subscribe to InfusionSoft you must have been authorized in InfusionSoft.
Also here you can:
- Activate subscription fields – email and name. Email field is mandatory for most of subscribe engines – so it should be always enabled.
- Set the “Confirmation email was sent” message – this will be message, that user will see after subscription – that email with confirmation link will be sent.
- Set the subscribe success message – right after subscriber will be created and confirmed – this message will be shown.
- Set the email error message – if email, that was entered by user, is invalid – user will see this message.
- Enable redirection after subscription, just enter URL that you want to redirect to after subscription – and user will be redirected there. If you don’t need this feature – just leave field empty.
- Change submit button name.
More detailed information about Subscription Settings you can find here.
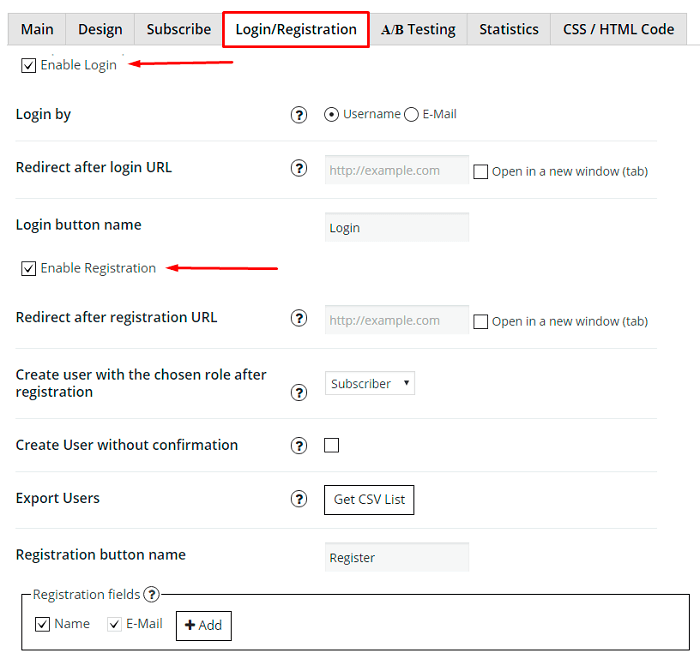
4. Login/Registration tab – Pro feature
Here you can enable Login form or Registration form, or enable both forms at the same time.

Check this page to view all features of Login/Registration tab.
5. A/B Testing tab
A/B testing (PRO feature) is one of the easiest ways to increase conversion rates and learn more about your audience, but it is still underutilized by many online marketing professionals and switched off,.
A/B test in Popup plugin involves testing two or more versions of a popup window — an A version (original) and a B versions (the variation) — with live traffic and measuring effect that each version has on your conversion rate.
Simply click “Add New Test” button, enter the name of test popup and click OK. On this tab will appear list with test popup. Here you will be able to edit test popups and monitor all the views, actions and conversion rate of test popups.
More details about A/B testing you can find here.
6. Statistics tab
Here you can find graphs with –
- Main PopUp Usage Statistics
- Ratio of All Actions
- Ratio of All Social Share
Popup plugin by Supsystic gives you the opportunity to –
- monitor the Main PopUp Usage Statistics in the form of line graph or bar graph
- select specific time frame for viewing statistics
- export statistics to cvs file
- monitor the table views of popup on the Statistics tab
Check more about Statistics functions .
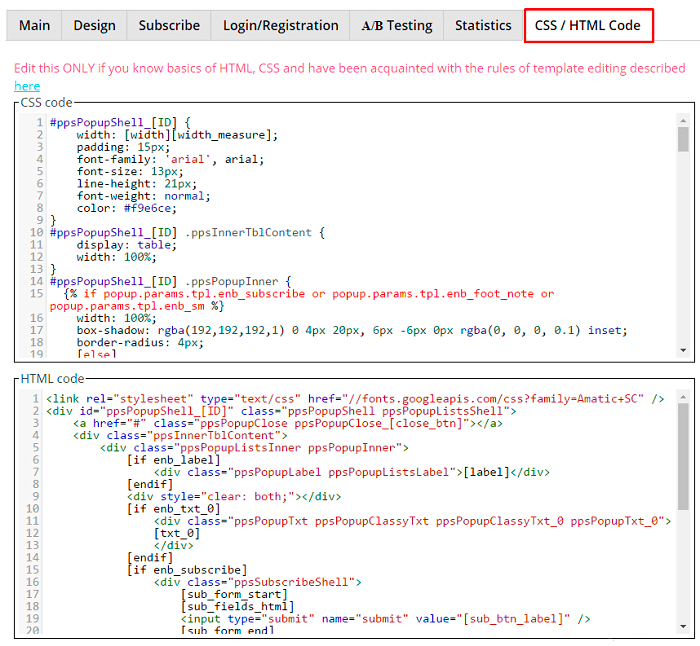
7. CSS/HTML Code tab

Also you have the ability to –
- Clone popup – click on the “Clone” button on the top, enter the name and click OK. On the “Show All Popups” tab in left navigation menu will appear copy of popup in the popups list and you will be redirected to this copy of popup.
- Disable popups (not delete, but just disable) – click “Turn Off” on the top and popup will disable. To enable it again – simply click “Turn On”.
Step 4: Preview settings
After you change some settings – with WordPress Popup plugin, you can immediately see the result in a live preview at the bottom of the page or click Preview button.

 Here you can enable layered popup style (PRO feature).
 On this tab you have the ability to disable or edit blocks of popup – header, text block and footnote.Check more about