Popup email forms have huge potential when it comes to list building, and even if you hate them, there’s no doubt that they work. Professional bloggers unanimously agree that they increase subscription rates, and have had great success with them.
With Popup by Supsystic you can collect subscribers through the –
- WordPress
- Aweber
- MailChimp
- MailPoet
- Jetpack
- Newsletter by Supsystic
- Constant Contact
- Campaign Monitor
- Vertical Response
- arpReach
- SendGrid
- SG Autorepondeur
- Get Response
- Active Campaign
- Mailrelay
- iContact
- Benchmark
- InfusionSoft
- SalesForce-Web-to-Lead
- ConvertKit
- Emma
- SendinBlue
- Vision6
- Vtiger
- Your Mailing List Provider (YMLP)
- 4Dem.it
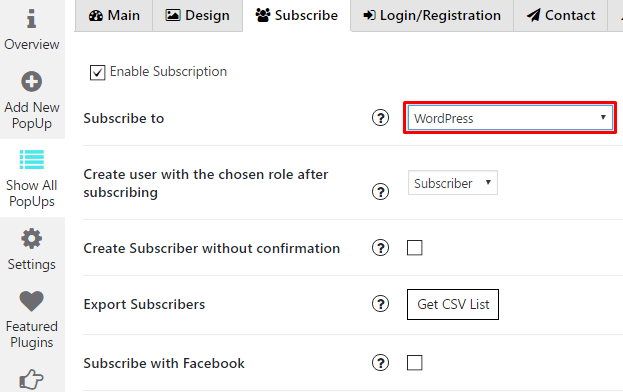
On the Subscribe tab you will be able to enable subscription option for popup. WordPress is selected by default for Subscription.
If you select subscription to WordPress, you have the ability to –
- Create users after subscribe with special roles – Subscriber, Author, Contributor etc.
- Create Subscriber without confirmation.
- Export all subscribers, who subscribed via WordPress. Export in csv file.

WPCom_Markdown class is not exists
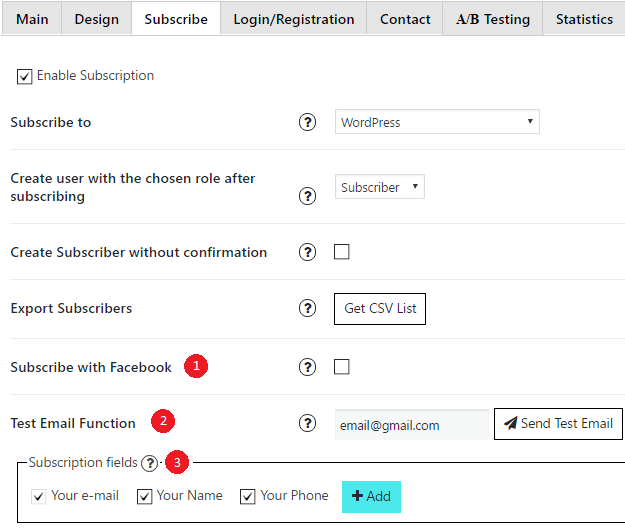
Also on the Subscribe section you have several opportunities:
- Enable Subscription with Facebook (PRO feature). This option adds button to your PopUp with possibility to subscribe just in one click – without filling fields in your subscribe form.
- Activate subscription fields. Email field is mandatory for most of subscribe engines – so it should be always enabled.
- Add new fields to Subscribe form (PRO feature). For more details – read Subscribe Custom Fields Builder article.
- Test Email Function – email delivery depends from your server configuration. For some cases – you and your subscribers can not receive emails just because email on your server is not working correctly. You can easy test it here – by sending test email. If you receive it – this will mean email functionality on your server works well. If not – it is not working correctly and you should contact your hosting provider with this issue and ask them to setup email functionality for you on your server.

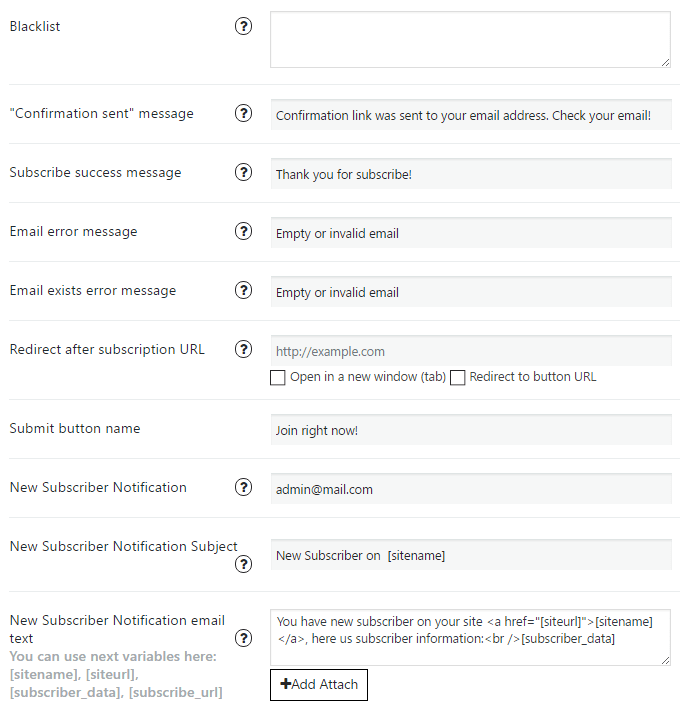
- Blacklist (PRO feature) – you can add emails, or email domains, into blacklist – and they will not be able to subscribe.
- Set the “Blacklist error message” (PRO feature) – error message, that user will see if he / she email is in Blacklist.
- Set the “Confirmation sent” message – a message user will see after subscribe.
- Set the subscribe success message – this message will be shown right after subscriber will be created and confirmed.
- Set the email error message – if email, that was entered by user, is invalid – user will see this message.
- Enable redirection after subscription, just enter URL that you want to redirect to after subscribe – and user will be redirected there. If you don’t need this feature – just leave field empty.
- Set submit button name – a text your subscribers will see on the button.
- New Subscriber Notification – enter the email addresses that should receive notifications (separate by comma), leave it blank and you will not get any notifications.
- New Subscriber Notification Subject – subject in emails about new subscribers.
- New Subscriber Notification email text – text of the message you’ll receive about new subscriber.

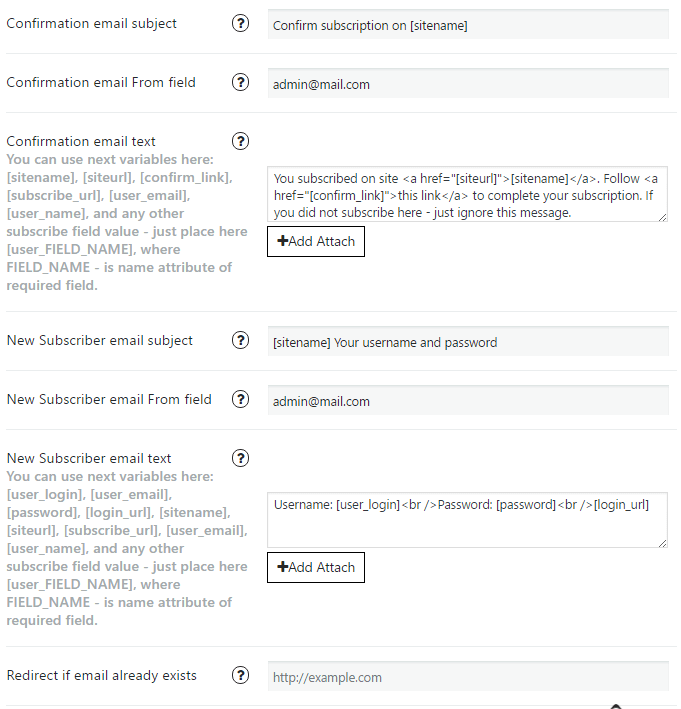
- Specify the confirmation email subject
- Set the confirmation email From field
- Specify the confirmation email text, where you can add attached files
- Set the New Subscriber email subject
- Set the New Subscriber email From field
- Set the New Subscriber email text, where you can add attached files
- Redirect if email already exists

In the Popup plugin settings area, you can choose popup template and enter the content that is displayed in the box. You are not restricted to display a popup newsletter sign up form. You could also use it to display a banner or a simple message to readers. Social media sharing buttons can be enabled in the box through the settings page and there are four different colour schemes available too. Alternatively, you can style the box using custom CSS. Check WordPress Popup Plugin Examples.