Getting Started with Slider by Supsystic is not so complicated as you can think. Here we have a very simple instruction which will help you to install our plugin and get the first slideshow to your page. Getting started with Slider by Supsystic it’s a great solution for the visual part of your business. Let’s make your site more alluring.
Step 1: Installing Slider by Supsystic
In WordPress, navigate to Plugins > Add New. Search for “Slider by Supsystic” and click Install. When the installation has completed click “Activate Plugin“. You will have a new admin menu item titled “Slider by Supsystic”.
Installing Slider by Supsystic PRO
Getting started with Slider by Supsystic also provides Pro version. In your personal account on the supsystic.com, you will find a unique download link after purchase. After downloading the file (supsystic_slider_pro.zip), navigate to Plugins > Add New > Upload and upload the file. When the installation has completed, click “Activate Plugin“.
After activation the PRO version, you need to enter license key (you can find it in your personal account on our site). To do this follow next steps:
- Go to the Slider by Supsystic in WordPress navigation menu.
- Click License tab on left navigation menu of plugin.
- Enter your email and license key.
- Click “Check” button.
With Slider by Supsystic PRO you have such possibilities as –
- Create Jssor sliders
- Add videos to your slider
- Add posts to your slider
- Edit your slider with visual builder
- Create sliders with HTML content
- Import images from Flickr, Tumblr and Facebook Accounts
Step 2: Creating Slider by Supsystic
-
- On the left navigation menu click “New Slider”.
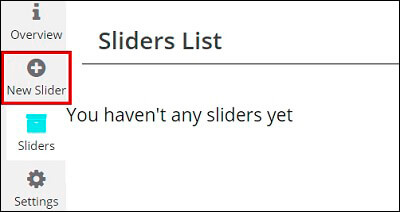
- Enter the name of slider.
- Choose slider template. You have the ability to choose one of 6 amazing templates:
- Bullets navigation
- Slideshow mode
- Thumbnails navigation
- Post Feed Slider (PRO feature)
- HTML content (PRO feature)
- Video slider (PRO feature)
- Click on Save button.
On the next steps you can change the slider template.
Step 3: Adding images to the Responsive Slider
With responsive slider plugin you can import images from –
- WordPress Media Library
- Instagram Account
- Flickr Account (PRO feature)
- Tumblr Account (PRO feature)
- Facebook Account (PRO feature)
-
- Click on “Add Images” button.

- Choose images from WordPress Media Library – mark those images that you like or need. If there are no images that you need, click the Upload Files tab – here you can drop files anywhere to upload or select files from your computer.
- Click on “Choose Image” button.
- Images will appear in the Media block at the left side.
Check these articles to view more information about Import Images in different cases.
Step 4: Customizing Slideshow
There is a choice of 3 slider modules:
- BxSlider – easy to use image slider plugin with built-in touch support.
- Coin Slider – slideshow plugin for creating slideshows with amazing transition effects.
- Jssor Slider (PRO feature) – touch swipe and responsive javascript image slider.
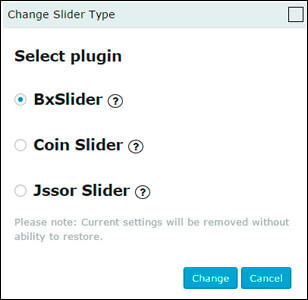

You will see different settings and effects become available depending on every slider you’ve selected.
WPCom_Markdown class is not exists
Step 5: Preview settings


Step 6: Displaying Slider WordPress Plugin on the website
This is the last step before really getting started with Slider by Supsystic. Pastintg your slider on your page.
Over the settings of slider you can see the shortcode.
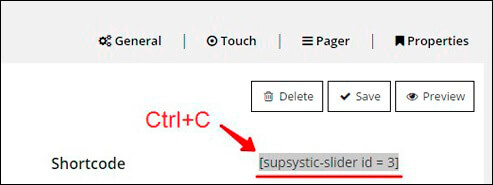
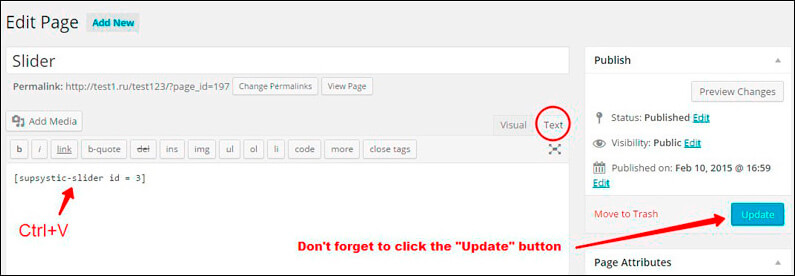
You can also use “add shortcode” button in WordPress visual editor of the page.
To add slider on the page with PHP code, move to the left navigation menu and click “Sliders”. Here, for each slider written its own php code.

In general php code can be inserted at any place of the page code – to display exactly in this place, for example in the header or footer of the page. Besides it can be inserted in the code of template of the theme – to display on all pages.
If you forget something about the plugin, want to reread some additional information – go to the main page of our product Slider Plugin!